MetaHub
Please note MetaHub is entirely optional. A MetaHub is not required to operate your MetaSensor.
The MetaHub is a linux based WiFi to BLE bridge that allows anyone to connect and retrieve data from multiple MetaSensors at once.
The MetaHub is a great way to connect sensors without the need for a smartphone, tablet, or computer.
The MetaHub can be mounted on the wall. When part of a building infrastructure such as a hospital, it can be used to locate nurses, patients, and doctors.
The MetaHub can graph sensor data live on screen and store sensor data locally.
On our Store
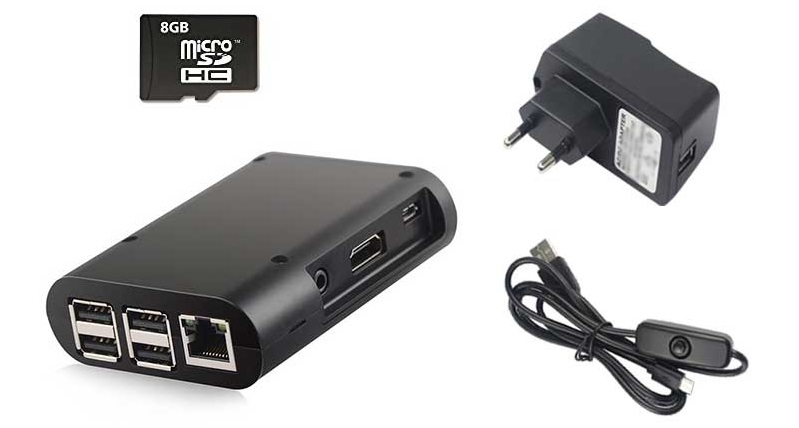
The MetaHub comes with a
5V 2.5Amps power supply,
a 8/16/32GB MicroSD card (Sandisk or similar),
and a black plastic case with 4 screws.
The SD card is loaded with the software mentioned below.
Hardware
The MetaHub is a mini computer built on the Raspberry Pi 3 Model B and Raspberry Pi 3 Model B+ platform:
Broadcom BCM2837B0, Cortex-A53 (ARMv8) 64-bit SoC @ 1.4GHz
1GB LPDDR2 SDRAM
2.4GHz and 5GHz IEEE 802.11.b/g/n/ac wireless LAN, Bluetooth 4.2, BLE
Gigabit Ethernet over USB 2.0 (maximum throughput 300 Mbps)
Full-size HDMI
4 USB 2.0 ports
4-pole stereo output and composite video port
Micro SD port for loading your operating system and storing data
5V/2.5A DC power input
Note
Your MetaHub can also use the new RaspberryPi 4 model.
You can add a Bluetooth to USB Dongle to each port to connect to more MetaSensors. Each Dongle can connect up to 4 MetaSensors at the same time.
Bluetooth dongles also add Bluetooth range; they perform better than the internal antenna.
Software
The MetaHub runs Raspbian OS and comes pre-loaded with our APIs and MetaBase App. Raspbian comes pre-installed with plenty of software for programming and general use.
Warning
While we have done our best to make it accessible for everyone, you should be comfortable with Linux before using the hub.
Build your own Hub
Download the image
The image file for the MetaHub OS is available here. The image files are very large, don’t be surprised if they take a while to download.
Warning
There is currently an issue with the MMS that requires that packed mode be turned of. Please see this code here. and undo this change.
Get the Hardware
Buy a Raspberry Pi Model4 or Model3 B/B+. Please don’t buy any other model, the image will not load.
Buy a 16GB micro SD card. We recommend 16GB class 10 cards. The image requires a 8GB SD Card at minimum.
Unzip the image
After you download the image from our Dropbox onto your computer, unzip it using 7ZIP.
Other software may not work and corrupt the file.
Writing an image to the SD card
Use Etcher, a graphical SD card writing tool that works on Mac OS, Linux and Windows.
To write the MetaHub.img image with Etcher:
Download Etcher and install it.
Connect an SD card reader with the SD card inside.
Open Etcher and select from your hard drive the Raspberry Pi
.imgor.zipfile you wish to write to the SD card.Select the SD card you wish to write your image to.
Review your selections and click ‘Flash!’ to begin writing data to the SD card.
Assembly of the Hub
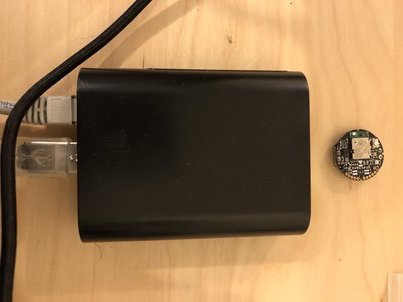
To get started, setup your RaspberryPi like a computer:
Connect a LED/LCD screen via the HDMI port.
Connect a keyboard and mouse to the USB ports.
Optionally connect a Bluetooth dongle to the USB port if you have one.
Insert the SD card into the RaspberryPi board.
Boot the MetaHub by plugging it in to power.
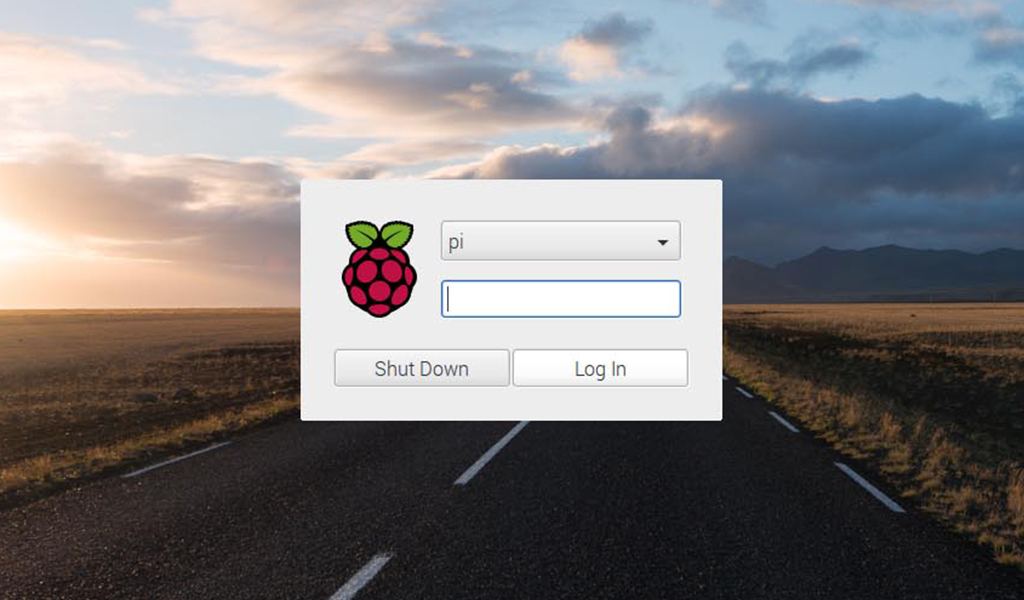
Login to the MetaHub using the following credentials (may be optional):
>>> Login: pi
>>> Password: raspberry
Connect the MetaHub to the internet.
The quickest way to get your MetaHub connected is to use an Ethernet cable and just plug it into the back of your router/switch. As soon as you plug your cable in, you should see the network LEDs start to flicker.
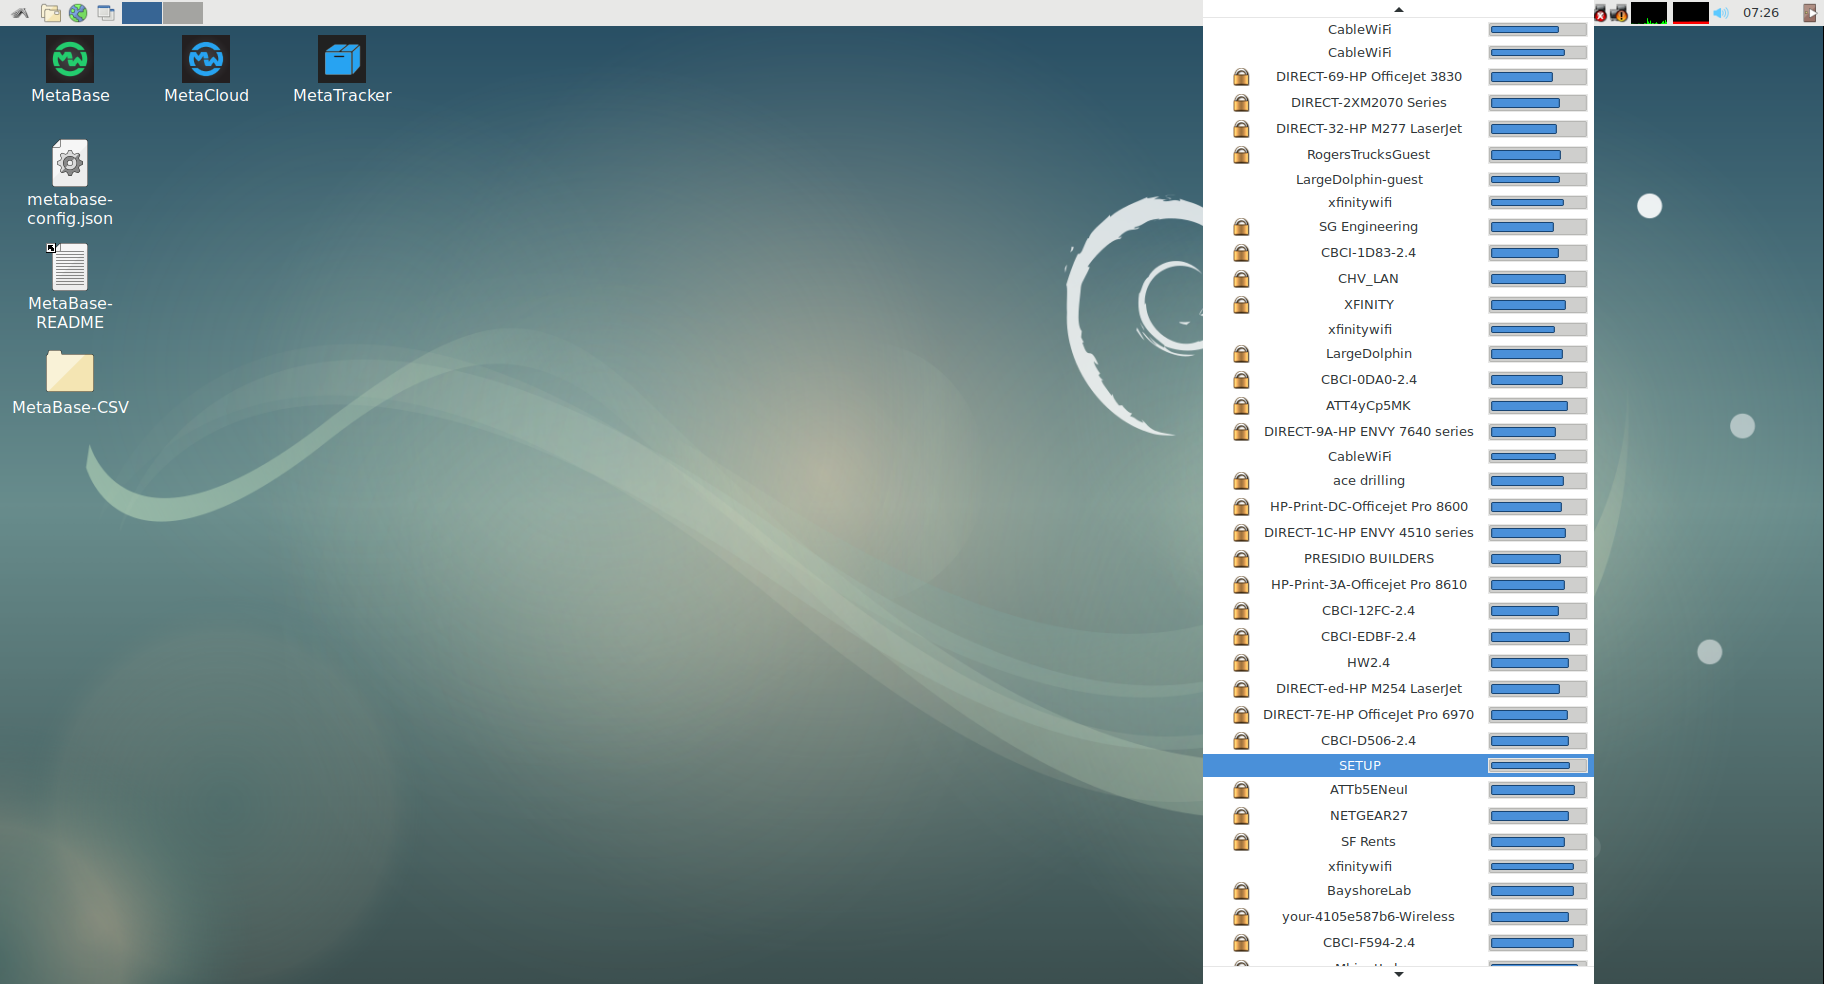
To connect to WiFi networks, look for the wifi icon at the top right hand corner of the Desktop. You should see any broadcasting signals nearby. Enter your password and you should be connected.
Warning
If nothing works, you can connect the RaspberryPi to the WiFi using the commandline. Follow the instructions here.
Dongles
Raspbian Linux supports Bluetooth Dongles. Since there are 4 USB ports on the RaspberryPi, you can connect up to 4 dongles and use the internal dongle all at the same time (5 hci devices total).
Each dongle means you can connect more MetaSensors simultaneously. That being said, there will still be a data throughput limit at the OS and BLE link level and we recommend a max of 4 sensors per dongle for maximum reliability.
In a typical setup, two of the USB ports are used for the mouse and keyboard on the Pi. This means that of the 4 USB ports on the Pi, only two USB ports remain free.
First, plug in the USB to BLE Dongle(s).
Second, type the commands:
>>> lsusb
    Bus 002 Device 005: ID 0a12:0001 Cambridge Silicon Radio, Ltd Bluetooth Dongle (HCI mode)
>>> hciconfig
    hci0:   Type: USB
>>> hciconfig -a hci0
    Manufacturer: Accel Semiconductor Ltd. (74)
If the dongle(s) shows up as an hci device, great, you are done!
If not, there are a couple things to consider. First, you need to make sure it is actually a Linux supported dongle: https://elinux.org/RPi_USB_Bluetooth_adapters. If your dongle is not on this list, you are out of luck and need to purchase a new one that is on the list.
Once you have determined that your BLE Dongle(s) is Linux supported, run the following commands with the Dongle(s) plugged-in:
>>> sudo apt-get update
>>> sudo apt-get upgrade
>>> sudo reboot
Issues
If you run into any issues setting up your hub hardware, please refer to the RaspberryPi documentation here.
If you run into any issues with the hub software, please post on our forum.
Understanding the Hub
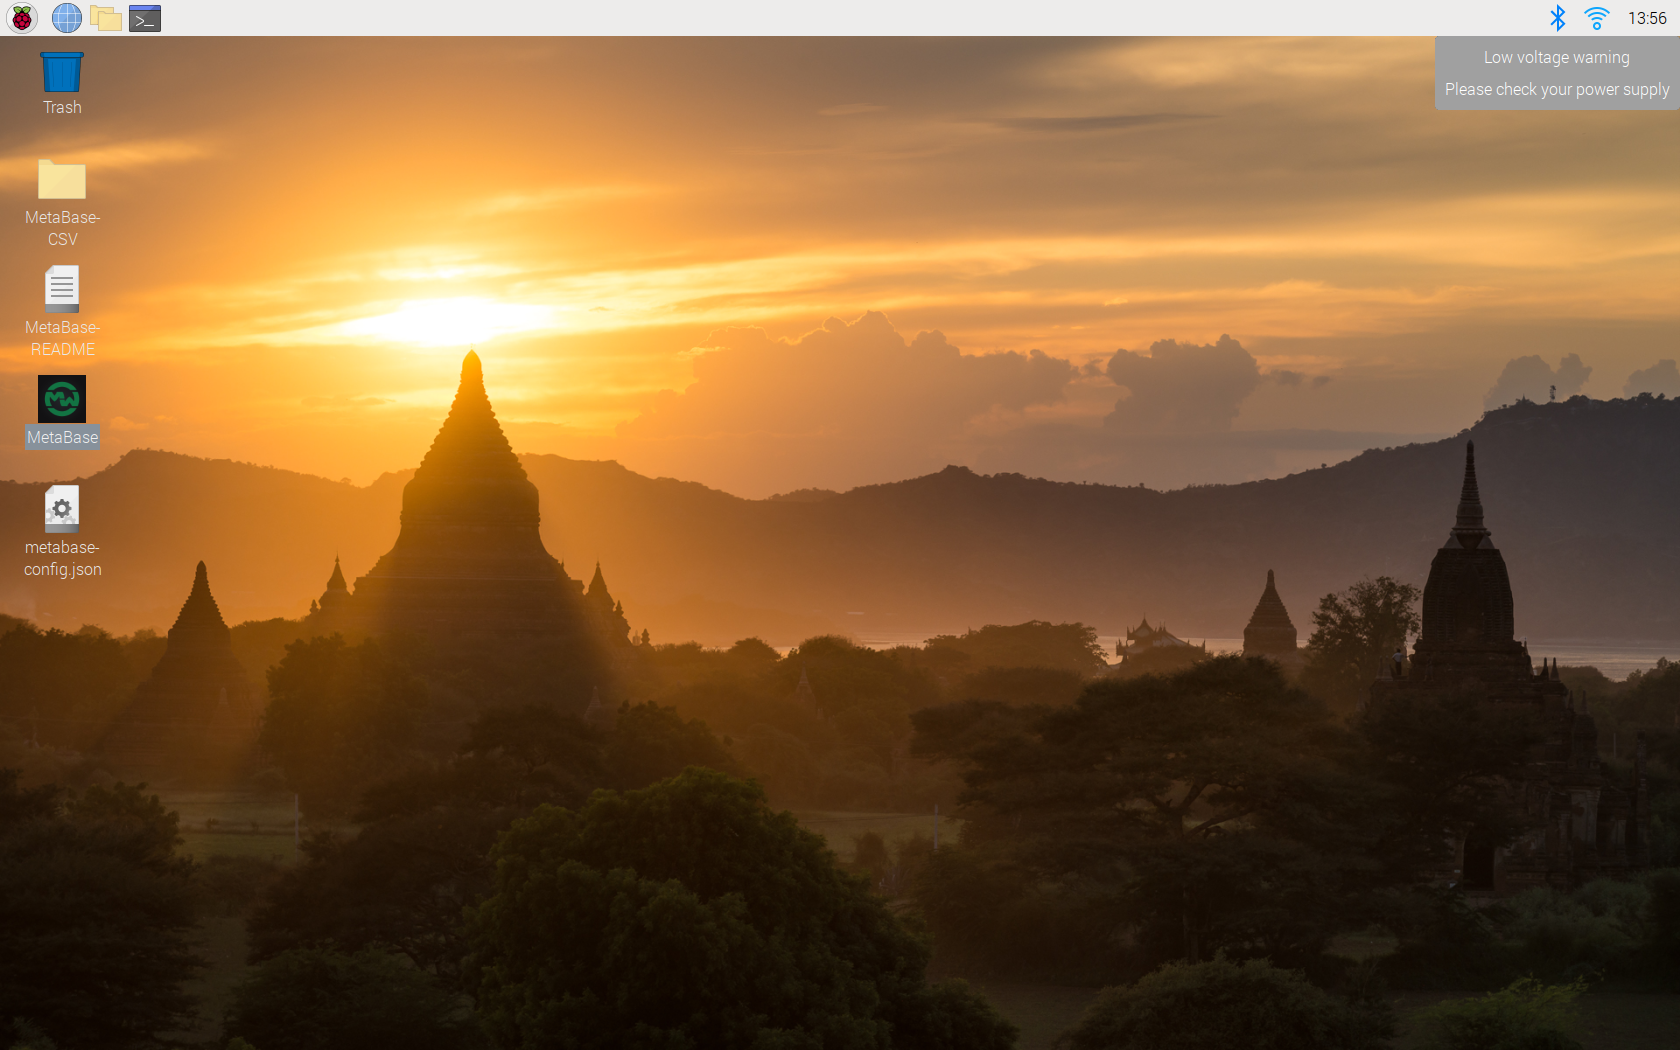
Once logged in, you will see the Raspbian Desktop.
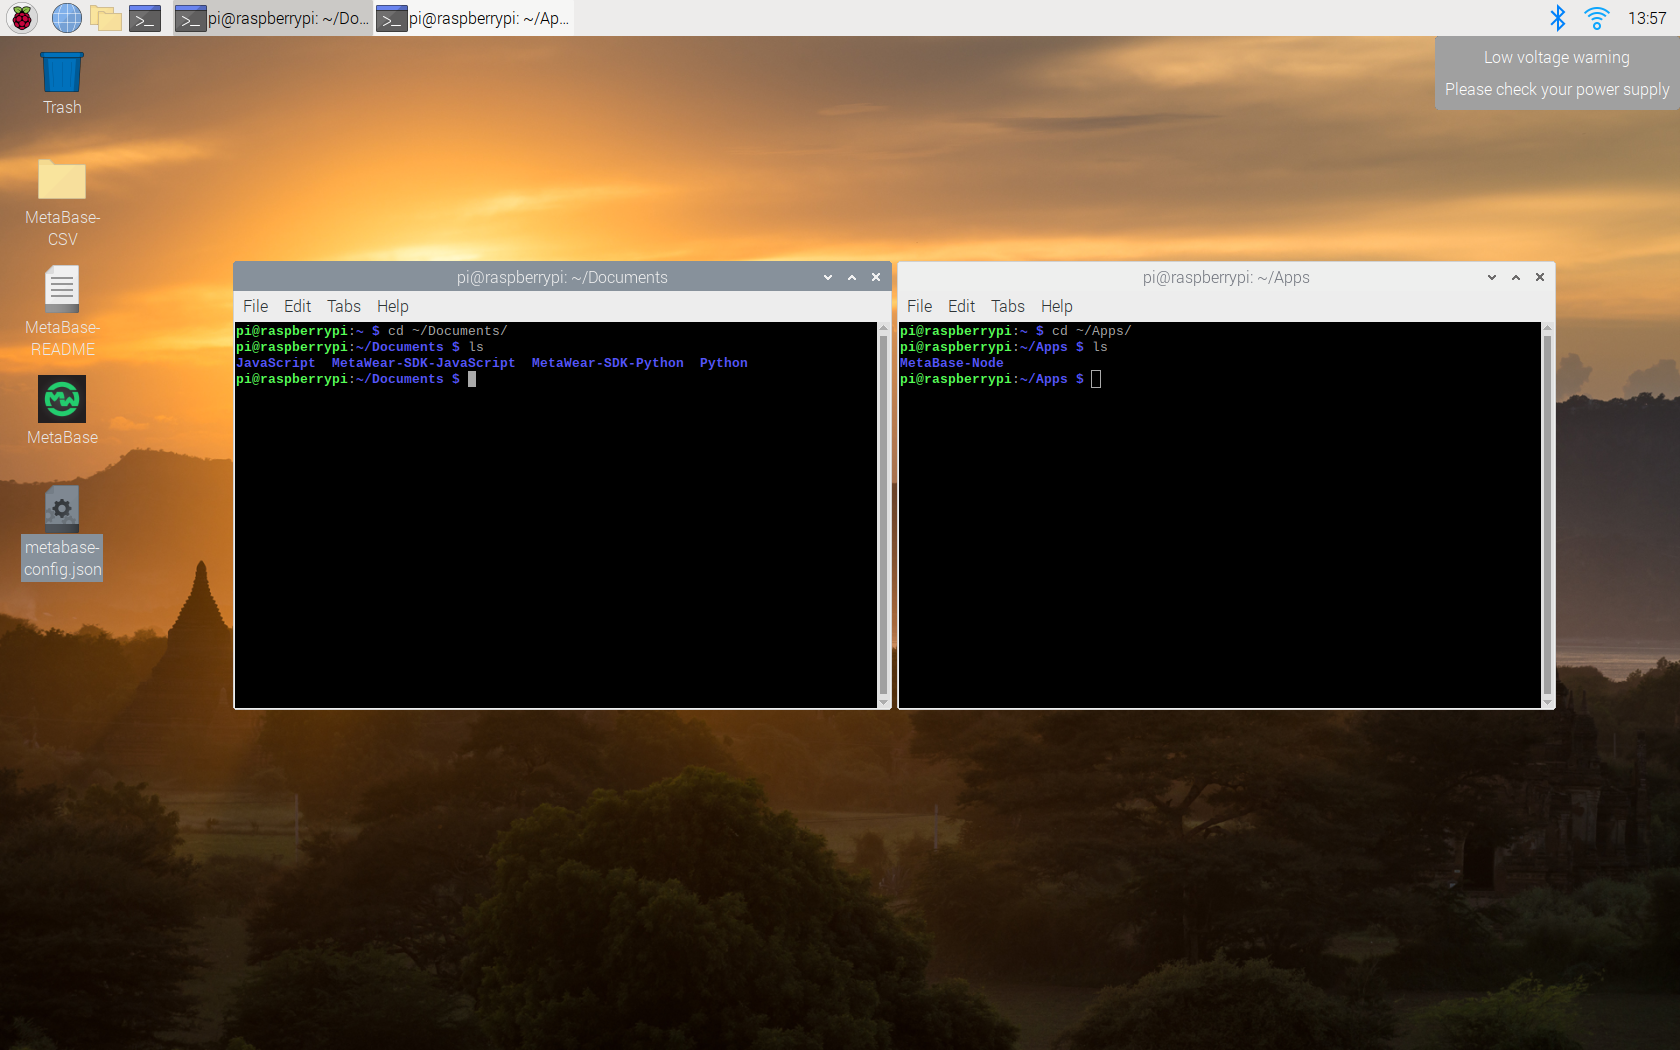
Everything is based in the App or Documents folder. You can open a terminal and navigate:
/home/pi/Apps
└── MetaBase-Node
/home/pi/Documents
├── JavaScript
├── Python
├── MetaWear-JavaScript
└── MetaWear-Python
MetaBase-Node is a node app which allows anyone to configure the MetaSensors using a configuration file placed on the RaspberryPi Desktop. Once the configuration file is complete, double-click the icon and the javascript runs automatically. No coding is needed but all the source code is provided.
MetaWear-JavaScript is our JavaScript repository (our Javascript API), downloaded and ready to go with all the supporting libraries and requirements loaded/compiled. This is for those that want to code a Javascript App using our sensors.
JavaScript is a single node script with npm/nvm, metawear, and node 10 installed for you to try and run an example right away. Simple run npm install and sudo node led.js to blink the LED. Make sure to use nvm to use the correct node version (nvm use 10) and change the mac address in the led.js file.
MetaWear-Python is our Python repository (our Python API), downloaded and ready to go with all the supporting libraries and requirements loaded/compiled. This is for those that want to code a Python App using our sensors.
Python is a single python script with metawear and Python3 installed for you to try and run an example right away. Just run python3 led.py [mac address] such as python3 led.py E6:Fe:B6:B4:DB:E7 to blink the LED.
MetaBase in Node
The easiest way to connect to a MetaSensor device from the hub is to configure the metabase-config.json file.
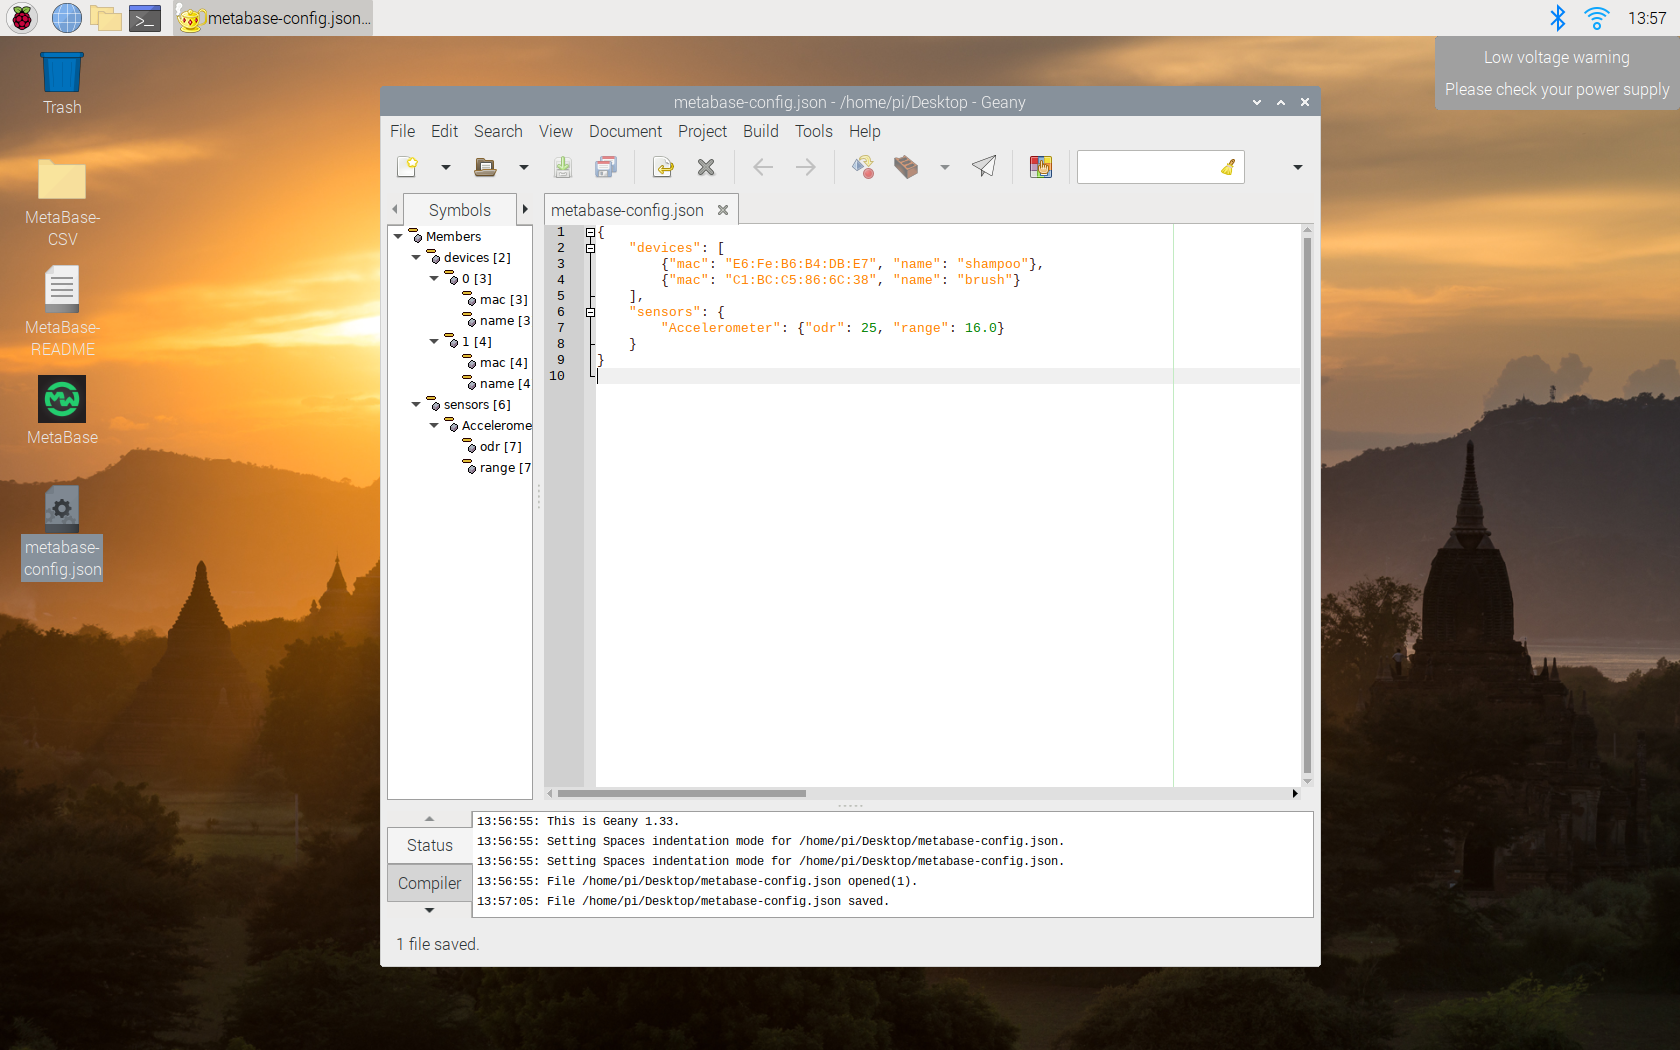
Open the metabase-config.json file on your desktop by right clicking it and using the “Text Editor”. You will see some configuration options that must be set before you can use MetaBase. Find the line that allows you set your MAC address. It should look something like this:
>>> " devices": [
>>>     "E2:C3:6D:33:73:6F"
>>> ],
Change the MAC address to the MAC address of the MetaWear you want to connect to.
Save the file. Now you are ready to run MetaBase.
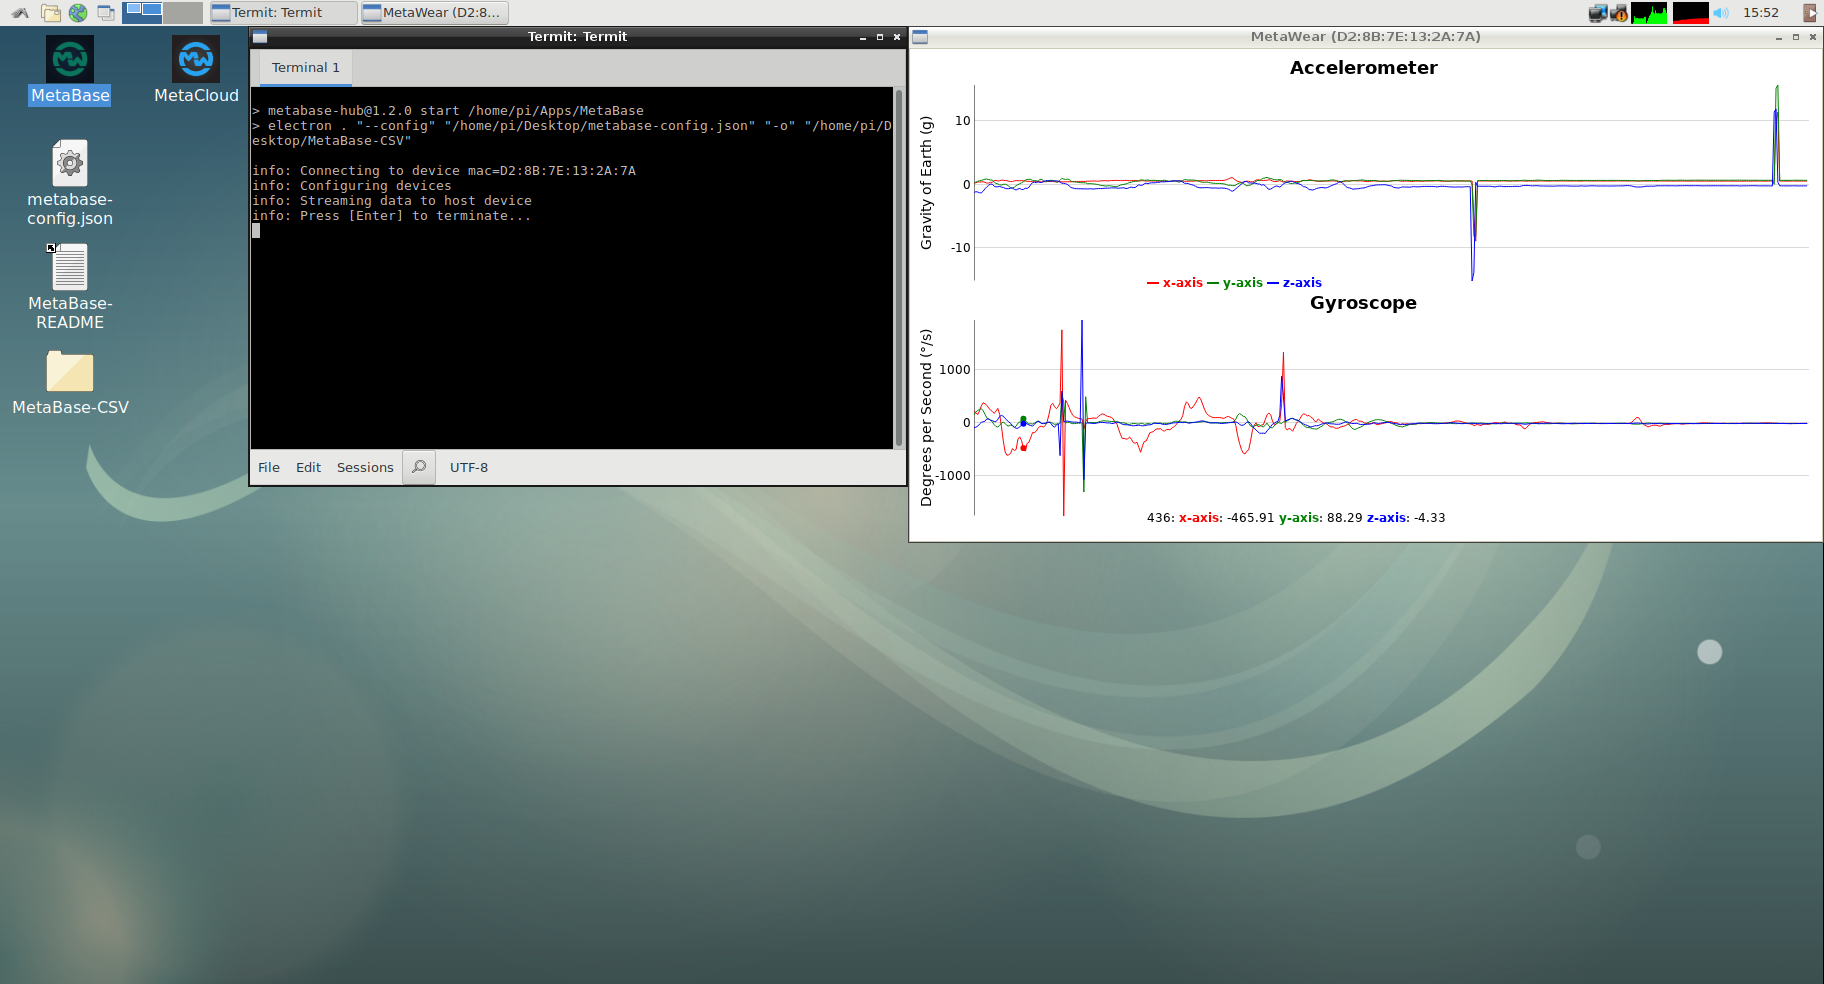
To run MetaBase, simply double-click the MetaBase App icon on the desktop.
If you entered your MAC address correctly, the MetaBase app should successfully connect to your MetaWear and start streaming data at the default rates.
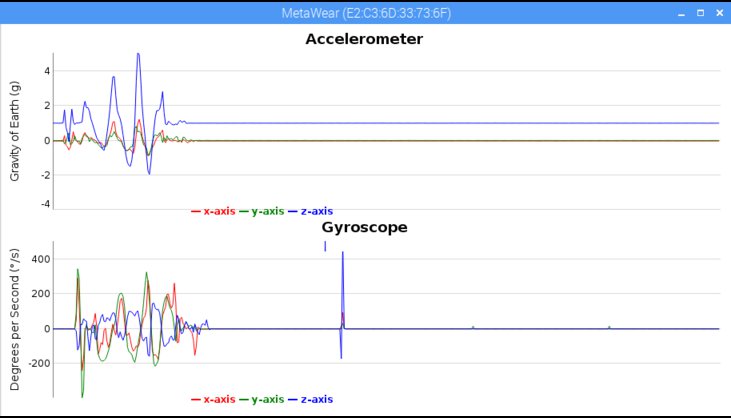
Follow the instructions on the screen to terminate the session.
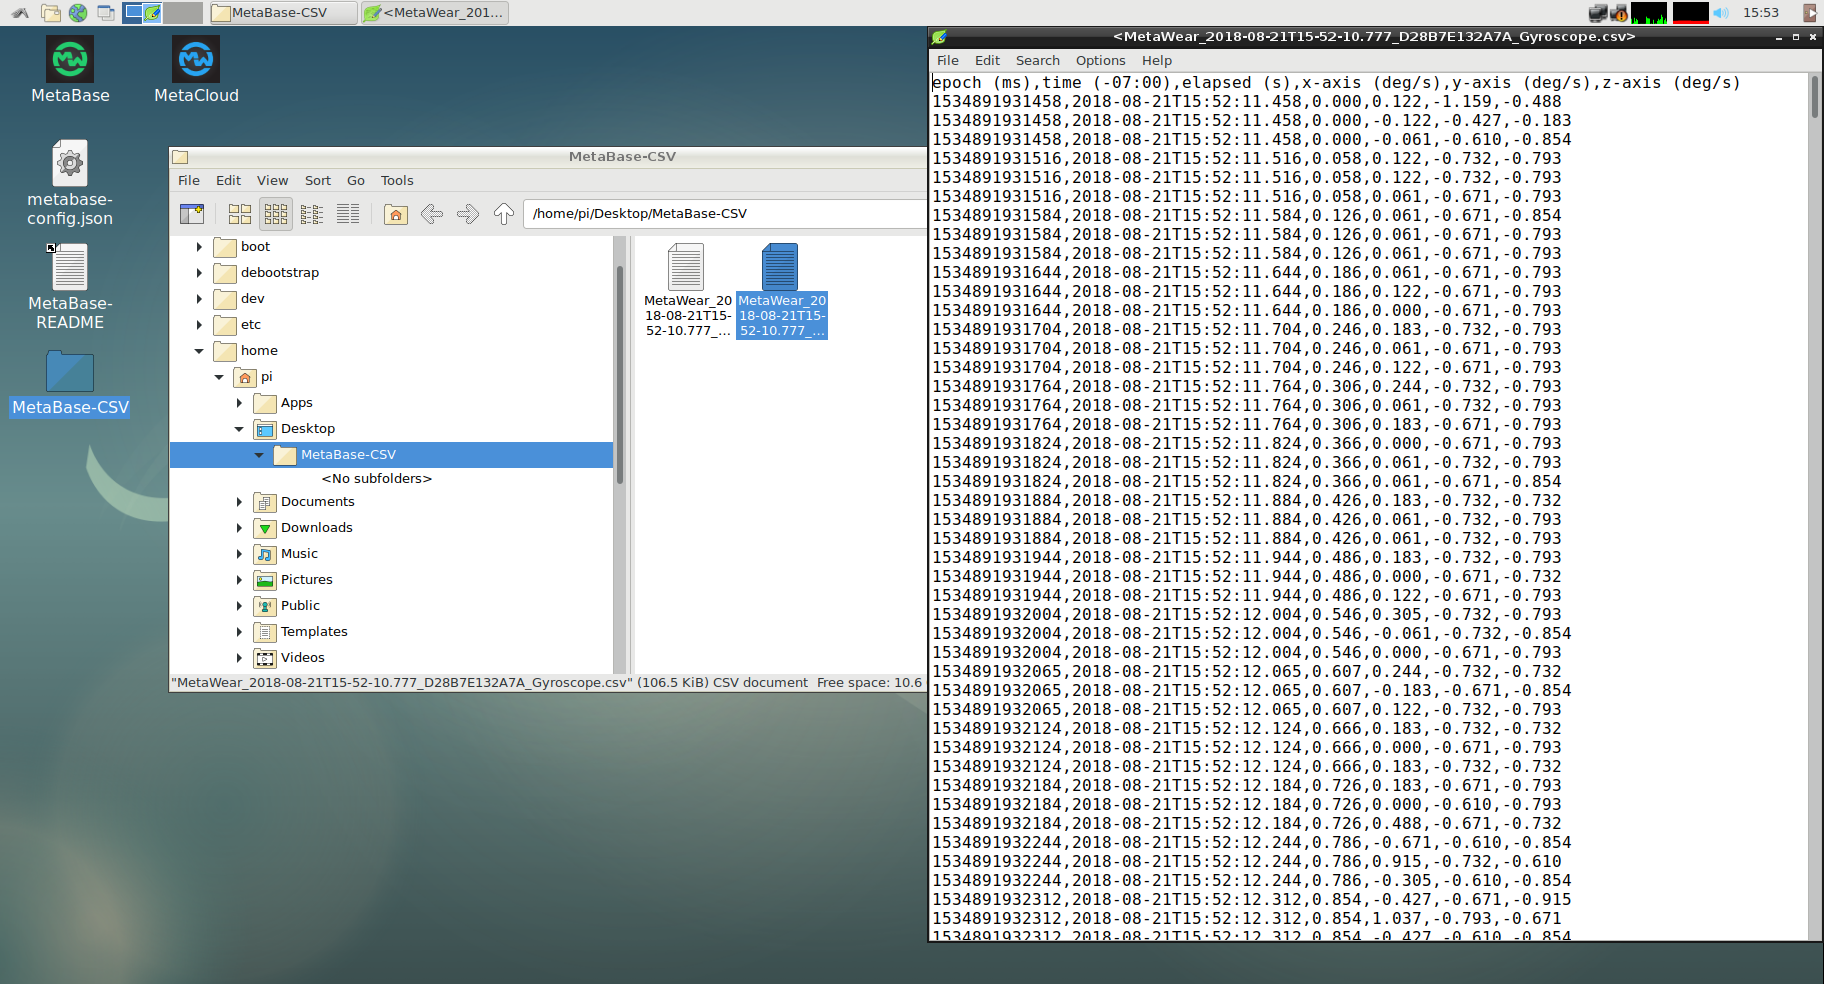
Data and Logs
Once you terminate your MetaBase session, all the logs can be found in the directory on the Desktop as shown below. The number of logs you will have and how frequent they log data will depend on your configuration file.
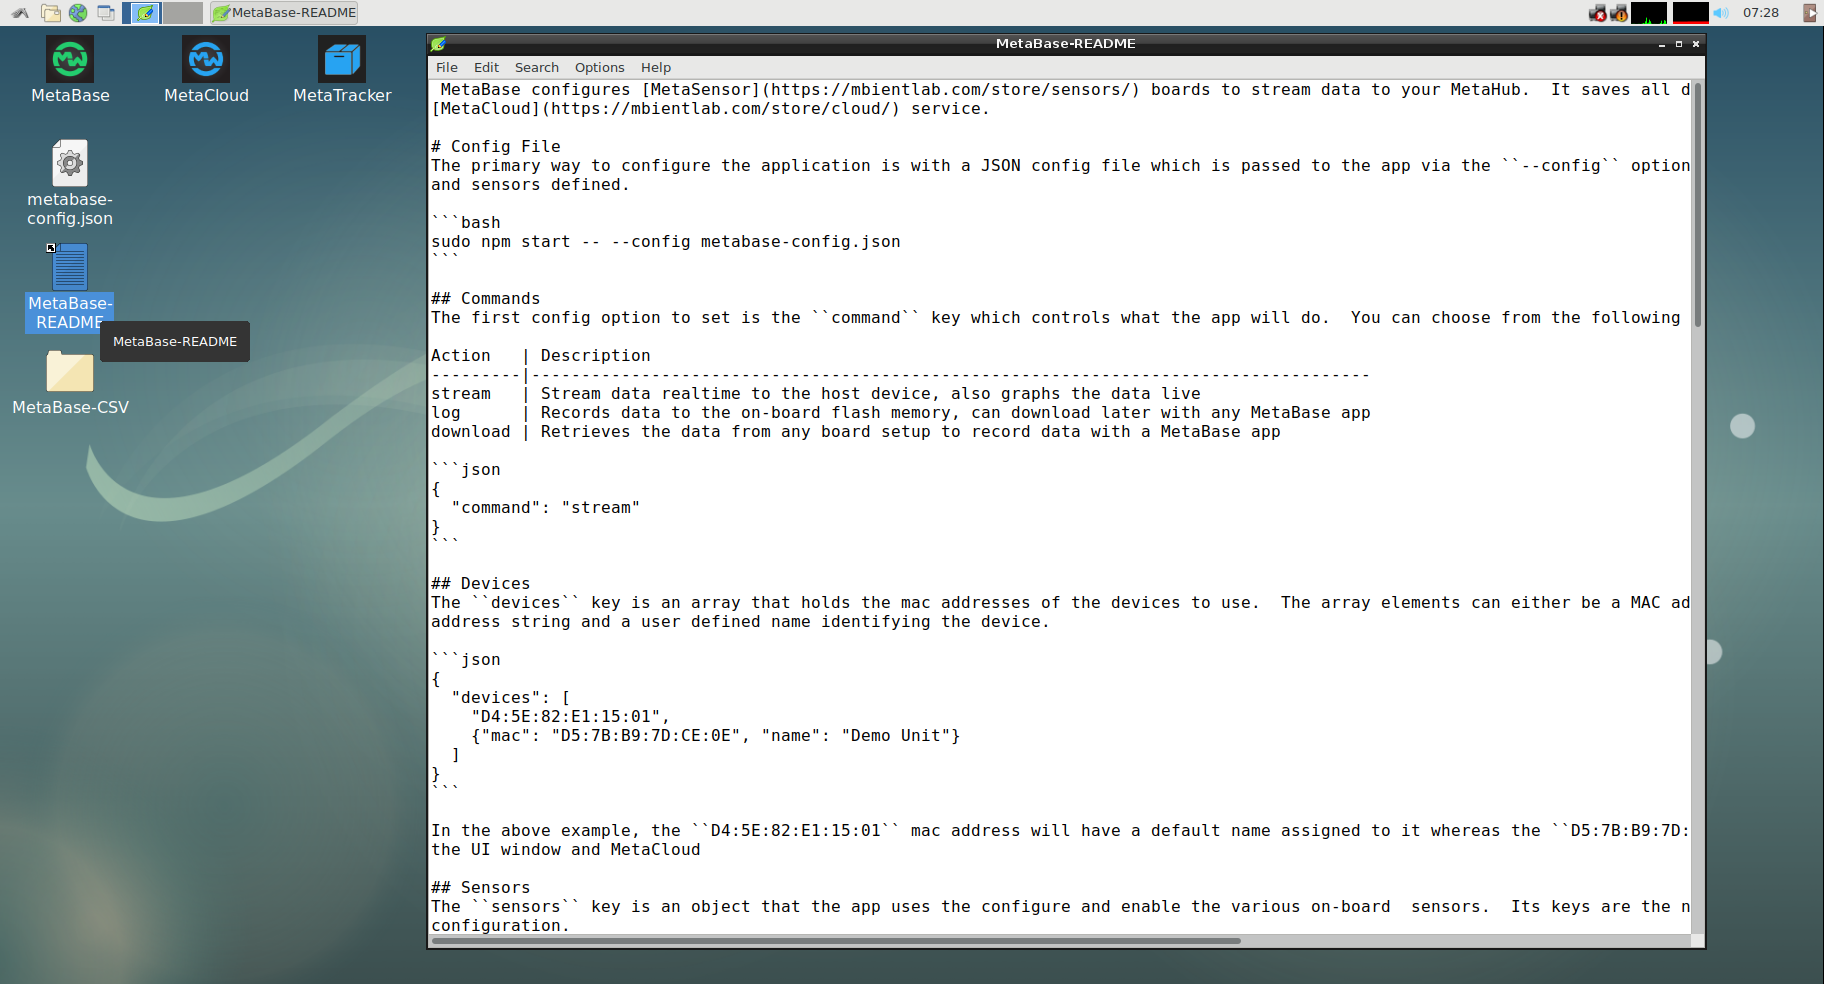
Usage
To understand how to use the configuration file, please refer to the MetaBase README on the Desktop. The README will explain all of the different ways you can configure the sensors through this interface.
Configuration
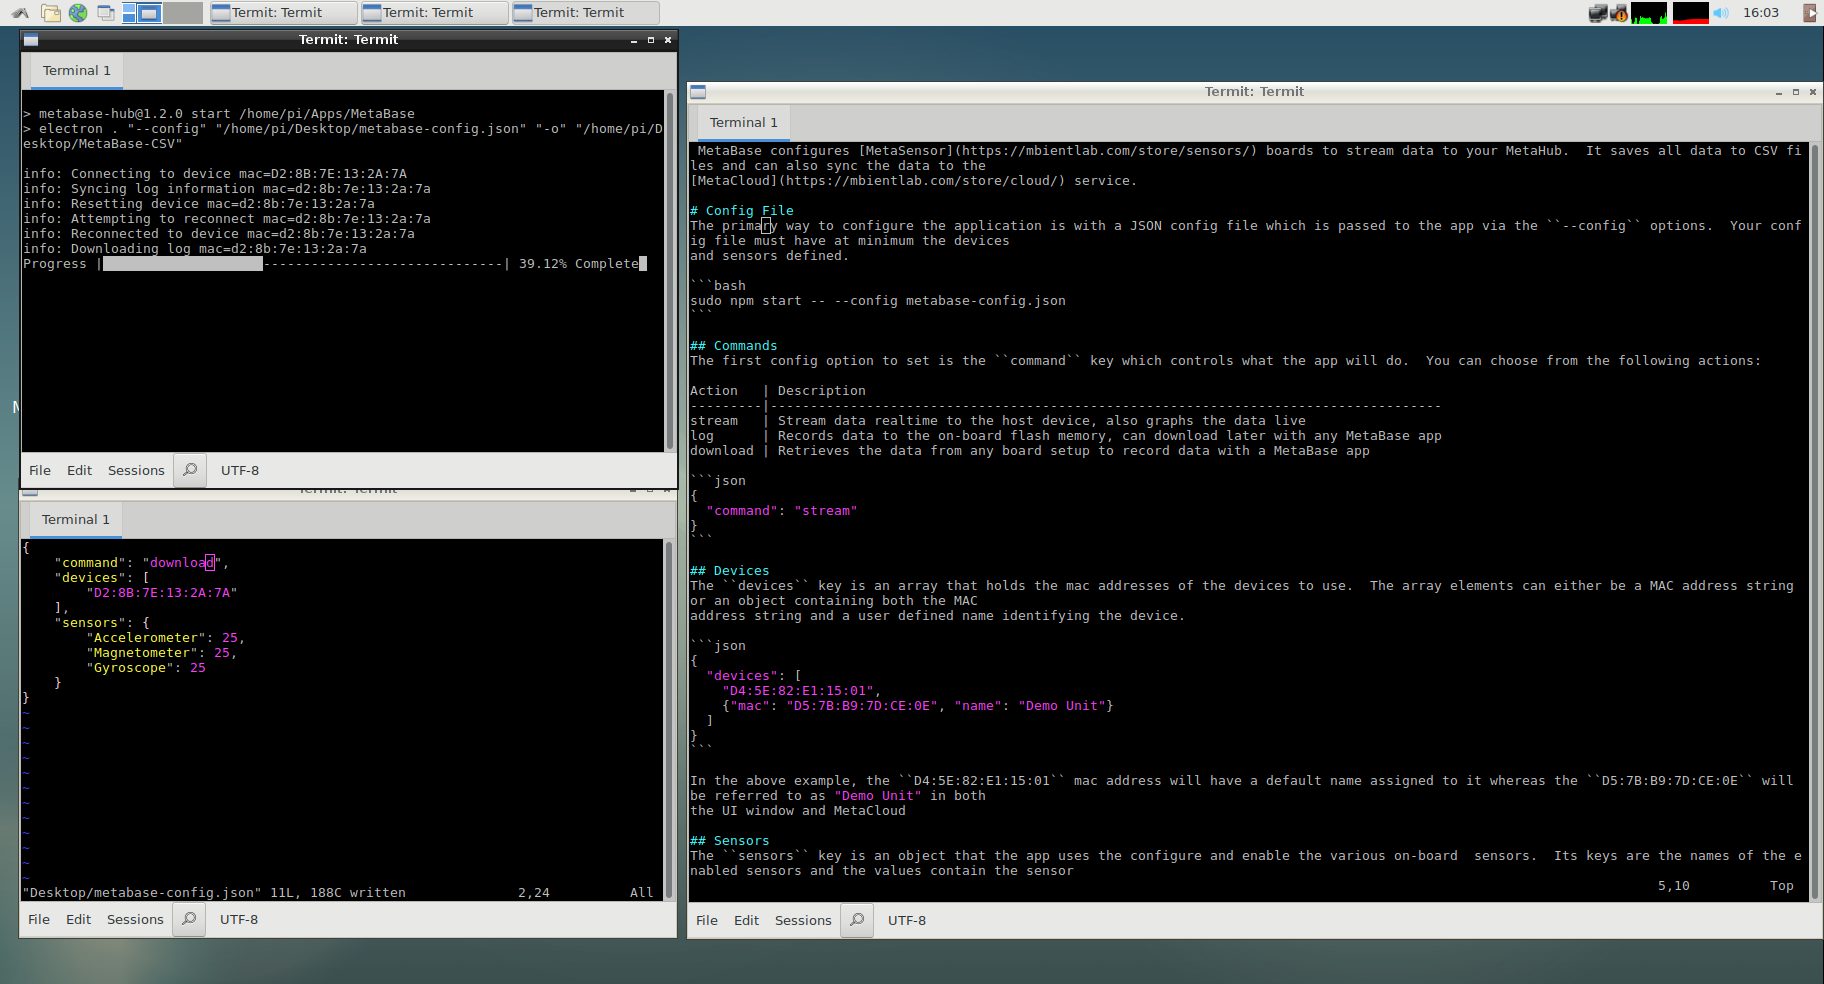
Don’t forget, if you use stream mode, the MetaSensor will continue to send sensor data to the MetaHub until you fully reset the device and terminate the session.
If you use log mode, first you must set the sensor to log. Then, when you are done, update the configuration file to download the data as per below:
MetaBase App
The MetaBase App in Javascript is available as open source code on our Github: https://github.com/mbientlab/MetaBase-Hub. This App runs with node 8 only.