Swift APIs
MetaSensors are supported on iOS, macOS, tvOS and watchOS. Ddevelopers can create Apps for iPads, iPhones, Watches and Mac desktops/latops. Any App you develop with our APIs can be released on the Apple App store.
For this tutorial, you will need Xcode on MAC OS.
You should be familiar with the Swift language and know how to deploy Apps and use Xcode before starting the tutorial.
Note
Other languages (such as Python) on MAC are not supported.
Source Code
You can find the Swift code on Github here: https://github.com/mbientlab/MetaWear-SDK-iOS-macOS-tvOS.
Swift Tutorials
You can find tutorials to use the Swift libs here: https://mbientlab.com/iosdocs/latest.
Swift API Documentation
The Swift API calls are documented here: https://mbientlab.com/documents/metawear/ios/latest/. The C++ API calls are documented here: https://mbientlab.com/documents/metawear/cpp/latest/.
Installation
Ensure that you are running the latest OS:
Visit the macOS page on the App Store or online:
Click the download button and follow the onscreen instructions to begin your upgrade.
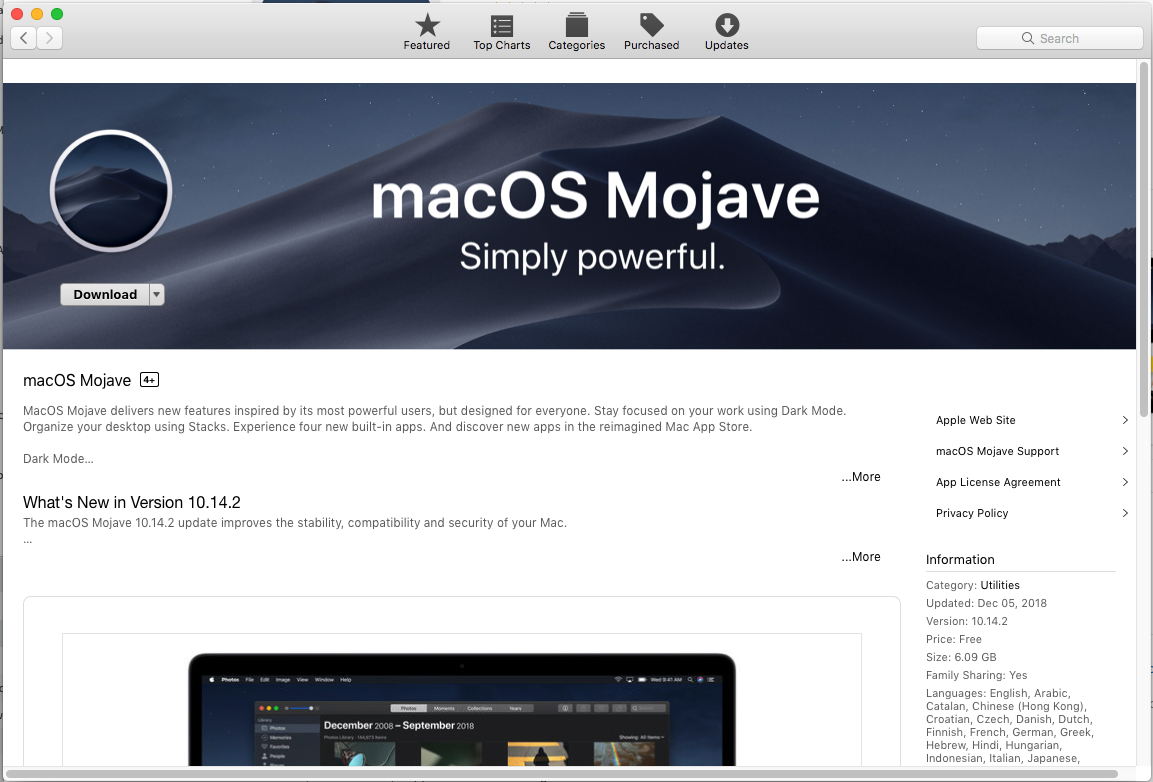
Then check and perform your system for Updates in the System Preferences menu.
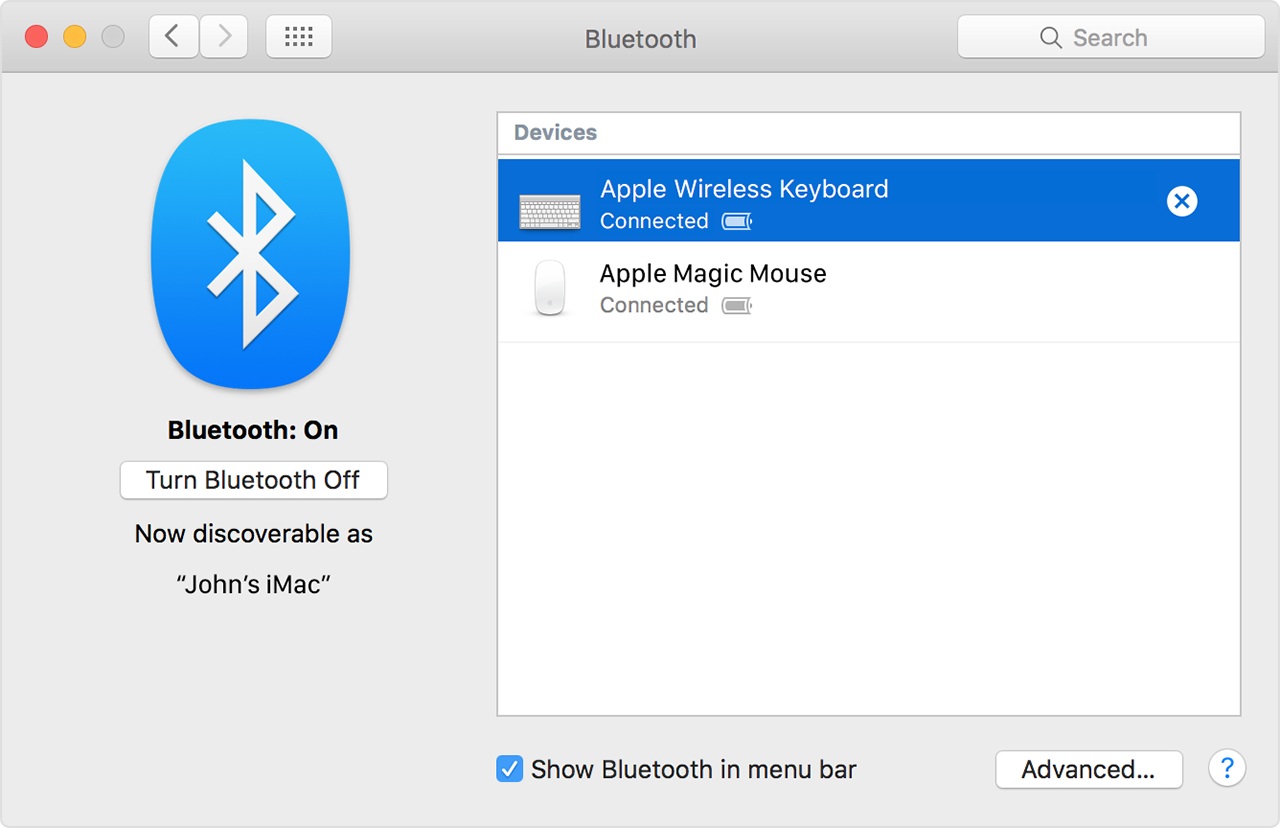
Bluetooth
Make sure your device support Bluetooth 4.0+
If the Bluetooth preferences lists options for enabling Bluetooth and making your device discoverable, Bluetooth is installed.
To check your Mac Bluetooth version:
Click on the Apple menu.
Select About This Mac.
Click on the More Info button.
Click on the System Report button.
Select Bluetooth from the sidebar on the left, underneath “Hardware.”
Scan down the list of information until you find “LMP Version.”
If your Mac is equipped with Bluetooth 4.0, LMP Version will say 0x6 (or higher). Anything lower than that is an older version of Bluetooth.
Warning
The Bluetooth version on your MAC will only be useful if you are developing a MAC App. If you are developing a Watch, iPad, and iPhone App, you must make sure that the device you are using for debugging supports Bluetooth 4.0 or later.
The following devices are compatible with wireless Bluetooth LE (4.0) connectivity:
iOS 8.12+ (With the exception of iOS 9 beta)
iPad Mini
iPad 3 (or later)
iPhone (4S or later)
iPod touch (5th Gen or later)
Mac OSX 10.10 (Yosemite)
The following Mac Models and later support BLE 4.0:
Mac mini - Mid 2011
MacBook Air - 2011
MacBook Pro - Late 2012
iMac - Late 2012
Mac Pro - Late 2013 / early 2014
Minimum Watch model recommendation:
WatchOS 5 and Apple Watch Series 4
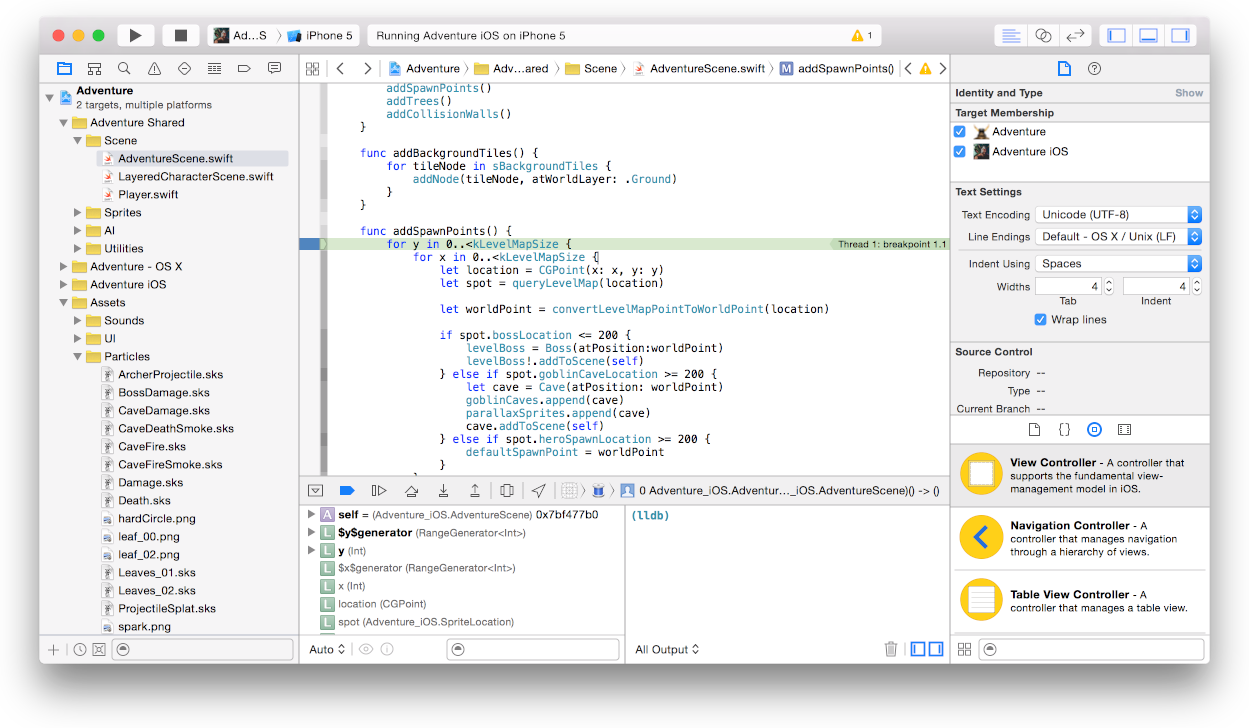
Xcode
Xcode is an integrated development environment for macOS containing a suite of software development tools developed by Apple for developing software for macOS, iOS, watchOS and tvOS.
Download and install it from the App Store or from Apple’s website.
It will prompt you to create a developer account. Follow the steps from Apple.
Dependencies
Terminal
The Terminal app allows you to control your Mac using a command prompt. You should get comfortable with the command line and basic commands.
The Terminal app is in the Utilities folder in Applications.
To open it, either open your Applications folder, then open Utilities and double-click on Terminal, or press Command - spacebar to launch Spotlight and type “Terminal,” then double-click the search result.
Homebrew
Homebrew is a free and open-source software package management system that simplifies the installation of software on Apple’s macOS operating system and Linux. Homebrew is an essential tool for any developer.
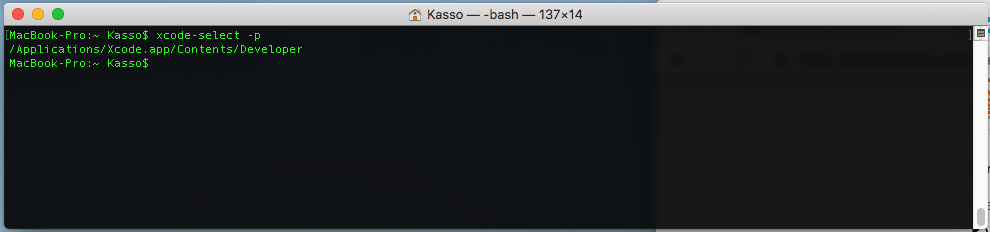
Before you can run Homebrew you need to have the Command Line Tools (CLT) for Xcode installed. CLT includes compilers that will allow you to build things from source, and if you are missing this it’s available through the App Store > Updates.
You can also run the following command to see if CLT is installed:
>>> xcode-select -p
This will return the path to the tool if the CLT is already installed: /Applications/Xcode.app/Contents/Developer.
To install Homebrew run the following:
>>> ruby -e "$(curl -fsSL https://raw.githubusercontent.com/Homebrew/install/master/install)"
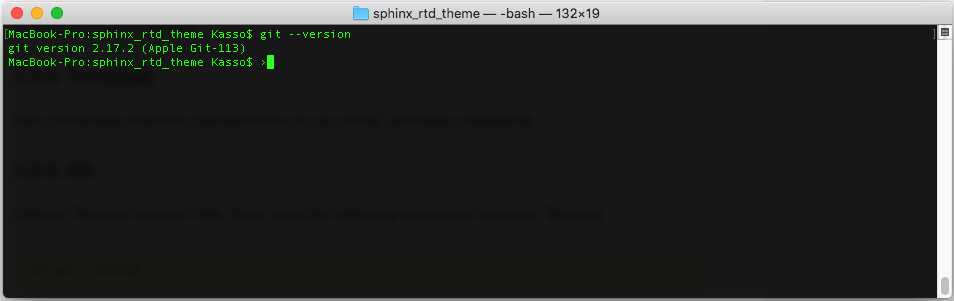
Git
Git is a distributed version-control system for tracking changes in source code during software development. It is designed for coordinating work among programmers, but it can be used to track changes in any set of files.
Type the following command into your Terminal:
>>> git --version
If it is already installed, you don’t need to do anything, otherwise read and agree to the Command Line Tools License Agreement and you are ready to use Git!
If the terminal install did not succeeed, you can install Git from this site.
Another option is to use homebrew:
>>> brew install git
When done, test that it installed properly installed by running:
>>> git --version
Git should output /usr/local/bin/git.
Don’t forget to define your Git user (should be the same name and email you use for Github, Bitbucket or whichever repository you are using):
>>> git config --global user.name "Your Name Here"
>>> git config --global user.email "your_email@youremail.com"
They will get added to your .gitconfig file.
You can learn more about how to use Git on the respective sites.
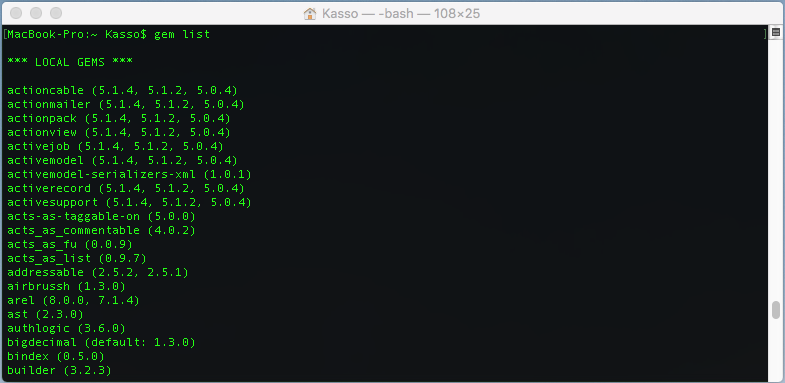
RubyGems
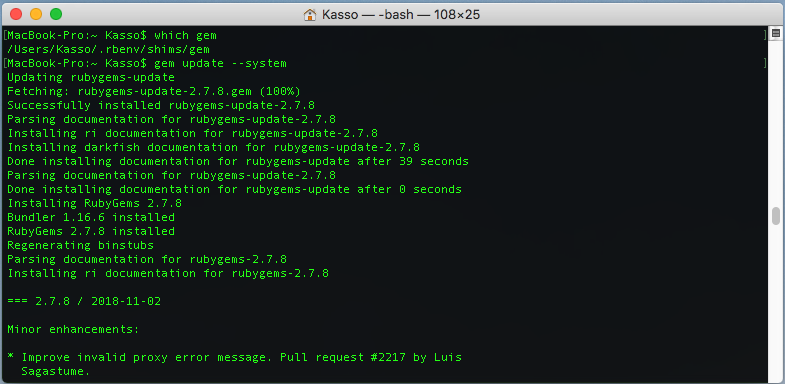
RubyGems, the Ruby package manager, should be installed on your machine. If you previously have installed Ruby; verify this by running:
>>> which gem
To update to its latest version with:
>>> gem update --system
To install a gem (Ruby package), run:
>>> gem install <gemname>
To install without generating the documentation for each gem (faster):
>>> gem install <gemname> --no-document
List installed gems:
>>> gem list
To check if any installed gems are outdated:
>>> gem outdated
To update all gems or a particular gem:
>>> gem update [<gemname>]
RubyGems keeps old versions of gems, so feel free to do some cleaning after updating:
>>> gem cleanup
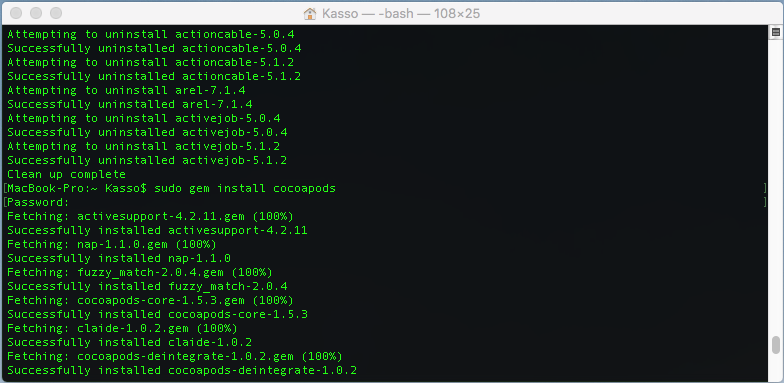
CocoaPods
CocoaPods is a dependency manager for Swift and Objective-C Cocoa projects. It has over 55 thousand libraries and is used in over 3 million apps.
You can learn more about CocoaPods here.
CocoaPods is built with Ruby and is installable with the default Ruby available on OS X. We recommend you use the default ruby.
Using the default Ruby install can require you to use sudo when installing gems:
>>> sudo gem install cocoapods
Simulator
Xcode Simulator allows you to rapidly prototype and test builds of your app during the development process. Installed as part of the Xcode tools, Simulator runs on your Mac and behaves like a standard Mac app while simulating an iPhone, iPad, Apple Watch, or Apple TV environment.
Warning
BLUETOOTH IS NOT SUPPORTED IN THE SIMULATOR.
You will need to compile your App and test it on the native machine you are developing for as Bluetooth is not supported in the Xcode simulator.
MetaWear
MetaWear is available as a CocoaPod to be added to your Xcode project. This is the recommended way to add MetaWear to your own iOS App if you already know how to use CocoaPods.
If you are a first time CocoaPods user, please see this tutorial.
If you are not comfortable with CoacoaPods, we recommend using our StarterApp project where everything has already been setup for you including a Podfile. Simply jump to to the next section.
To install it, simply add the following line to your Podfile:
>>> pod "MetaWear", :subspecs => ['UI', 'AsyncUtils', 'Mocks', 'DFU']
Save your Podfile.
Run:
>>> pod install
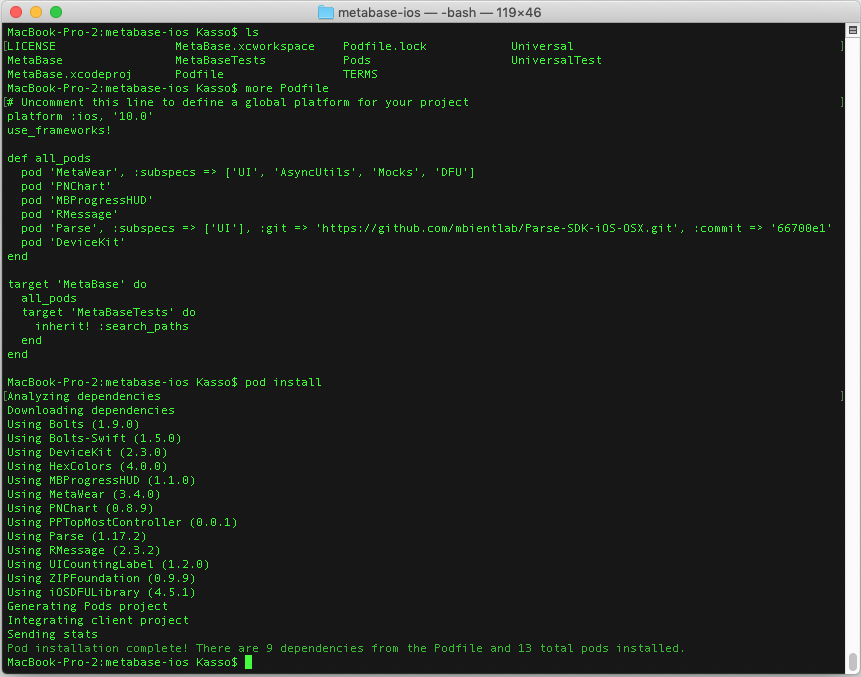
Open the MyApp.xcworkspace that was created.
Usage
Import the framework header files like this:
>>> import MetaWear
>>> import MetaWearCpp
API Code Repository
Head over to our Swift Github page: https://github.com/mbientlab/MetaWear-SDK-iOS-macOS-tvOS
You can clone the repository or simply download as a ZIP file:
>>> git clone https://github.com/mbientlab/MetaWear-SDK-iOS-macOS-tvOS.git

Make sure the MetaWear-SDK-Cpp submodule is also downloaded. If it is not present, use the command:
>>> git clone --recurse-submodules https://github.com/mbientlab/MetaWear-SDK-iOS-macOS-tvOS.git
Template App
For those who want to build a simple MetaWear App or are new to iOS development, we have provided a template for creating MetaWear Apps.
Go to the MetaWear-SDK-iOS-macOS-tvOS/StarterProject directory.
Run:
>>> pod update
Open StarterProject.xcworkspace with Xcode.

Let’s build our first App!
Make sure you are confident with Xcode and Swift, there is a great tutorial here.
UI Elements
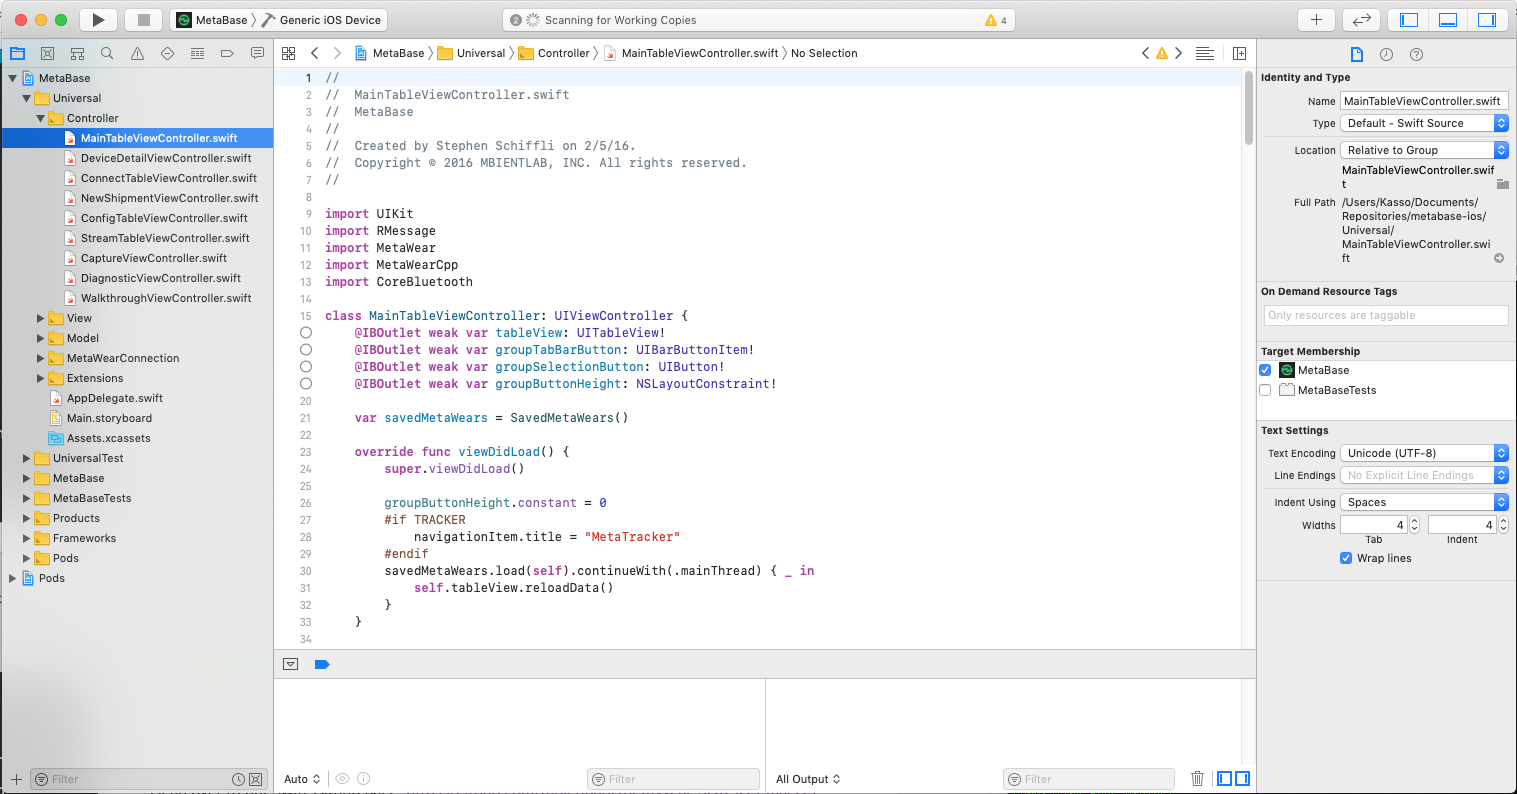
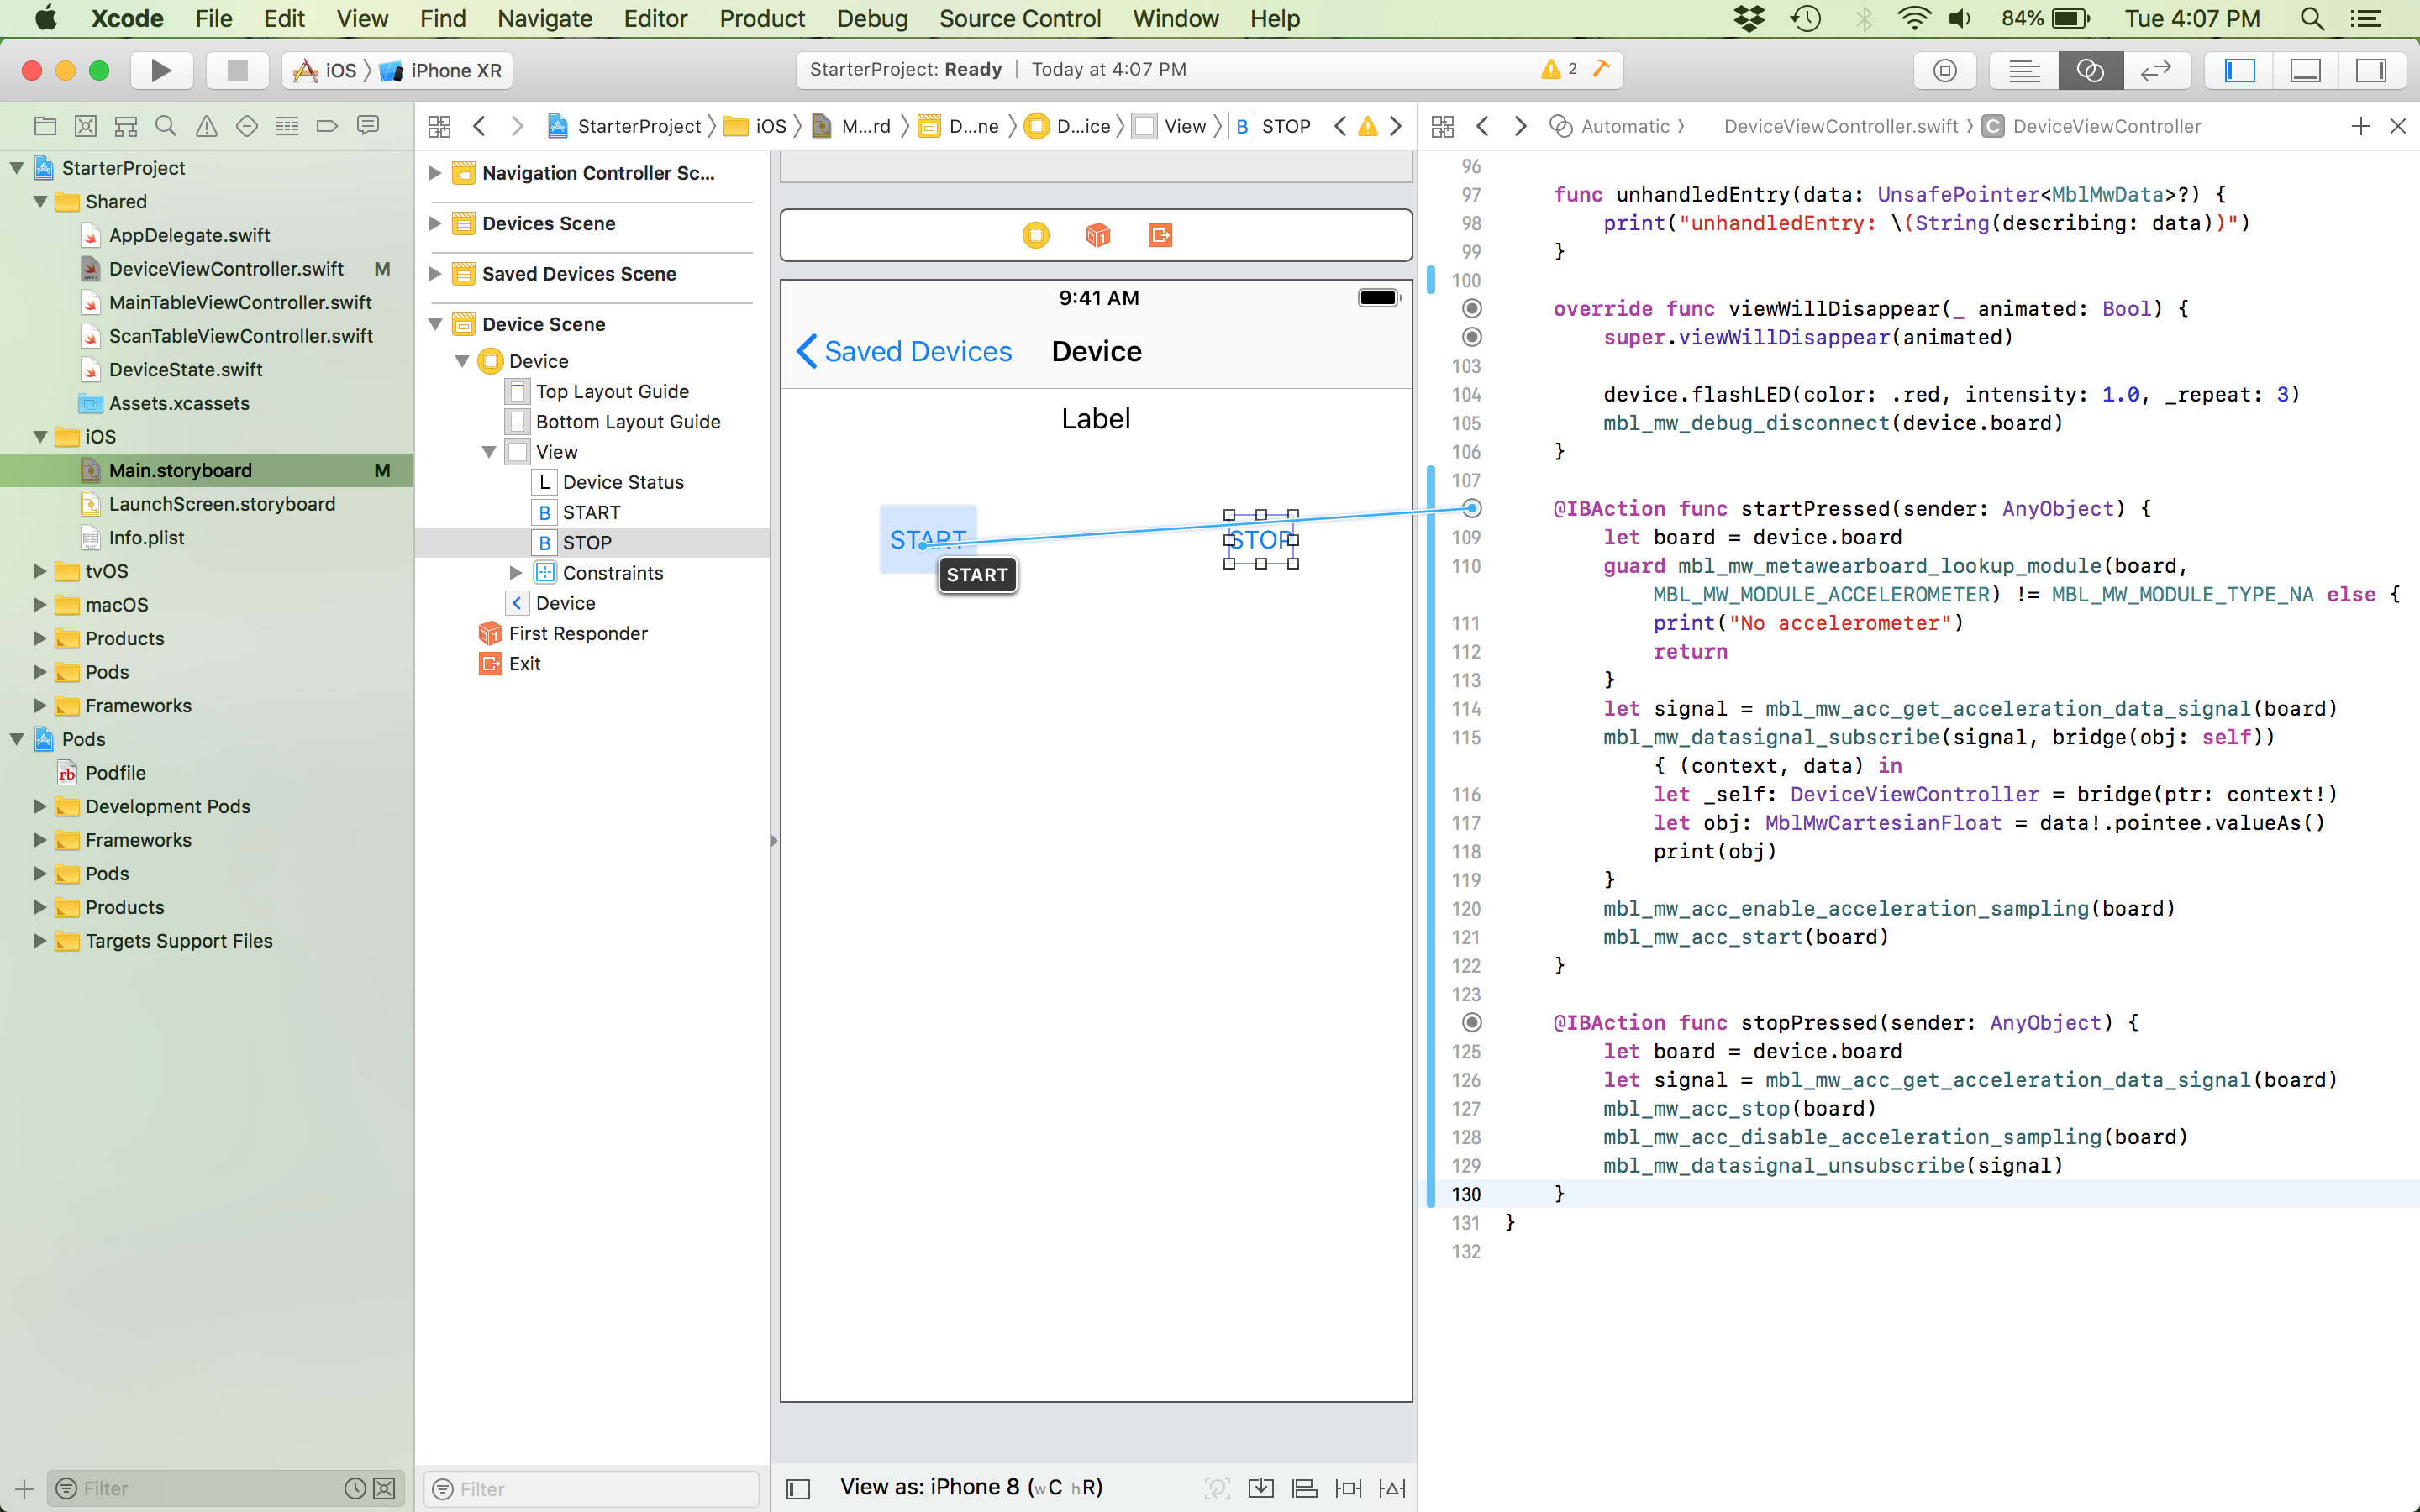
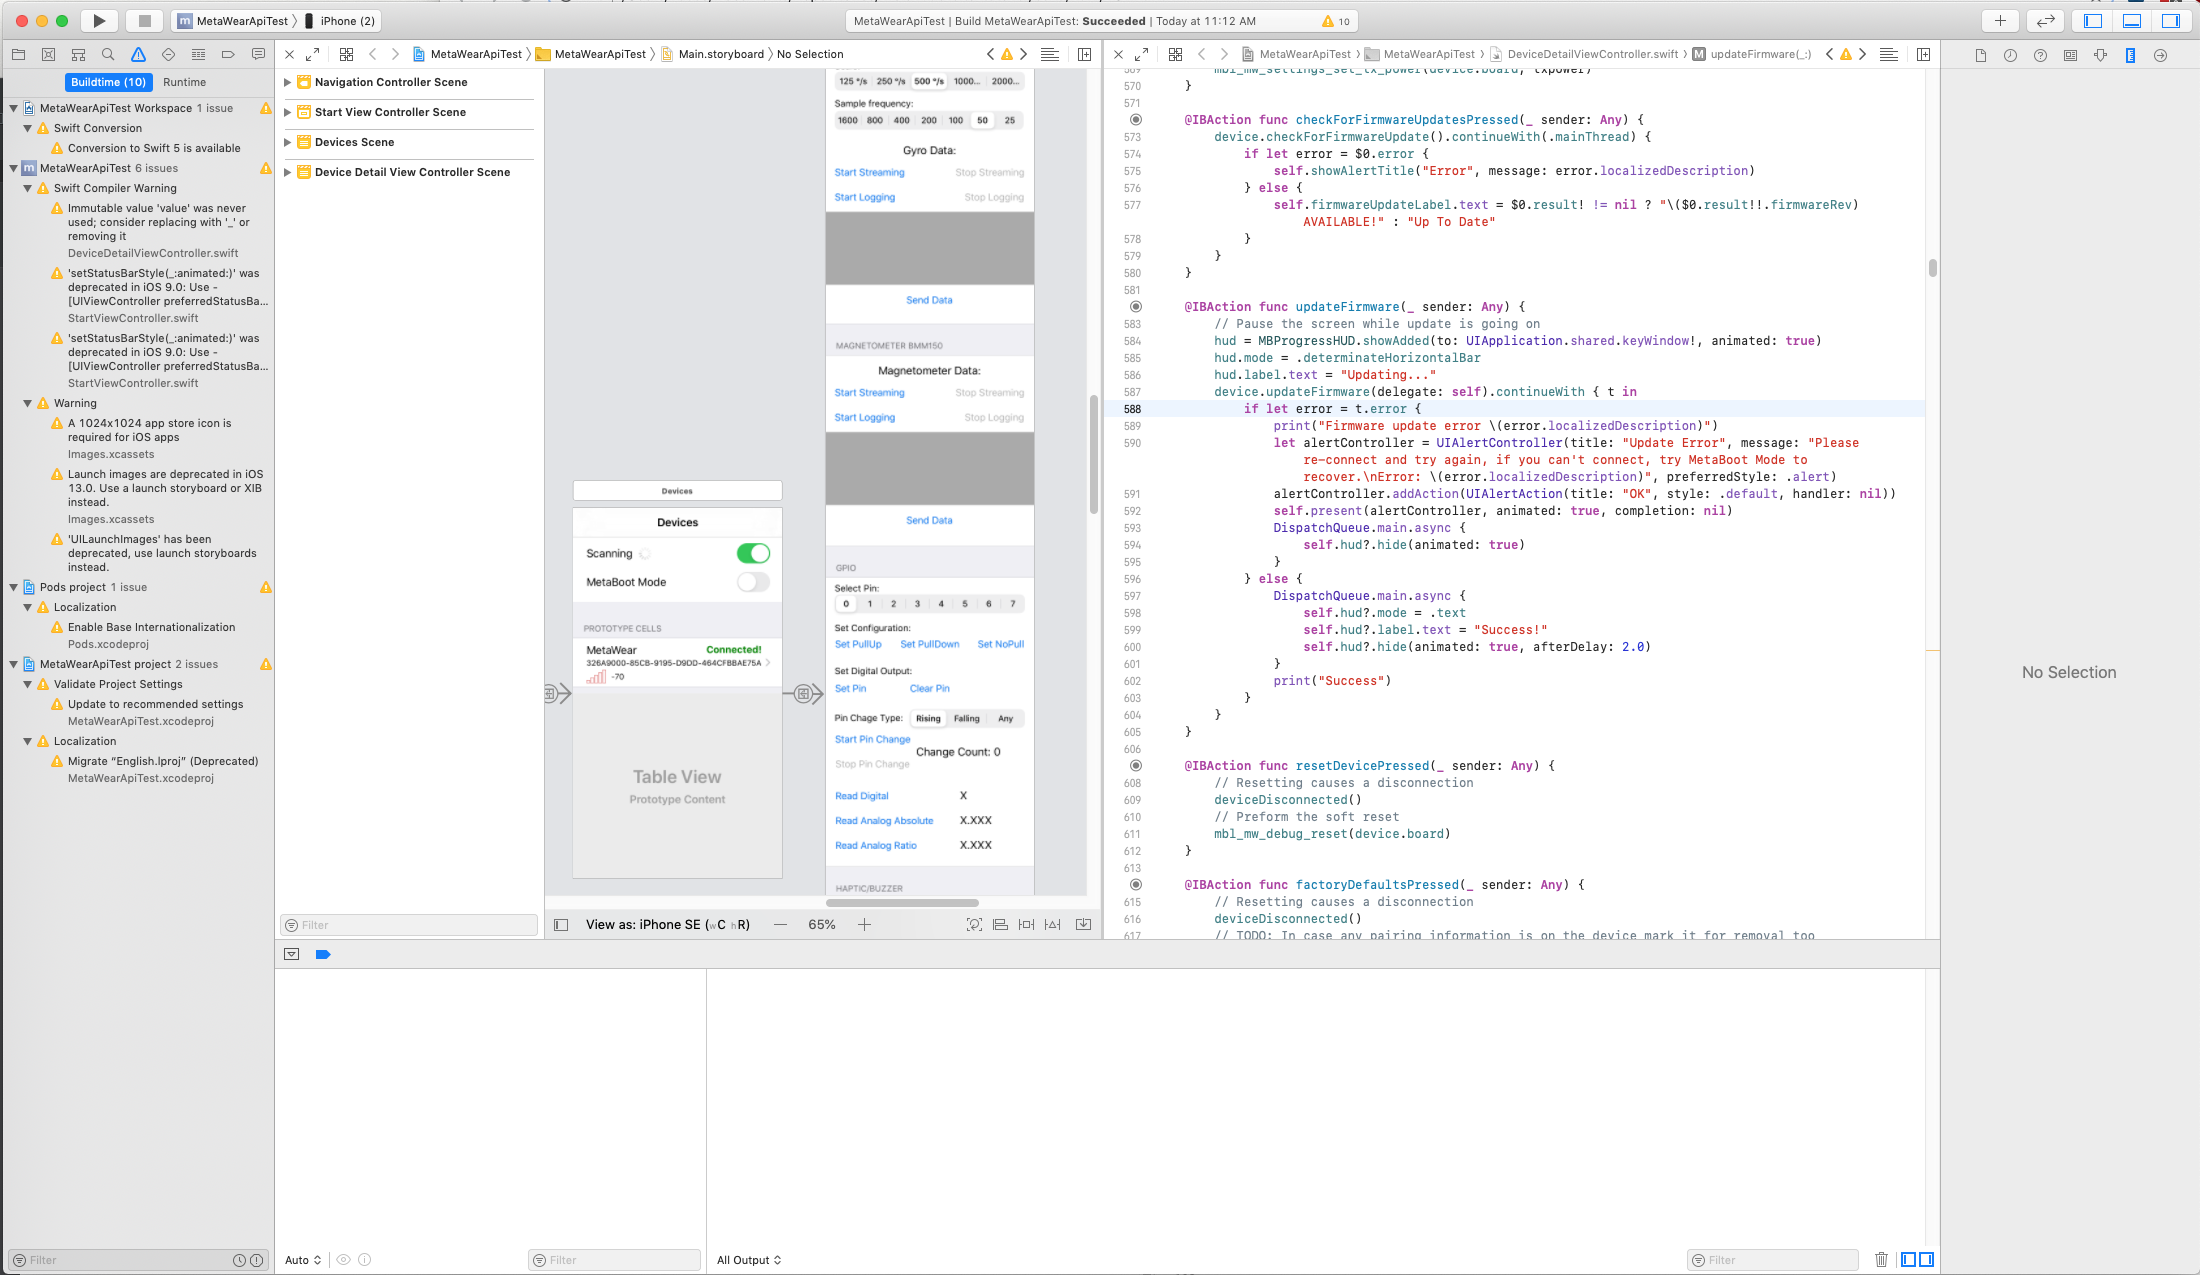
To add a start and stop button using interface builder, so open up iOS/Main.storyboard.
Then drag two buttons onto the Device View Controller and connect the buttons to DeviceViewController.swift.
Data Stream
Switching back to the DeviceViewController class, lets fill in the startPressed and stopPressed functions.
The start button will enable the accelerometer data stream. The stop button will disable the stream.
@IBAction func startPressed(sender: AnyObject) {
    let board = device.board
    guard mbl_mw_metawearboard_lookup_module(board, MBL_MW_MODULE_ACCELEROMETER) != MODULE_TYPE_NA else {
        print("No accelerometer")
        return
    }
    let signal = mbl_mw_acc_get_acceleration_data_signal(board)
    mbl_mw_datasignal_subscribe(signal, bridge(obj: self)) { (context, data) in
        let _self: DeviceViewController = bridge(ptr: context!)
        let obj: MblMwCartesianFloat = data!.pointee.valueAs()
        print(obj)
    }
    mbl_mw_acc_enable_acceleration_sampling(board)
    mbl_mw_acc_start(board)
}

@IBAction func stopPressed(sender: AnyObject) {
    let board = device.board
    let signal = mbl_mw_acc_get_acceleration_data_signal(board)
    mbl_mw_acc_stop(board)
    mbl_mw_acc_disable_acceleration_sampling(board)
    mbl_mw_datasignal_unsubscribe(signal)
}
Test the App
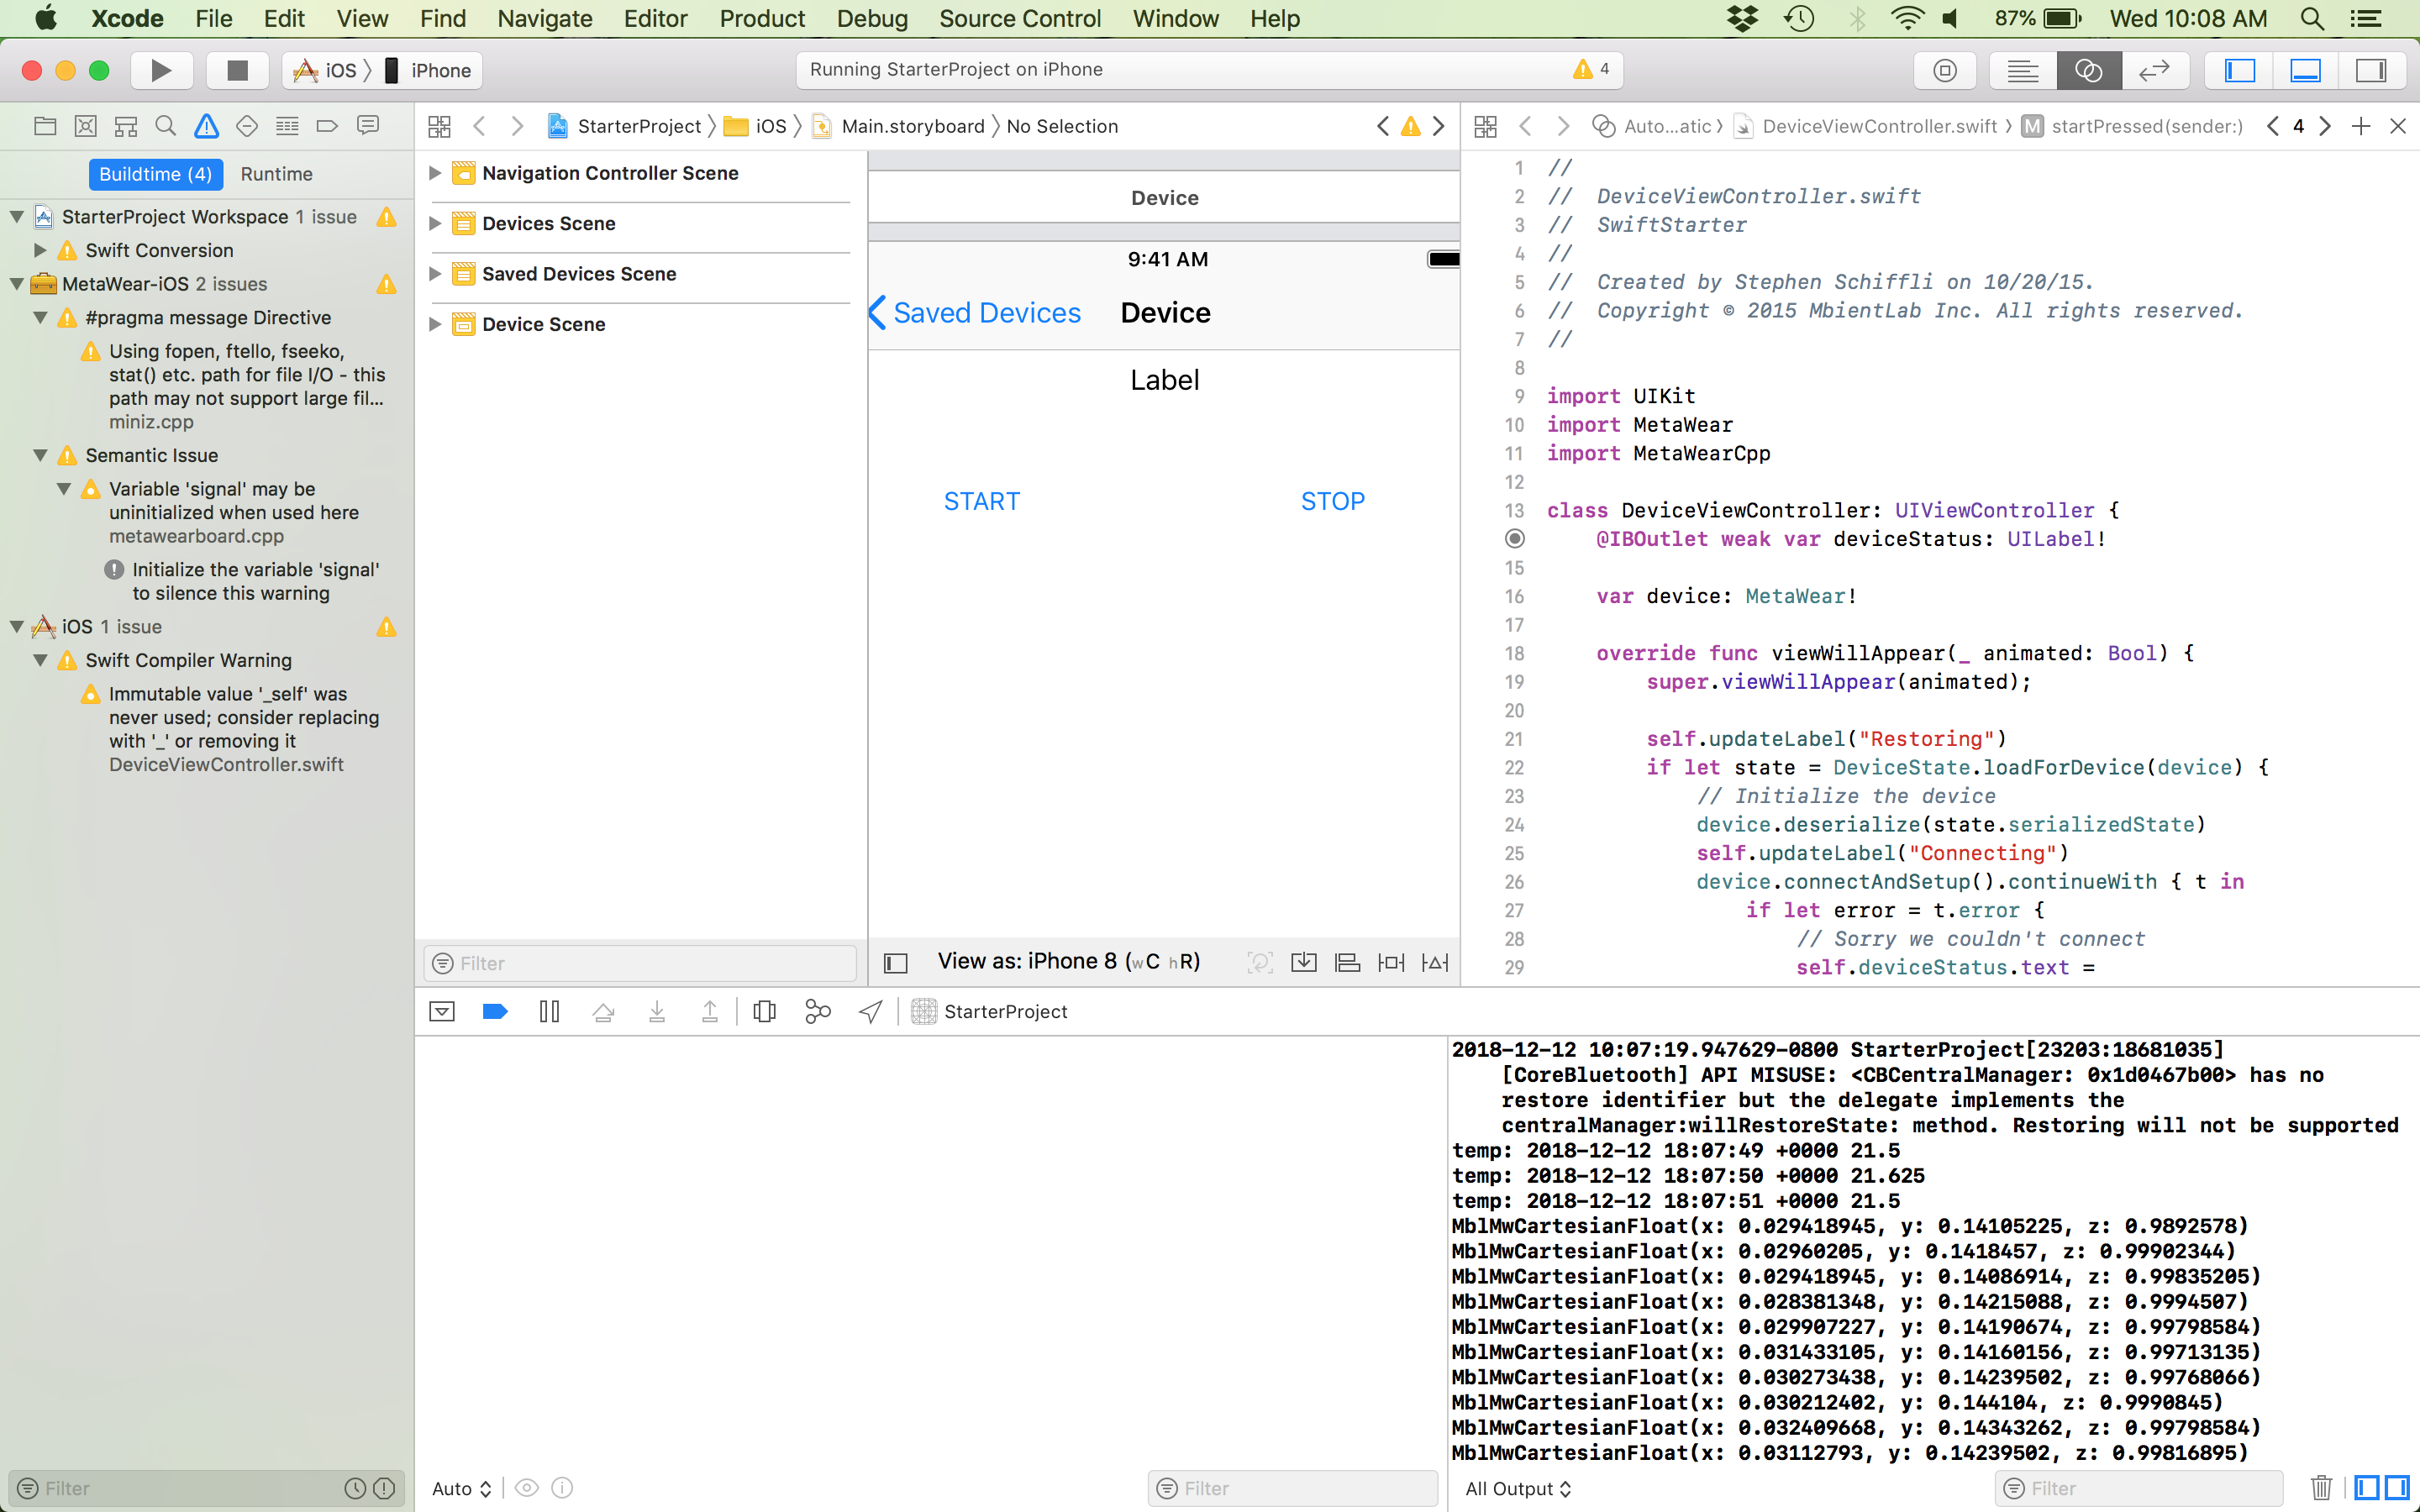
Connect your iOS device to your Mac.
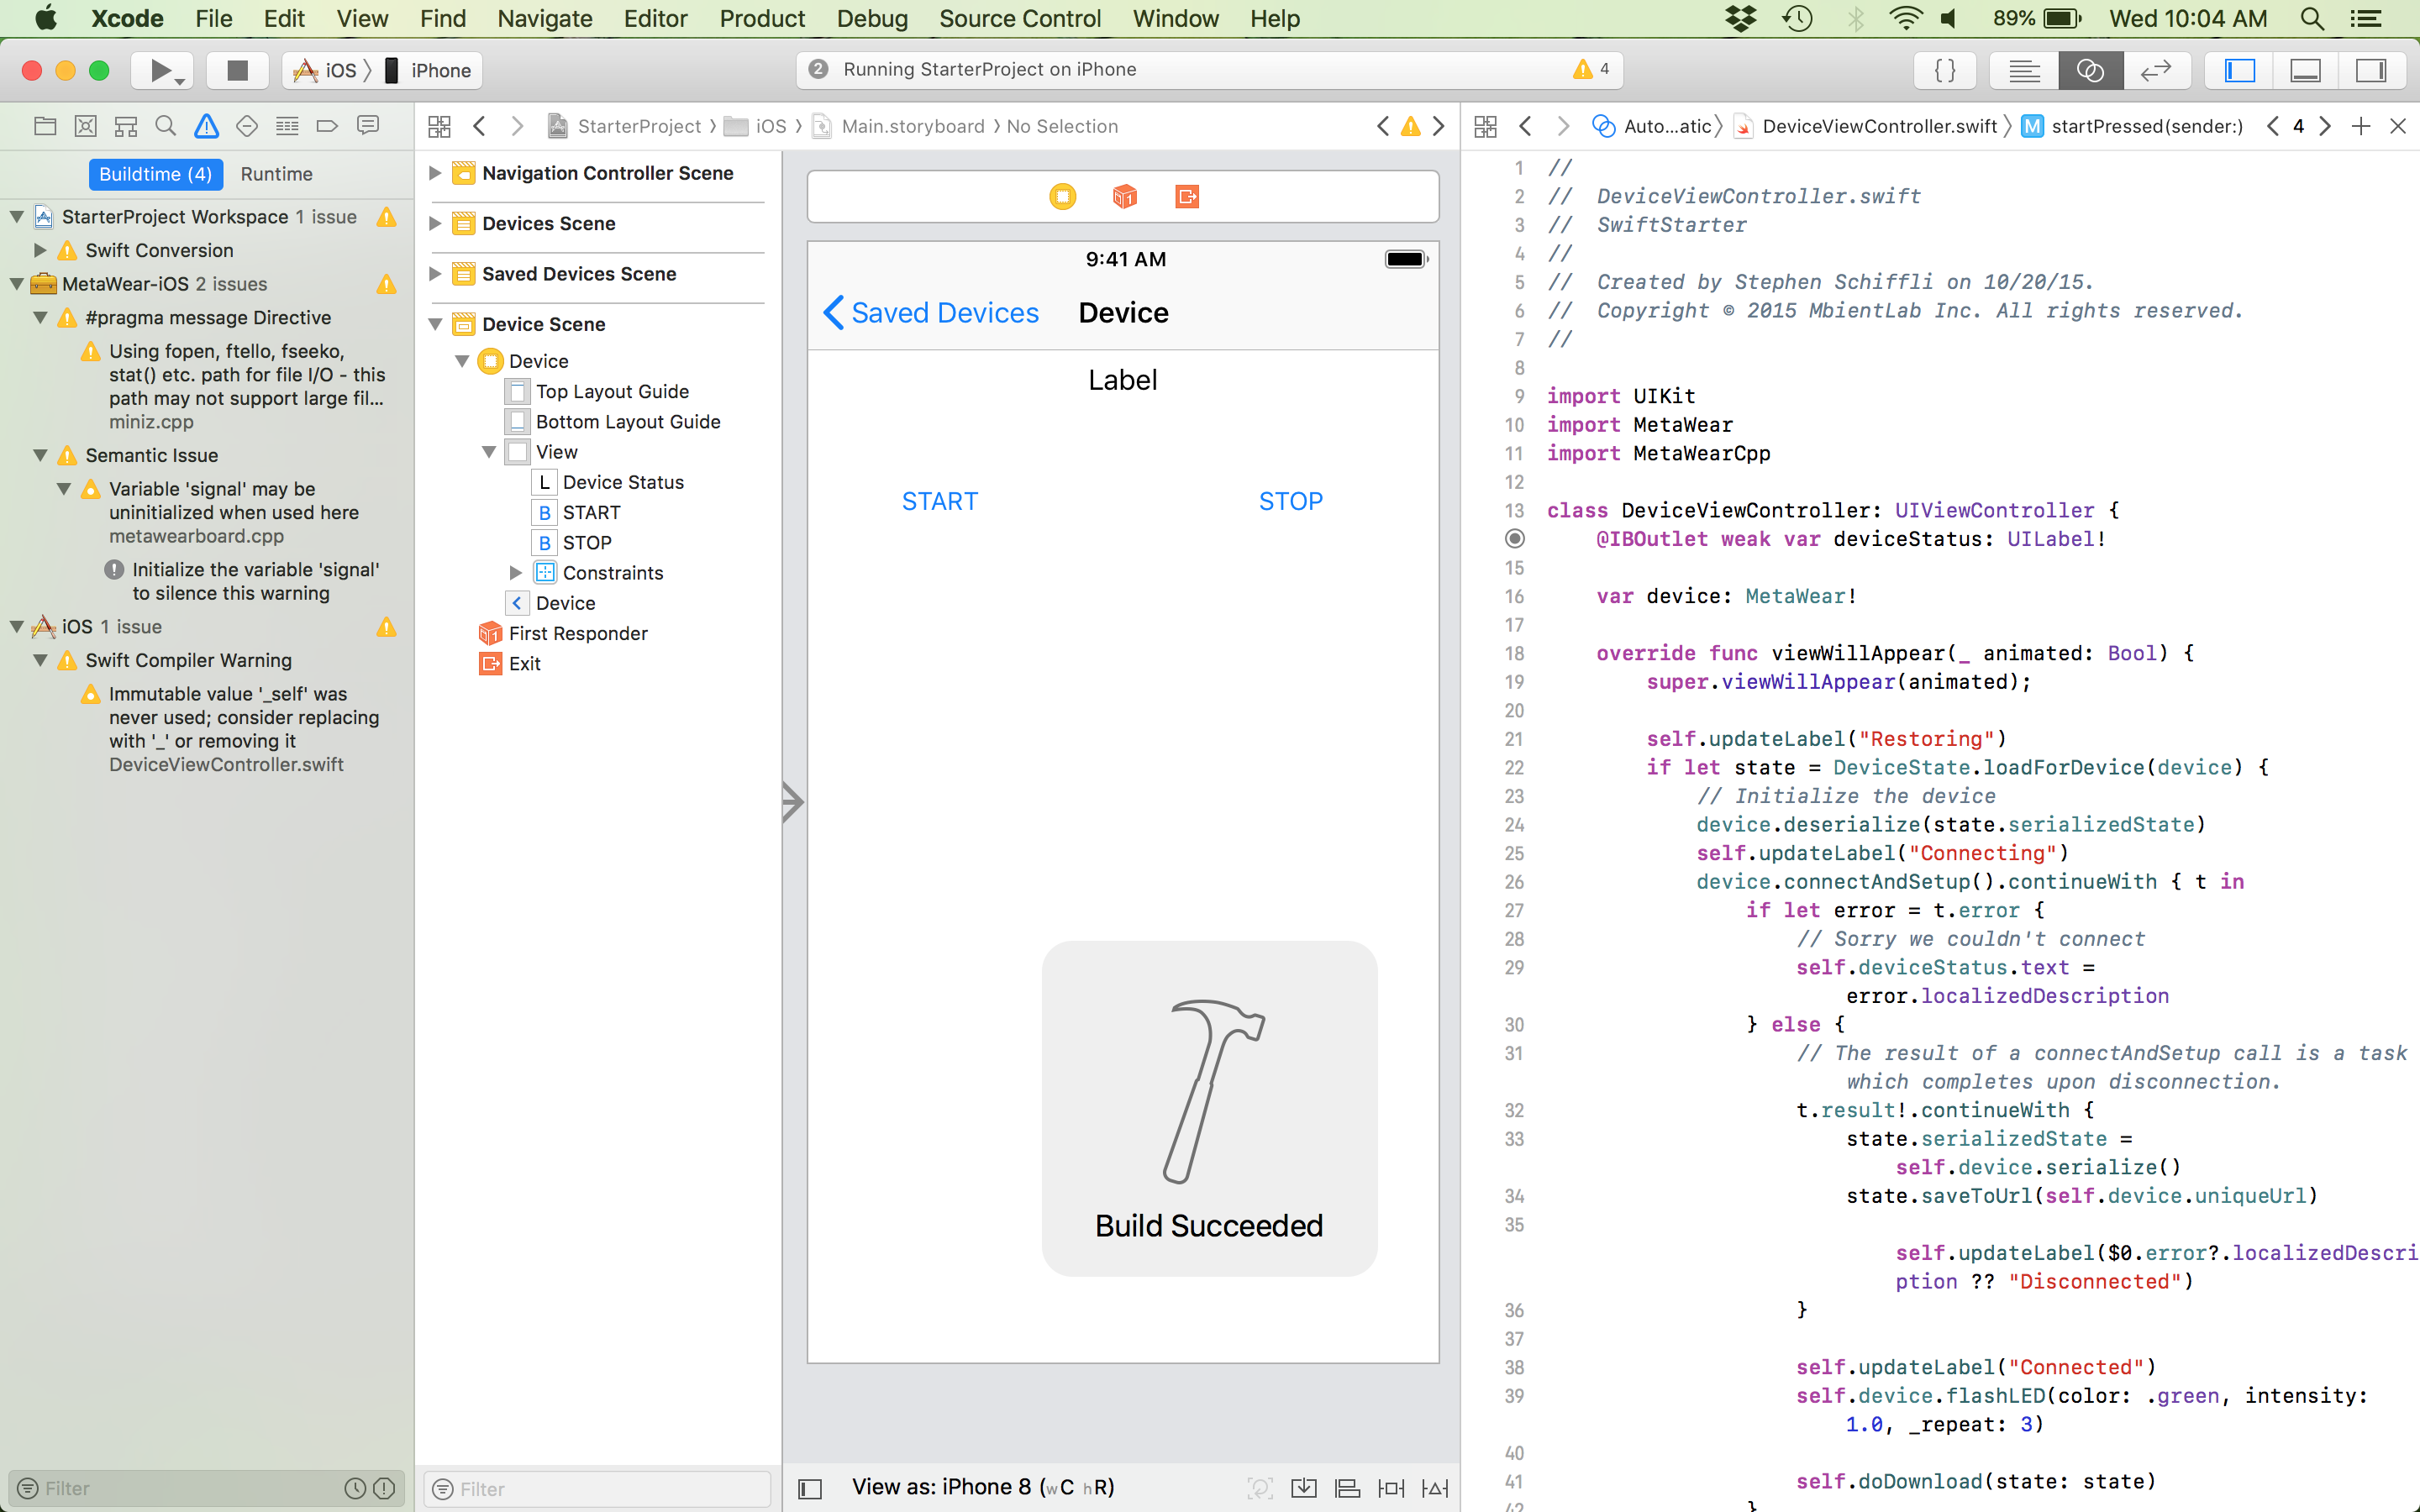
Load the StartApp onto your iOS device and connect to your board.
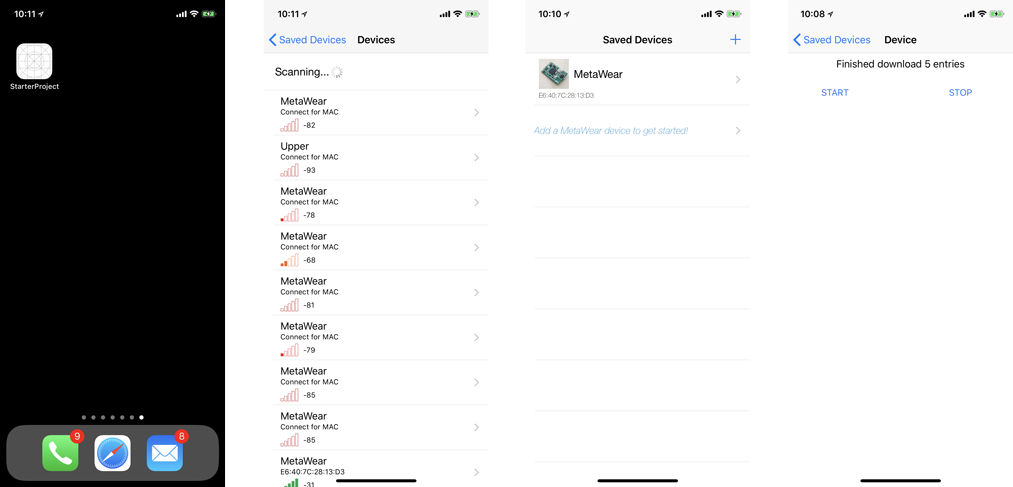
Press the START button to see acceleration data being outputted to the log.
MetaWear App
The MetaWear App is available on the App store: https://apps.apple.com/us/app/metawear/id1547334547. The source code for this App is available on Github.
For those who want to see coded examples of the functionalities of the Metawear, we have provided a MetaWear App.
Run:
>>> pod update
Open MetaWearApp.xcworkspace with Xcode.
This sample MetaWear App shows you how to update firmware, graph accelerometer data, blink the leds red and much more. It is best for you to open up the project, run it on your phone and read through the code.
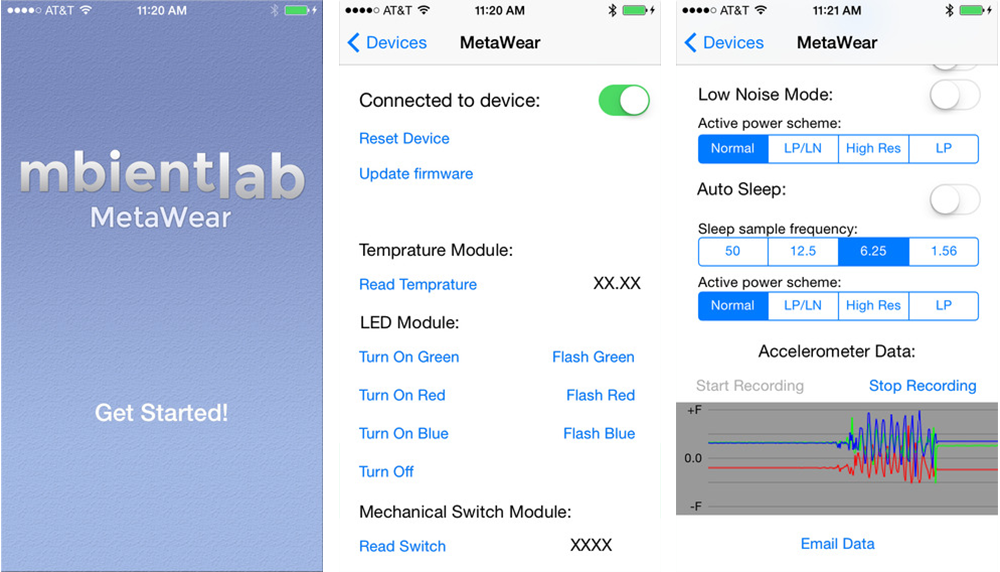
Please note this is only an example App. It doesn’t support automatic reconnects, long term logging, or any functionalities you should have in a public published App.
MetaBase App
The MetaBase App is available on the App store: https://apps.apple.com/us/app/metabase/id1088416232. The source code for this App is available on Github.
The MetaBase App has a lot more functionality built in such as grouping metawears.
Run:
>>> pod update
Open MetaBase.xcworkspace with Xcode.
Swift APIs
When are you want learn more about the inner workings of the APIs and advanced functionalities of the MetaWear, go to the Next Steps.
Here’s a look at our APIs in Python and Javascript that wrap around our C++ library.
Connect
When using our Swift APIs, MetaWear is the central class of the MetaWear API. It contains methods for connecting, disconnecting, saving and restoring state. Before using any API features, you must first connect to the board with connectAsync. The returned task will finish when a connection has been established and the MetaWear state has been initialized.
import MetaWear
import MetaWearCpp

MetaWearScanner.shared.startScan(allowDuplicates: true) { (device) in
    // We found a MetaWear board, see if it is close
    if device.rssi.intValue > -50 {
        // Hooray! We found a MetaWear board, so stop scanning for more
        MetaWearScanner.shared.stopScan()
        // Connect to the board we found
        device.connectAndSetup().continueWith { t in
            if let error = t.error {
                // Sorry we couldn't connect
                print(error)
            }
        }
    }
}
Disconnect
Swift uses the Apple Bluetooth libraries called Core Bluetooth.
We have created the function cancelConnection() which can be called to disconnect the board. We give you an error on function connectAndSetup() if a connection is lost.
device.cancelConnection().continueWith { t in
    print("Disconnected")
}
...
device.connectAndSetup().continueWith { t in
    t.result?.continueWith { t in
        print("Lost connection")
    }
}
Reset
If your board is stuck in a bad state or needs to be reset, there are a few steps and functions you should call to throughly reset your board:
device.connectAndSetup().continueWith(.mainThread) { t in
    device.clearAndReset() // this handles everything for you
    print("Clear and Reset the board")
}
You can take time to look at what each call does in the C++ documentation yourself.
Data
Data signals are an abstract representation of data producers. The API treats them as an event that contains data and represents them with the MblMwDataSignal struct.
They can be safely typecasted to an MblMwEvent.
Signal data is encapsulated by the MblMwData struct. The struct contains a:
Timestamp of when the data was created
Pointer to the data
Data type id indicating how to cast the pointer
An enumeration of data types is defined by the MblMwDataTypeId enum and structs wrapping non basic data types are defined in the types.h header file.
#include "metawear/core/data.h"
#include <chrono>
#include <iomanip>

using std::chrono::duration_cast;
using std::chrono::milliseconds;
using std::chrono::system_clock;
using std::chrono::time_point;

void data_printer(void* context, const MblMwData* data) {
    // Print data as 2 digit hex values
    uint8_t* data_bytes = (uint8_t*) data->value;
    string bytes_str("[");
    char buffer[5];
    for (uint8_t i = 0; i < data->length; i++) {
        if (i) {
            bytes_str += ", ";
        }
        sprintf(buffer, "0x%02x", data_bytes[i]);
        bytes_str += buffer;
    }
    bytes_str += "]";

    // Format time as YYYYMMDD-HH:MM:SS.LLL
    time_point<system_clock> then(milliseconds(data->epoch));
    auto time_c = system_clock::to_time_t(then);
    auto rem_ms= data->epoch % 1000;

    cout << "{timestamp: " << put_time(localtime(&time_c), "%Y%m%d-%T") << "." << rem_ms << ", "
        << "type_id: " << data->type_id << ", "
        << "bytes: " << bytes_str.c_str() << "}"
        << endl;
}
Let’s take a look at the most common MblMwCartesianFloat data type. Angular velocity from the Gyropscope is represented by the MblMwCartesianFloat struct and is in units of degrees per second. The x, y, and z fields contain the angular velocity of the spin around that axis.
For the Python and Javascript APIs, you cast the type when you subscribe to the signal. The type FnVoid_VoidP_DataP represents the MblMwCartesianFloat type.
Don’t bother too much with the rest of the code, we will look into it in more details in the rest of this tutorial. Concentrate on the different data types that can come from our sensors and how we cast them:
func gyroBMI160StartStream(_ sender: Any) {
    let signal = mbl_mw_gyro_bmi160_get_rotation_data_signal(device.board)!
    mbl_mw_datasignal_subscribe(signal, bridge(obj: self)) { (context, obj) in
        let gyroscope: MblMwCartesianFloat = obj!.pointee.valueAs()
        print(obj!.pointee.epoch, gyroscope, gyroscope.x, gyroscope.y, gyroscope.z)
    }
    mbl_mw_gyro_bmi160_enable_rotation_sampling(device.board)
    mbl_mw_gyro_bmi160_start(device.board)

    streamingCleanup[signal] = {
        mbl_mw_gyro_bmi160_stop(self.device.board)
        mbl_mw_gyro_bmi160_disable_rotation_sampling(self.device.board)
        mbl_mw_datasignal_unsubscribe(signal)
    }
}
You can take a look at our swift, javascript and python binding files for all the available data types. The binding file locations are in the next section.
Bindings
The binding files that bridge the C++ to the Swift APIs are particularly important.
They describe all the different data types, sensor classes, settings and more:
Language |
Bindings File |
|---|---|
Swift: |
The bindings are very useful and you should have them handy in the language of your choice.
Streaming
You can stream sensor data continuously from any of the digital sensors on board including the magnetomer, gyroscope, accelerometer, pressure, humidity and light sensor.
When you do so, you need to setup the sensor with the frequency interval of the desired data (sampling frequency).
You need to lookup the capabilities and setup requirements of that particular sensor and write your code accordingly. For example, the accelerometer might need the resolution to be set at +/-4g and the sample rate at 25Hz.
To stream data live from your MetaSensor board, call mbl_mw_datasignal_subscribe with the desired data signal and include a callback function for handling the received data.
Terminating the live stream is done by calling mbl_mw_datasignal_unsubscribe . Don’t forget to turn of the sensor as well!
Here is an example to stream accelerometer data:
func accelerometerBMI160StartStreamPressed(_ sender: Any) {
     mbl_mw_acc_bosch_set_range(device.board, MBL_MW_ACC_BOSCH_RANGE_2G)
     mbl_mw_acc_set_odr(device.board, 25.f)
     mbl_mw_acc_bosch_write_acceleration_config(device.board)
     let signal = mbl_mw_acc_bosch_get_acceleration_data_signal(device.board)!
     mbl_mw_datasignal_subscribe(signal, bridge(obj: self)) { (context, obj) in
         let acceleration: MblMwCartesianFloat = obj!.pointee.valueAs()
         print(Double(acceleration.x), Double(acceleration.y), Double(acceleration.z))
         }
     }
     mbl_mw_acc_enable_acceleration_sampling(device.board)
     mbl_mw_acc_start(device.board)

     streamingCleanup[signal] = {
         mbl_mw_acc_stop(self.device.board)
         mbl_mw_acc_disable_acceleration_sampling(self.device.board)
         mbl_mw_datasignal_unsubscribe(signal)
     }
 }
Logging
Alternatively, data can be logged and retrieved at a later time. This applies to the same sensors including the magnetomer, gyroscope, accelerometer, pressure, humidity and light sensor.
This takes a bit more effort because your code will need to know what data is being logged so you are responsible for saving logger IDs and retrieving them when you download the sensor data from the MetaSensor internal memory.
You also need to handle the callbacks as the data is downloaded from the MetaSensor memory.
Warning
MetaSensors have a finite memory and when you run out of memory, new entries will over-write old entries. You can actually change this setting in the mbl_mw_logging_start call.
Note
Please see our calculator function to see how many sensor data entries and at what frequency will the memory of the MetaSensor become full.
Loggers record data from a data signal and are represented by the MblMwDataLogger struct. You create an MblMwDataLogger object by calling mbl_mw_datasignal_log with the data signal you want to log. If successful, the callback function will be executed with a MblMwDataLogger* pointer and a null pointer if it failed.
MblMwDataLogger objects only interact with the specific data signal, they do not control the logging features.
MblMwDataLogger objects are identified by a numerical id; you can retrieve the id by calling mbl_mw_logger_get_id. The id is used to retrieve existing loggers from the API with the mbl_mw_logger_lookup_id function and is important when you have multiple loggers running.
Like a data signal, you can subscribe to an MblMwDataLogger to process the downloaded data. Call mbl_mw_logger_subscribe to attach a callback function to the MblMwDataLogger which handles all received data.
After you have setup the signal loggers, start the logger by calling mbl_mw_logging_start.
When you are ready to retrieve the data, execute mbl_mw_logging_download . You will need to pass in a MblMwLogDownloadHandler struct to handle notifications from the logger.
We have updated our streaming accelerometer data example to log data this time:
func accelerometerBMI160StartLog(_ sender: Any) {
    let signal = mbl_mw_acc_bosch_get_acceleration_data_signal(device.board)!
    mbl_mw_datasignal_log(signal, bridge(obj: self)) { (context, logger) in
        let _self: DeviceDetailViewController = bridge(ptr: context!)
        let cString = mbl_mw_logger_generate_identifier(logger)!
        let identifier = String(cString: cString)
        _self.loggers[identifier] = logger!
    }
    mbl_mw_logging_start(device.board, 0)
    mbl_mw_acc_enable_acceleration_sampling(device.board)
    mbl_mw_acc_start(device.board)
}

func accelerometerBMI160StopLog(_ sender: Any) {
    guard let logger = loggers.removeValue(forKey: "acceleration") else {
        return
    }
    mbl_mw_acc_stop(device.board)
    mbl_mw_acc_disable_acceleration_sampling(device.board)
    mbl_mw_logger_subscribe(logger, bridge(obj: self)) { (context, obj) in
        let acceleration: MblMwCartesianFloat = obj!.pointee.valueAs()
    }
    var handlers = MblMwLogDownloadHandler()
    handlers.context = bridgeRetained(obj: self)
    handlers.received_progress_update = { (context, remainingEntries, totalEntries) in
        let _self: DeviceDetailViewController = bridge(ptr: context!)
        let progress = Double(totalEntries - remainingEntries) / Double(totalEntries)
        if remainingEntries == 0 {
            _self.logCleanup { error in
                DispatchQueue.main.async {
                    if error != nil {
                        _self.deviceConnected()
                    }
                }
            }
        }
    }
    handlers.received_unknown_entry = { (context, id, epoch, data, length) in
        print("received_unknown_entry")
    }
    handlers.received_unhandled_entry = { (context, data) in
        print("received_unhandled_entry")
    }
    mbl_mw_logging_download(device.board, 100, &handlers)
}
Reading
Analog sensors such as the temperature sensor or the on-board push button cannot be read continuously; they will only send data when they receive a command to do so. You can either read them once OR use a timer loop to read them multiple times.
You can also read the pressure, light, and humidity sensors once if you wish.
Data signals that represent this type of data source are called readable signals. You can check if a data signal is readable by calling mbl_mw_datasignal_is_readable.
The read command is issued by calling mbl_mw_datasignal_read or mbl_mw_datasignal_read_with_parameters.
When using readable signals, you must decide up front if the data will be streamed or logged before interacting with it. That is, you should either have subscribed to or setup a logger for a readable signal before reading it.
Note
This is a great way to get very low sampling rates for certain sensors.
We will look at an example for the temperature sensor. Temperature reads are manually triggered by calling mbl_mw_datasignal_read. The data is represented as a float and is in units of Celsius.
Let’s do a one time read:
func readTemprature(_ sender: Any) {
    let source = mbl_mw_multi_chnl_temp_get_source(device.board, UInt8(MBL_MW_TEMPERATURE_SOURCE_PRESET_THERM.rawValue))
    let selected = mbl_mw_multi_chnl_temp_get_temperature_data_signal(device.board, UInt8(MBL_MW_TEMPERATURE_SOURCE_PRESET_THERM.rawValue))!
    selected.read().continueOnSuccessWith(.mainThread) { obj in
        print(String(format: "%.1f°C", (obj.valueAs() as Float)))
    }
}
See the Timer section below to understand how we can do continuous reads of some of the analog sensors and peripherals.
Writing
Sometimes you want to send commands to the board. You can turn on the LED, make the board vibrate if it has a coin vibration motor on it, or send GPIO, I2C or SPI commands.
Let’s take a look at the LED since all boards come with an on-board RGD LED.
An led pattern is represented by the MblMwLedPattern struct. Users can configure every part of the pulse or load one of the preset patterns using the mbl_mw_led_load_preset_pattern function. Patterns are written to the board with the mbl_mw_led_write_pattern function.
After writing patterns to the board, you can playback the pattern, similar to playing a music track, using mbl_mw_led_play, mbl_mw_led_pause, and mbl_mw_led_stop.
To remove patterns, call mbl_mw_led_stop_and_clear; this will also stop pattern playback.
device.connectAndSetup().continueWith { t in
    var pattern = MblMwLedPattern()
    mbl_mw_led_load_preset_pattern(&pattern, MBL_MW_LED_PRESET_PULSE)
    mbl_mw_led_stop_and_clear(device.board)
    mbl_mw_led_write_pattern(device.board, &pattern, MBL_MW_LED_COLOR_GREEN)
    mbl_mw_led_play(device.board)
}
Events
An event is an asynchronous notification from the MetaWear board represented in the C++ API by the MblMwEvent struct.
The board can be programmed to execute MetaWear commands in response to an event firing. To start recording commands, call mbl_mw_event_record_commands. While in a recording state, all MetaWear functions called will instead be recorded on the board and executed when the event is fired.
To stop recording, call mbl_mw_event_end_record. This function is asynchronous and will alert the caller when it is completed via a callback function. If recording events was successful, MBL_MW_STATUS_OK will be passed into the callback function, otherwise MBL_MW_STATUS_ERROR_TIMEOUT is used.
event= mbl_mw_settings_get_disconnect_event(device.board);
var pattern = MblMwLedPattern(high_intensity: 31, low_intensity: 31, rise_time_ms: 0, high_time_ms: 2000, fall_time_ms: 0, pulse_duration_ms: 2000, delay_time_ms: 0, repeat_count: 0xFF)

mbl_mw_event_record_commands(event)
mbl_mw_led_write_pattern(device.board, &pattern, color)
mbl_mw_led_play(device.board)

event.eventEndRecord()
Timer
A MetaWear timer can be thought of as an event that is fired at fixed intervals. These timers are represented by the MblMwTimer struct and can be safely typcased to a MblMwEvent struct. Timers can be used to schedule periodic tasks or setup a delayed task execution.
MblMwTimer objects are identified by a numerical id; you can retrieve the id by calling mbl_mw_timer_get_id. The id is used to retrieve existing timers from the API with the mbl_mw_timer_lookup_id function.
Before you can schedule tasks, you first need to create a timer, by calling either mbl_mw_timer_create or mbl_mw_timer_create_indefinite. These functions are asynchronous and will pass a pointer to the caller when the timer is created. When you have a valid MblMwTimer, you can use the command recording system outlined in Events section to program the board to respond to the periodic events. Upon recording timer task commands, call mbl_mw_timer_start to start the timer.
When you are done using a timer, you can remove it with mbl_mw_timer_remove.
let signal = mbl_mw_multi_chnl_temp_get_temperature_data_signal(device.board, 1)!
mbl_mw_datasignal_subscribe(signal, bridge(obj: self)) { (context, obj) in
    let temp: UInt32 = obj!.pointee.valueAs()
    print(format: "%d", temp)
}
// Create a timer to read every 700 ms
device.timerCreate(period: 700).continueOnSuccessWith { timer in
    self.streamingCleanup[signal] = {
        mbl_mw_timer_remove(timer)
        mbl_mw_datasignal_unsubscribe(signal)
    }
    mbl_mw_event_record_commands(timer)
    mbl_mw_datasignal_read(signal)
    timer.eventEndRecord().continueOnSuccessWith {
        mbl_mw_timer_start(timer)
    }
}
Component Signals
Some signals, such as the acceleration datasignal, are composed of multiple values. While you can interact with them as a whole, sometimes it is more convenient to only use individual values.
To access the component values, call mbl_mw_datasignal_get_component with the signal and an index represnting which component to retrieve. If a signal is single valued, the function will return null.
let signal = mbl_mw_acc_bosch_get_acceleration_data_signal(device.board)!
let signal_x = mbl_mw_datasignal_get_component(signal, Const.ACC_ACCEL_X_AXIS_INDEX)!

mbl_mw_datasignal_subscribe(signal_x, bridge(obj: self)) { (context, obj) in
    let accelerationx: MblMwCartesianFloat = obj!.pointee.valueAs()
    print(Double(accelerationx))
}

mbl_mw_acc_enable_acceleration_sampling(device.board)
mbl_mw_acc_start(device.board)

streamingCleanup[signal] = {
    mbl_mw_acc_stop(self.device.board)
    mbl_mw_acc_disable_acceleration_sampling(self.device.board)
    mbl_mw_datasignal_unsubscribe(signal_x)
}
Sensor Fusion
The sensor_fusion.h header file interfaces with the sensor fusion algorithm running on MetaMotion boards. When using the sensor fusion algorithm, it is important that you do not simultaneously use the Accelerometer, Gyro, and Magnetometer modules; the algorithm configures those sensors internally based on the selected fusion mode.
To activate the sensor fusion algorithm, first set the fusion mode and data ranges, then subscribe to and enable the desired output data, and finally, call mbl_mw_sensor_fusion_start.
The sensor fusion algorithm has 4 fusion modes, listed in the below table:
Mode |
Description |
|---|---|
NDoF |
Calculates absolute orientation from accelerometer, gyro, and magnetometer |
IMUPlus |
Calculates relative orientation in space from accelerometer and gyro data |
Compass |
Determines geographic direction from th Earth’s magnetic field |
M4G |
Similar to IMUPlus except rotation is detected with the magnetometer |
The mode is set with mbl_mw_sensor_fusion_set_mode and written to the board by calling mbl_mw_sensor_fusion_write_config. Before writing the configuration, you can also set the acceleration and rotation ranges of the accelerometer and gyroscope respectively.
let signal = mbl_mw_sensor_fusion_get_data_signal(device.board, MBL_MW_SENSOR_FUSION_DATA_QUATERNION)!
mbl_mw_datasignal_subscribe(signal, bridge(obj: self)) { (context, obj) in
    let quaternion: MblMwQuaternion = obj!.pointee.valueAs()
    print(Double(quaternion.x))
    print(Double(quaternion.y))
    print(Double(quaternion.z))
    print(Double(quaternion.w))
}
mbl_mw_sensor_fusion_clear_enabled_mask(device.board)
mbl_mw_sensor_fusion_enable_data(device.board, MBL_MW_SENSOR_FUSION_DATA_QUATERNION)
mbl_mw_sensor_fusion_write_config(device.board)
mbl_mw_sensor_fusion_start(device.board)

streamingCleanup[signal] = {
    mbl_mw_sensor_fusion_stop(self.device.board)
    mbl_mw_sensor_fusion_clear_enabled_mask(self.device.board)
    mbl_mw_datasignal_unsubscribe(signal)
}
What’s important is that you look at all the capabilities and settings of each sensor.
For example, for the sensor fusion to work, you need to pick the MODE, the OUTPUT TYPE, the GYROSCOPE RANGE, and the ACCELEROMETER RANGE. These are things you need to think about before you start coding.
Learn more here: https://mbientlab.com/cppdocs/latest/sensor_fusion.html
Data Processing
Data signals can be fed through the on-board data processors to filter and/or transform the data in the firmware.
By performing computations on the MetaWear side, you can reduce the amount of data that is sent over the radio and the amount of postprocessing that is done on your mobile device.
Data processors can also be chained together to perform more complex tasks, such as using the rss, average, and threshold processors to determine if the board is in freefall based on the XYZ acceleration data.
Here is an example of the rss processor. RSS which stands for root sum square is a statistical method of dealing with a series of values where each value is squared, the sum of these squares is calculated and the square root of that sum is then taken:
let signal = mbl_mw_acc_bosch_get_acceleration_data_signal(device.board)

// Create RSS
signal!.rssCreate().continueOnSuccessWith { rss in
    self.streamingCleanup[signal!] = {
        mbl_mw_acc_stop(self.device.board)
        mbl_mw_acc_disable_acceleration_sampling(self.device.board)
        mbl_mw_datasignal_unsubscribe(rss)
    }
    mbl_mw_datasignal_subscribe(rss, bridge(obj: self)) { (context, obj) in
        let acceleration_rss: MblMwCartesianFloat = obj!.pointee.valueAs()
        print(acceleration_rss)
    }
    mbl_mw_acc_enable_acceleration_sampling(self.device.board)
    mbl_mw_acc_start(self.device.board)
}
Data processors are functions in the firmware that filter or transform sensor data and are represented by the MblMwDataProcessor struct.
In the C++ API, data processors can be thought of as a data signal whose data is produced by the on-board data processor. As such, a MblMwDataProcessor can be safely typecasted to a MblMwDataSignal.
This section will focus on the MblMwDataProcessor struct. Data processors are identified by a unique numerical ID; you can retrieve this id by calling mbl_mw_dataprocessor_get_id. The data processor ID is used to lookup a previously created MblMwDataProcessor object with the mbl_mw_dataprocessor_lookup_id function.
Some processors have an internal state that can be read and modified; the internal state is treated as a readable MblMwDataSignal.
Removing a processor is handled by calling mbl_mw_dataprocessor_remove. When a processor is removed, all processors that consume its output will also be removed.
There are many more processors which are detailed here.
Multiple sensors
@IBAction func accelerometerBMI160StartStreamPressed(_ sender: Any) {
    accelerometerBMI160StartStream.isEnabled = false
    accelerometerBMI160StopStream.isEnabled = true
    accelerometerBMI160StartLog.isEnabled = false
    accelerometerBMI160StopLog.isEnabled = false
    updateAccelerometerBMI160Settings()
    accelerometerBMI160Data.removeAll()
    let signal = mbl_mw_acc_bosch_get_acceleration_data_signal(device.board)!
    mbl_mw_datasignal_subscribe(signal, bridge(obj: self)) { (context, obj) in
        let acceleration: MblMwCartesianFloat = obj!.pointee.valueAs()
        let _self: DeviceDetailViewController = bridge(ptr: context!)
        DispatchQueue.main.async {
            _self.accelerometerBMI160Graph.addX(Double(acceleration.x), y: Double(acceleration.y), z: Double(acceleration.z))
        }
        // Add data to data array for saving
        _self.accelerometerBMI160Data.append((obj!.pointee.epoch, acceleration))
    }
    mbl_mw_acc_enable_acceleration_sampling(device.board)
    mbl_mw_acc_start(device.board)

    streamingCleanup[signal] = {
        mbl_mw_acc_stop(self.device.board)
        mbl_mw_acc_disable_acceleration_sampling(self.device.board)
        mbl_mw_datasignal_unsubscribe(signal)
    }
}

@IBAction func accelerometerBMI160StopStreamPressed(_ sender: Any) {
    accelerometerBMI160StartStream.isEnabled = true
    accelerometerBMI160StopStream.isEnabled = false
    accelerometerBMI160StartLog.isEnabled = true
    let signal = mbl_mw_acc_bosch_get_acceleration_data_signal(device.board)!
    streamingCleanup.removeValue(forKey: signal)?()
}

@IBAction func gyroBMI160StartStreamPressed(_ sender: Any) {
    gyroBMI160StartStream.isEnabled = false
    gyroBMI160StopStream.isEnabled = true
    gyroBMI160StartLog.isEnabled = false
    gyroBMI160StopLog.isEnabled = false
    updateGyroBMI160Settings()
    gyroBMI160Data.removeAll()

    let signal = mbl_mw_gyro_bmi160_get_rotation_data_signal(device.board)!
    mbl_mw_datasignal_subscribe(signal, bridge(obj: self)) { (context, obj) in
        let acceleration: MblMwCartesianFloat = obj!.pointee.valueAs()
        let _self: DeviceDetailViewController = bridge(ptr: context!)
        DispatchQueue.main.async {
            // TODO: Come up with a better graph interface, we need to scale value
            // to show up right
            _self.gyroBMI160Graph.addX(Double(acceleration.x * 0.008), y: Double(acceleration.y * 0.008), z: Double(acceleration.z * 0.008))
        }
        // Add data to data array for saving
        _self.gyroBMI160Data.append((obj!.pointee.epoch, acceleration))
    }
    mbl_mw_gyro_bmi160_enable_rotation_sampling(device.board)
    mbl_mw_gyro_bmi160_start(device.board)

    streamingCleanup[signal] = {
        mbl_mw_gyro_bmi160_stop(self.device.board)
        mbl_mw_gyro_bmi160_disable_rotation_sampling(self.device.board)
        mbl_mw_datasignal_unsubscribe(signal)
    }
}

@IBAction func gyroBMI160StopStreamPressed(_ sender: Any) {
    gyroBMI160StartStream.isEnabled = true
    gyroBMI160StopStream.isEnabled = false
    gyroBMI160StartLog.isEnabled = true
    let signal = mbl_mw_gyro_bmi160_get_rotation_data_signal(device.board)!
    streamingCleanup.removeValue(forKey: signal)?()
}
Multiple sensors with Fuser
The fuser is one of our data processors.
The fuser processor combines data from multiple sensors into 1 message. When fusing multiple data sources, ensure that they are sampling at the same frequency, or at the very least, integer multiples of the fastest frequency. Data sources sampling at the lower frequencies will repeat the last received value.
Unlike the other data sources, fuser data is represented as an MblMwData array, which is indexed based on the order of the data signals passed into mbl_mw_dataprocessor_fuser_create.
// Use the helper functiosn created for you
fuserCreate()
Anonymous downloading
Anonymous data signals are a variant of the Logger type used to retrieve logged data from a board that was not programmed by the current host device. Use mbl_mw_metawearboard_create_anonymous_datasignals to sync the host device with the board’s current logger state. If the function fails, a null pointer will be returned and the uint32_t parameter instead corresponds to a status code from the SDK.
Because of the anonymous nature of the object, users will need to rely on an identifier string to determine what kind of data is being passed to each route. Generate the identifier string by calling mbl_mw_logger_generate_identifier for each MblMwDataLogger type and match these values with mbl_mw_anonymous_datasignal_get_identifier.
Warning
Please note that not all loggers are supported.
device.createAnonymousDatasignals().continueOnSuccessWith(device.apiAccessExecutor) { signals in
    var states: [State] = []
    signals.forEach {
        let cString = mbl_mw_anonymous_datasignal_get_identifier($0)!
        let identifier = String(cString: cString)
        if let config = configs.first(where: { $0.isConfigForAnonymousEventName(identifier) }) {
            let state = State(sensor: config, device: device, isStreaming: false)
            states.append(state)
            mbl_mw_anonymous_datasignal_subscribe($0, bridgeRetained(obj: state), state.handler)
        }
    }
    return states
}
Macro
The on-board flash memory can also be used to store MetaWear commands instead of sensor data. Recorded commands can be executed any time after being programmed with the functions in macro.h header file.
To record commands:
Call mbl_mw_macro_record to put the API in macro mode
Use the MetaWear commands that you want programmed
Exit macro mode with mbl_mw_macro_end_record
Macros can be set to run on boot by setting the exec_on_boot parameter with a non-zero value.
Erasing macros is done with the mbl_mw_macro_erase_all method. The erase operation will not occur until you disconnect from the board.
// Record everything to macro
mbl_mw_macro_record(device.board, 1)
var redPattern = MblMwLedPattern(high_intensity: 10,
                                low_intensity: 0,
                                rise_time_ms: 100,
                                high_time_ms: 200,
                                fall_time_ms: 100,
                                pulse_duration_ms: 15000,
                                delay_time_ms: 2400,
                                repeat_count: 0xFF)
mbl_mw_led_write_pattern(device.board, &redPattern, MBL_MW_LED_COLOR_RED)
mbl_mw_led_play(device.board)

// Finish off this macro
return device.macroEndRecord()
Next Steps
Advanced developers building more complex apps can refer to the Swift Documentation.