2. Python APIs
MetaSensors are supported on Windows. Developers can create their own Apps using Python on Windows.
For this tutorial, you should be comfortable with Windows, the terminal, and Python.
We will be using the Git Bash terminal to run the Python examples below.
Note
Windows 10 or newer is required. BluetoothLE is no supported on Windows 8 or older.
2.1. Installation
Ensure that you are running Windows 10 or newer (Windows 7 or older is not supported):
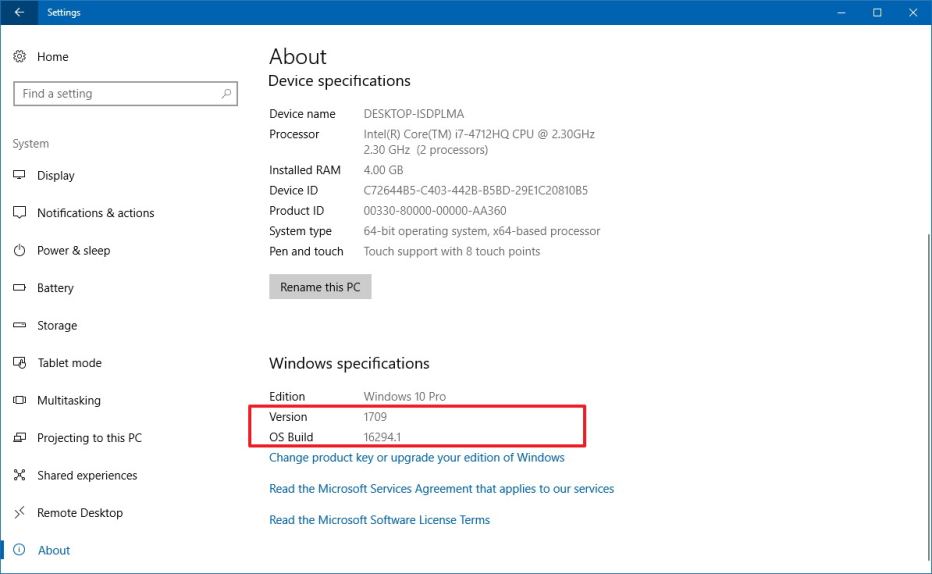
- Select the Start button, then select Settings > System > About.
- Under Windows specifications, you can find out which edition and version of Windows your device is running. It must be a version of Windows 10 or higher.
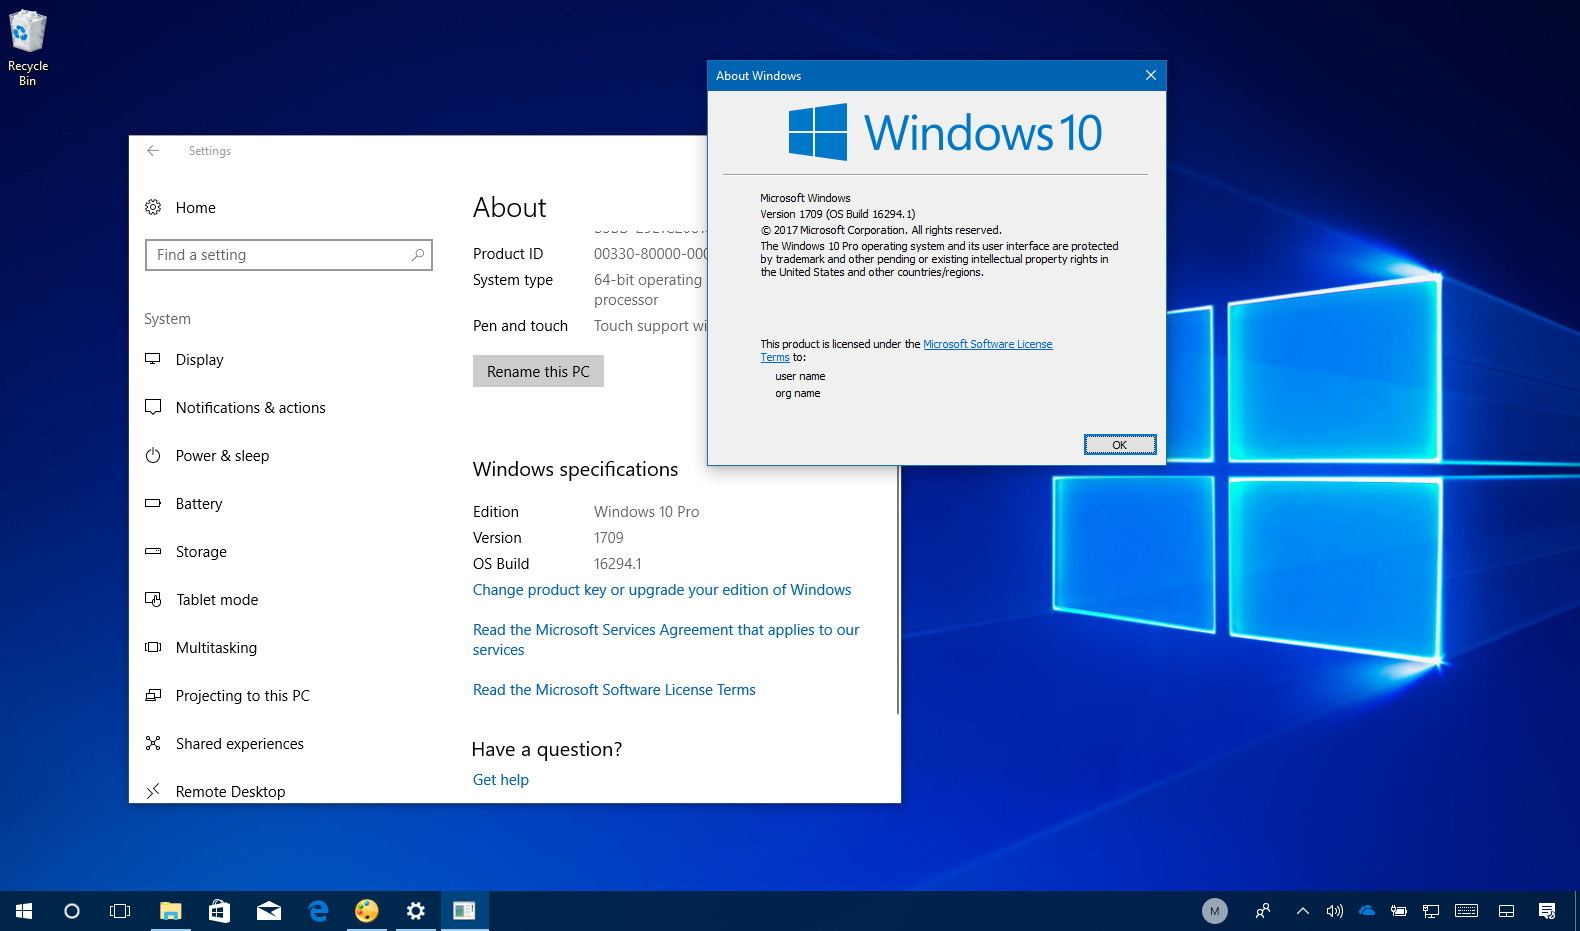
- You must be at least on the Fall Creator’s Update of Windows 10. Once you’re in the About page, on “Version”, you should see the 1709 number, and under “OS Build”, the number should be 16299.192 or later.
2.1.1. Bluetooth
Your computer needs to support Bluetooth Low Energy (Bluetooth 4.0 or later) to work with MetaSensors. First you will need to check if your computer supports it as-is by following the steps below:
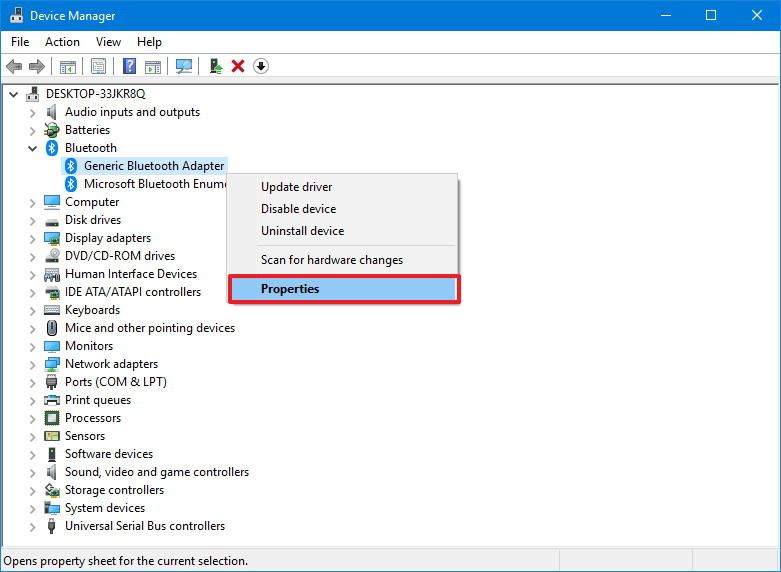
- Open Start.
- Search for Device Manager and click the top result.
- Expand the Bluetooth category.
- Right-click the Bluetooth adapter, and select Properties.
- Click on the Advanced tab.
- Under “Firmware,” make a note of the LMP version number.
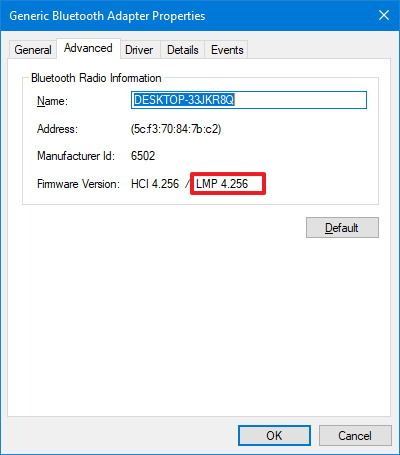
- After completing the steps, check the LMP number using the list below to find out the actual Bluetooth version:
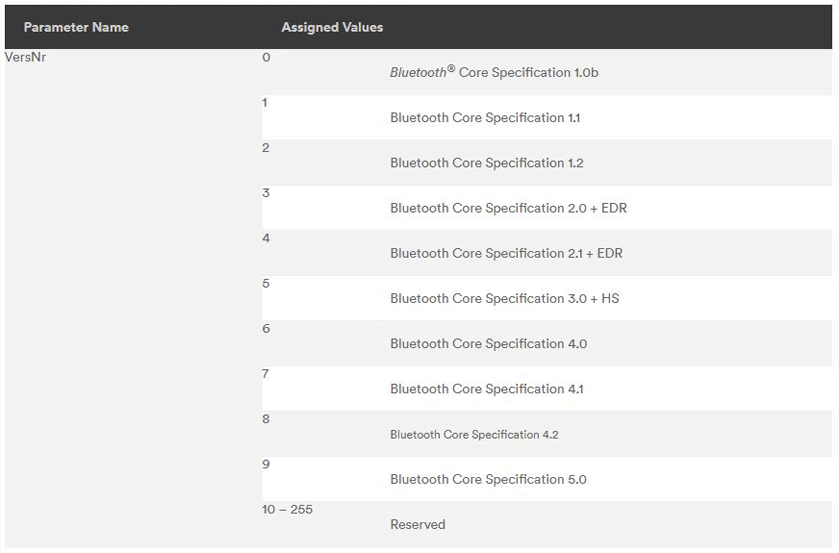
- If your computer does not support Bluetooth 4 (LMP 6) or higher you will need a Bluetooth Dongle. You can purchase a BLE Dongle on our store.
- Plug in the dongle into a USB slot on your PC.
- Automatically install the Bluetooth drivers. Windows 10 includes the basic Broadcom Bluetooth drivers required by the dongle and will install them automatically when it recognizes the new device.
Note
Windows 10 only supports 1 USB to BLUETOOTH dongle.
Because Bluetooth is limited on Windows and only 1 dongle is supported, we recommend that only 3 devices be connected simultaneously. You can always connect to 3 devices, access sensor data, disconnect and then connect to 3 other devices in a round-robin fashion for optimal performance.
2.1.2. Visual Studio
Download the Visual Studio 2017 Installer here.
Note
We do not support VS2018, VS2019, or VS2020. You can have multiple instalations however our APIs ONLY work with VS2017.
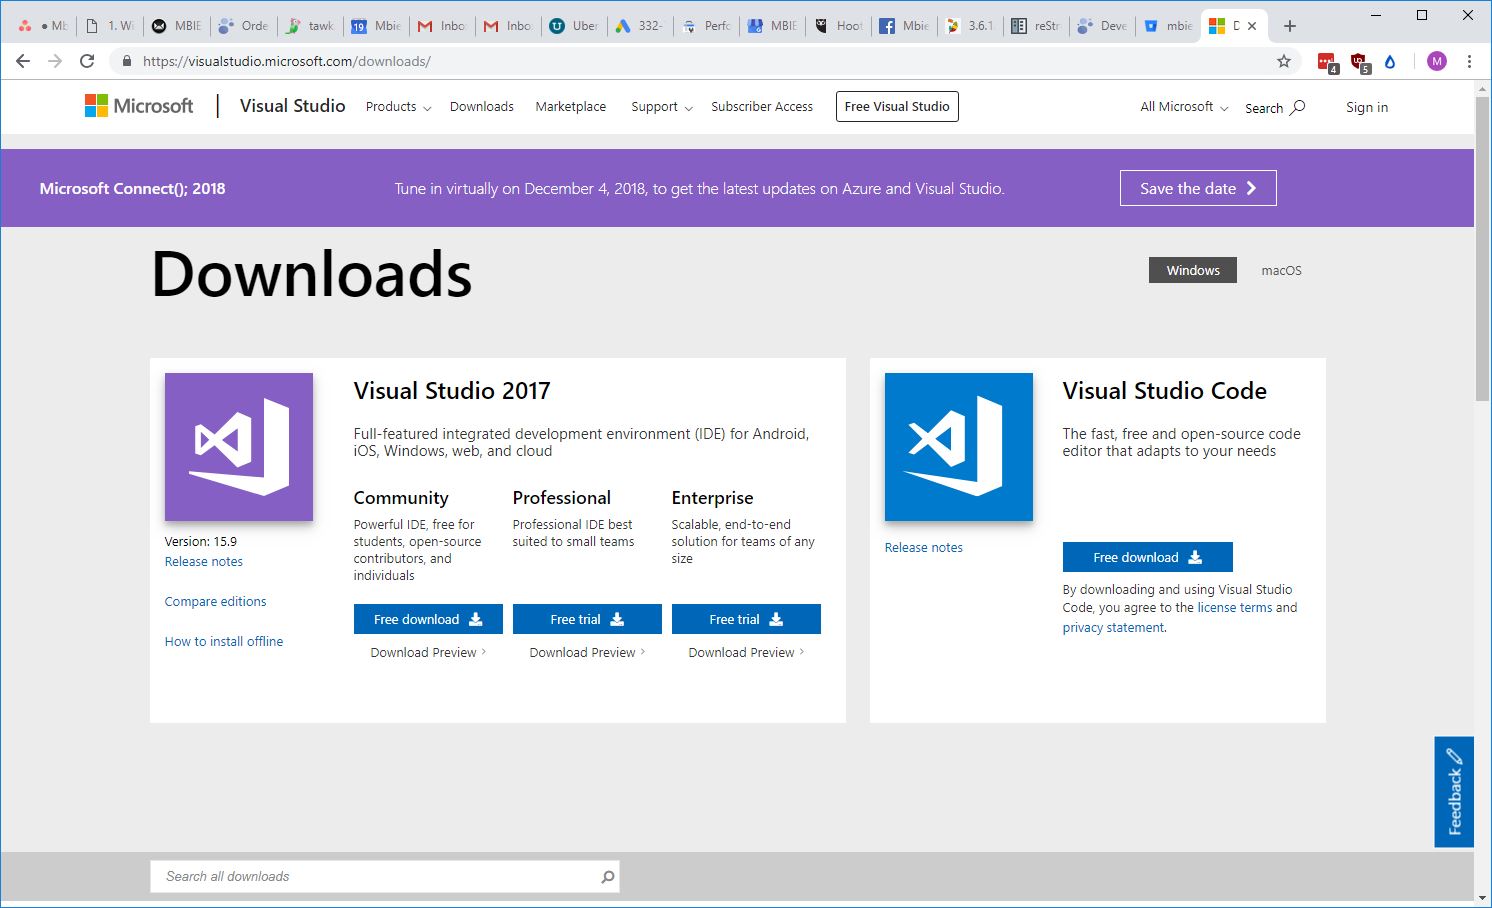
You can select:
- Visual Studio 2017 Community Edition
- Visual Studio 2017 Professional Edition (30 Day Free Trial)
Warning
MetaWear APIs require VS2017. YOU MUST USE VISUAL STUDIO 2017!
If you have another Visual Studio version on your machine, please install the 2017 edition.
Click on the downloaded .exe file. Open up Visual Studio Installer.
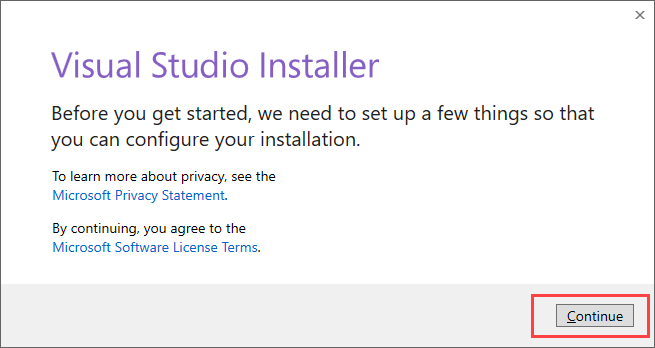
You will be prompted to create or use your existing Microsoft login.
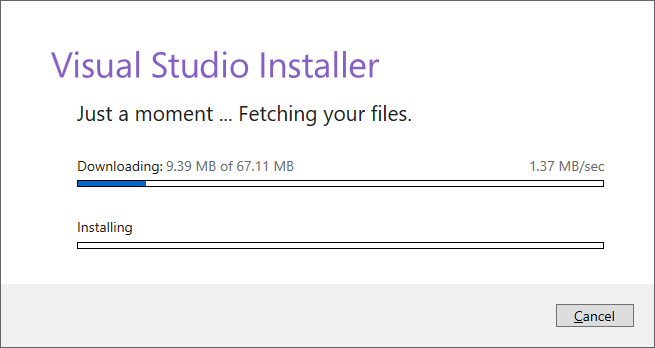
Visual Studio will start downloading the initial files. Download speed will vary as per your internet connection.
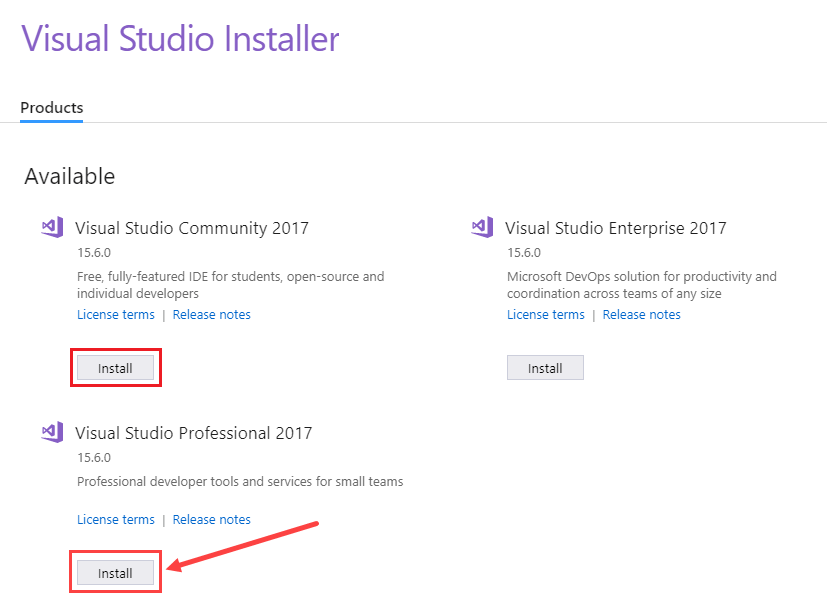
Install Visual Studio. Click Install on the appropriate Product section.
Install all of the required individual components by selecting “Individual components”.
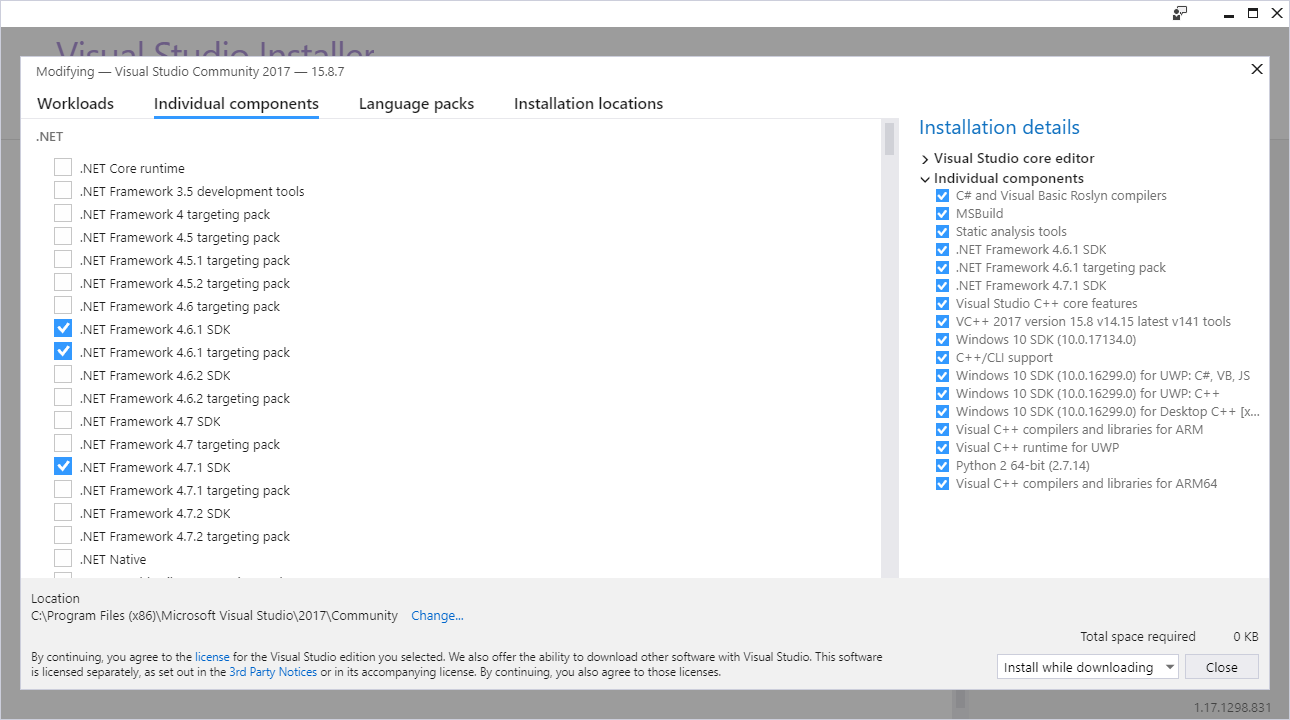
You must install:
- C# and Visual Basic Roslyn compilers
- MSBuild
- Static analysis tools
- .NET Framework 4.6.1 SDK
- .NET Framework 4.6.1 targeting pack
- .NET Framework 4.7.1 SDK
- Visual Studio C++ core features
- VC++ 2017 version 15.8 v14.15 latest v141 tools
- Windows 10 SDK (10.0.17134.0)
- C++/CLI support
- Windows 10 SDK (10.0.16299.0) for UWP: C#, VB, JS
- Windows 10 SDK (10.0.16299.0) for UWP: C++
- Windows 10 SDK (10.0.16299.0) for Desktop C++ [x86 and x64]
- Visual C++ compilers and libraries for ARM
- Visual C++ runtime for UWP
- Python3 (see section below)
- Visual C++ compilers and libraries for ARM64
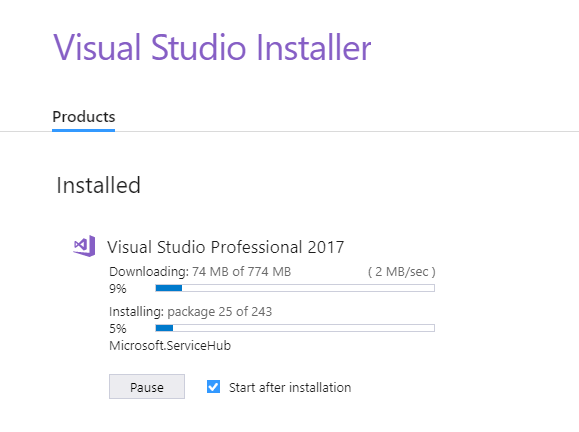
Visual Studio Installer will download the relevant files based on all of your selections.
You may need to reboot your computer.
If you are new to visual studio, please follow the Microsoft tutorials:
2.1.3. Python
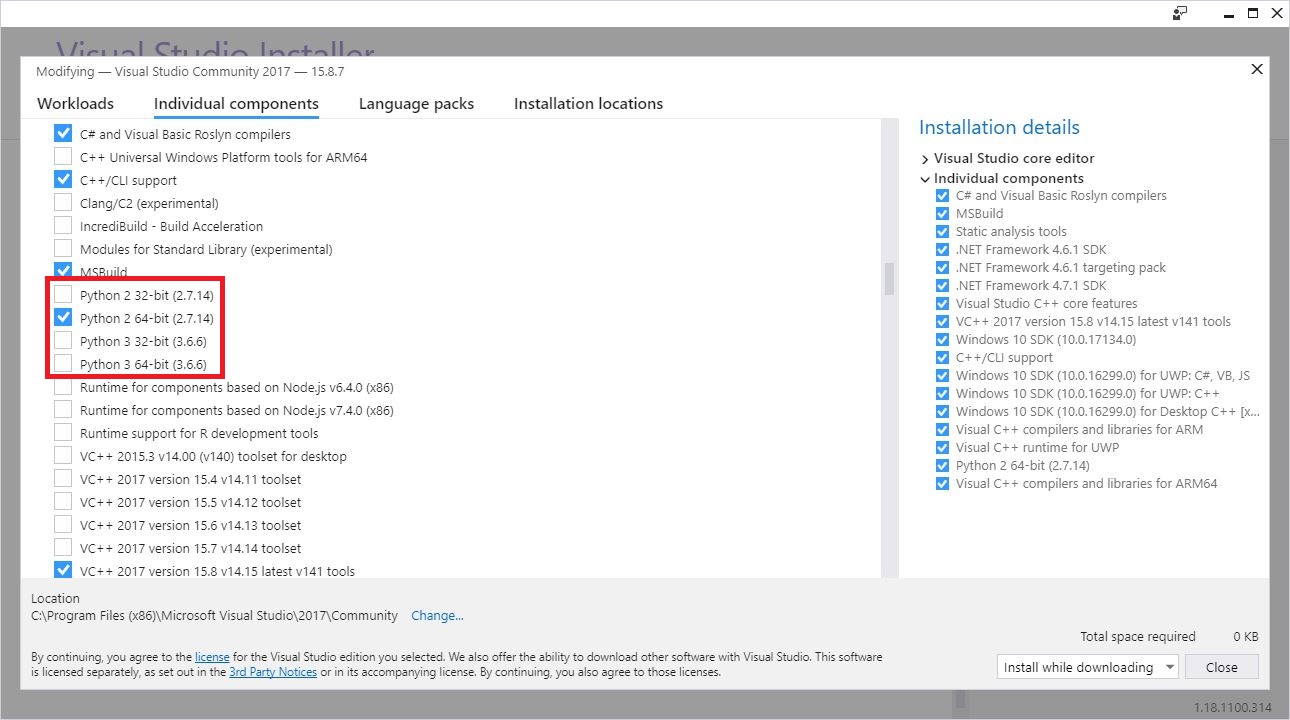
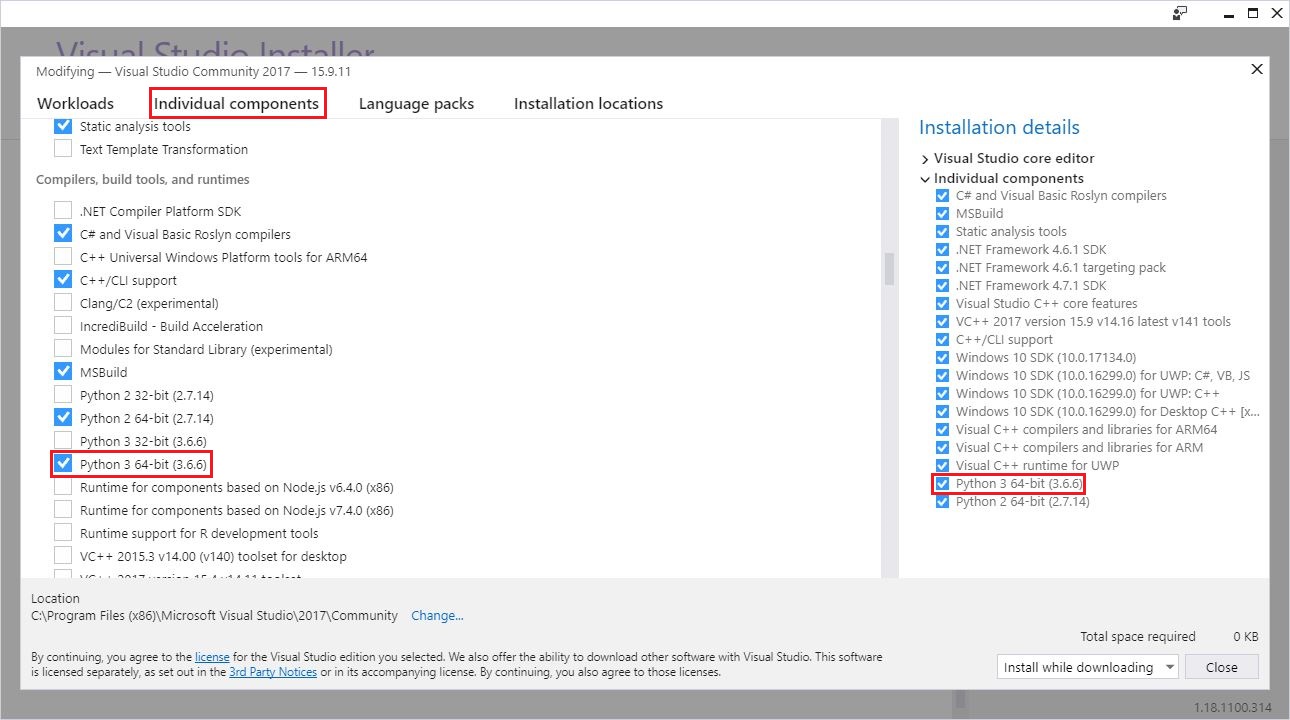
The easiest way to install Python is through the VS installer which will take care of the details for you.
You can install Python 3 simply by selecting it as an “Individual components” in VS:
You can find more on this subject on the microsft site.
2.1.4. Environment
To enable MSBUILD and Python in the Command Prompt, you have to add the path to the .NET 4 Framework and Python executables on your machine to the PATH environment variable.
You can access the environment variables by:
- Right clicking on Computer
- Click Properties
- Then click Advanced system settings on the left navigation bar
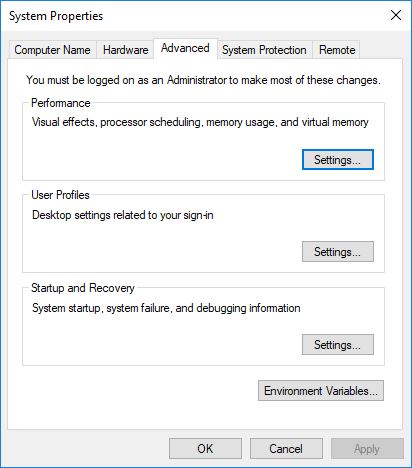
- On the next dialog box click Environment variables
- Scroll down to PATH
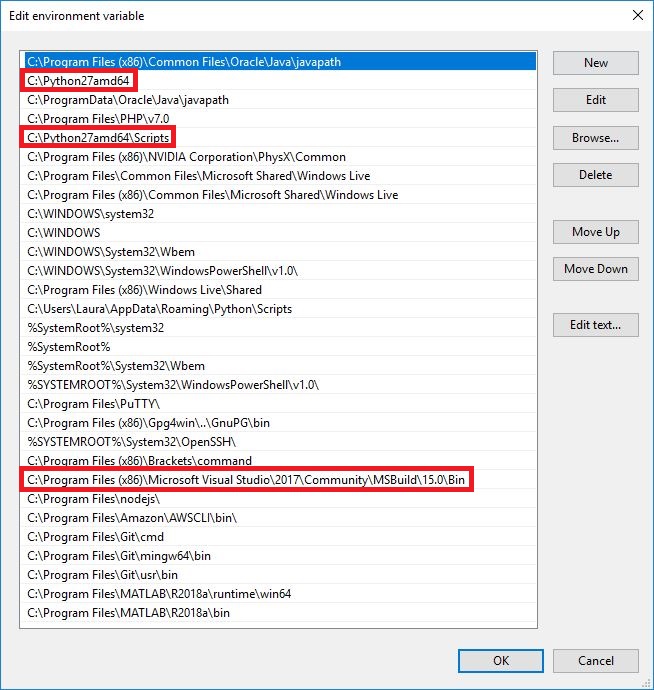
- Edit it to include your MSBUILD and Python (including the Scripts subfolder) paths to the framework (don’t forget a “;” after the last entry in here or add them one at a time).
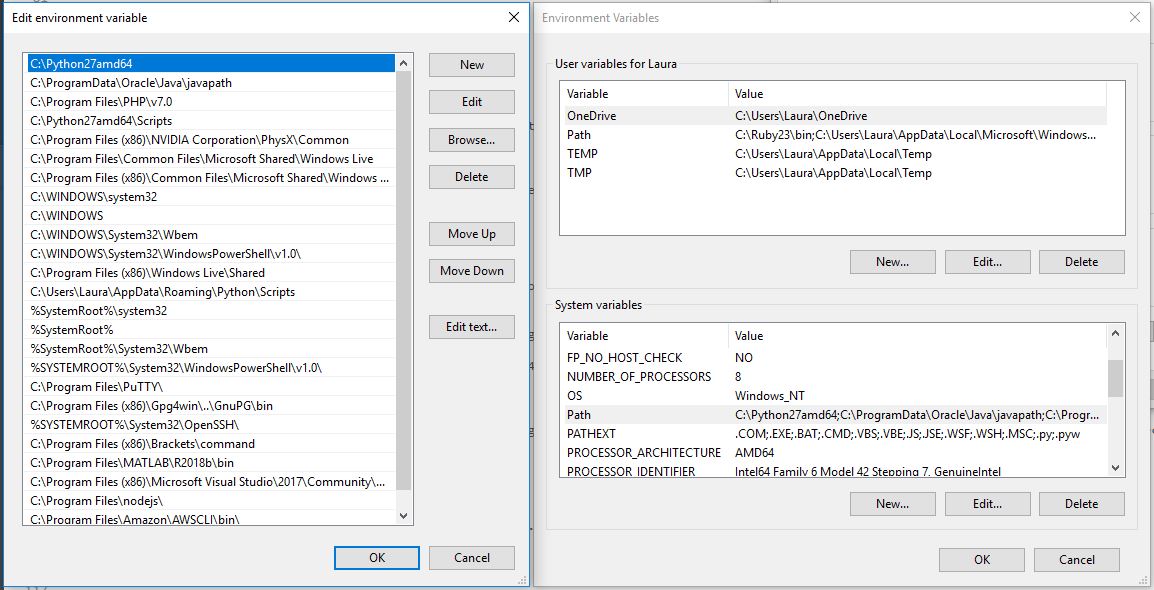
For reference, my path was C:\\Program Files (x86)\\VS-path\\MSBuild\\14.0\\Bin and Python was C:\\Python27amd64 (I also added C:\\Python27amd64\\Scripts).
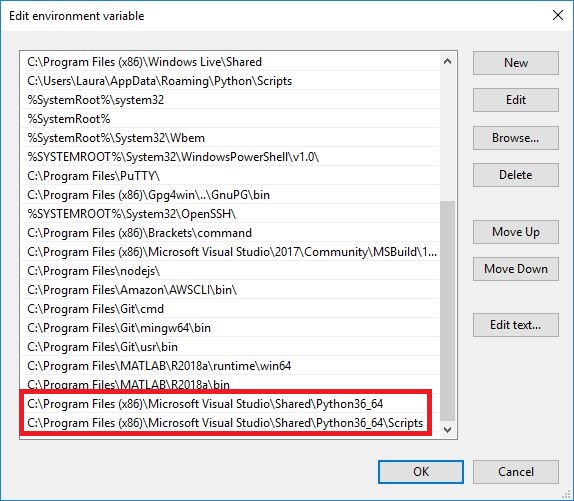
I added those three paths to my environmental variables. Here is another one of my environment variables setup for your reference:
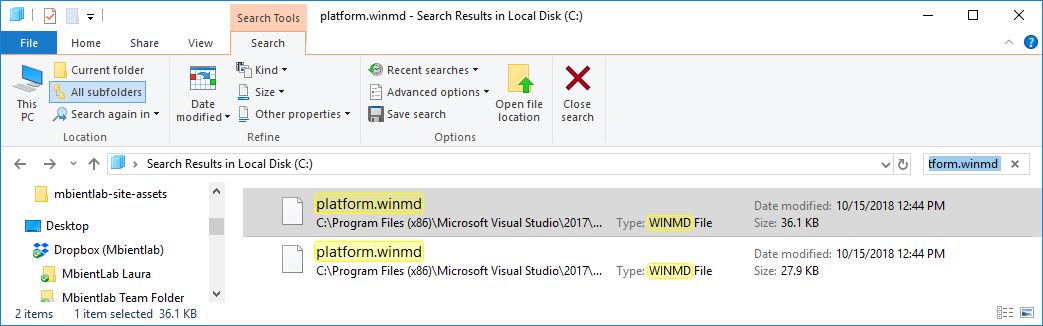
A good final check is to make sure that platform.winmd is installed in the proper location on your machine:
- C:\Program Files (x86)/Microsoft Visual Studio/2017/Community/VC/Tools/MSVC/14.15.26726/lib/x86/store/references
- C:\Program Files (x86)/Microsoft Visual Studio/2017/Community/Common7/IDE/VC/vcpackages
2.1.5. Windows Terminal
You should be comfortable with the Windows Command Prompt and basic DOS commands.
You can find a quick tutorial here.
2.1.6. Git BASH/CMD/GUI
We recommend that you use git bash and the command line on windows. You can download git bash here: https://gitforwindows.org/ or https://git-scm.com/.
You should also be comfortable with basic Unix/Linux commands. You can find a tutorial here.

2.2. Dependencies
First, let’s check that you have Python 3 installed:
- Open Git CMD or Windows Command Prompt
- Run the command
>>> which python3

If Python3 is not installed, use Visual Studio to install it:
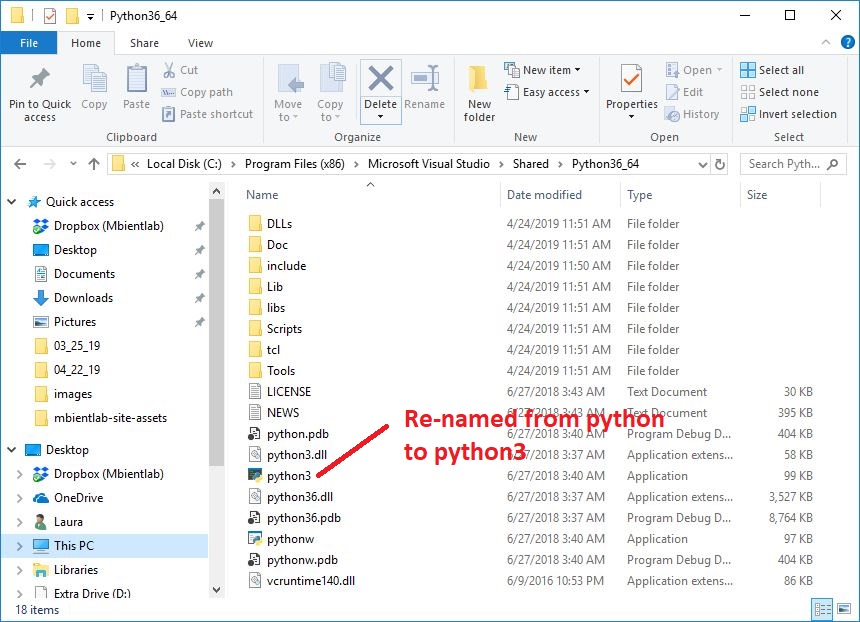
Visual Studio installed Python3 in this directory on my machine (it may be different for you): C:/Program Files (x86)/Microsoft Visual Studio/Shared/Python36_64.
VS installed Python 3.6 but left the executable named python. Because I already had python2.7 installed and it is executed as python already, I had to manually rename the Python 3.6 executable to python3:
I also updated my environment variables:
2.2.1. Install Pip
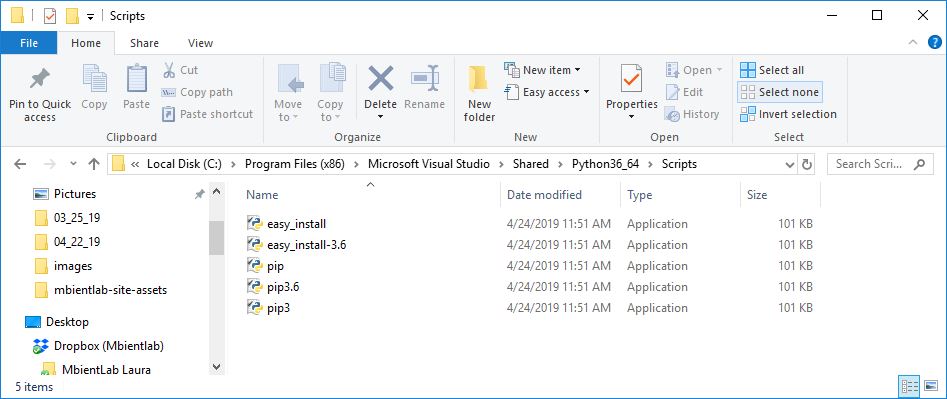
The package manager for python is pip. In Python 3 it is typically refered to pip3 and it is generally a soft link to pip. Essentially, pip = pip3.
Pip and Pip3 should be installed when Python 3 is installed and should be locatted in your Script directory: C:/path/to/python/Scripts/pip3.
Note
You should already have pip/pip3 installed (by Visual Studio). Please check this using the command which pip3 and if pip is missing, consult Visual Studio support here.

If you have Python 2 installed and you don’t want the pip packages to go into the Python 2 package manager folder, you need to make sure pip3 is properly installed and linked and that your environment variables point to the right Scripts directory.
2.2.2. Upgrade Pip
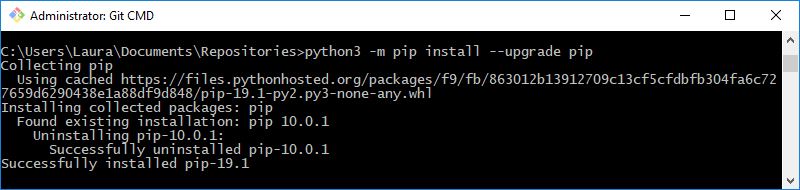
It is essential that your pip be up to date. For good measure, run the commands below:
Warning
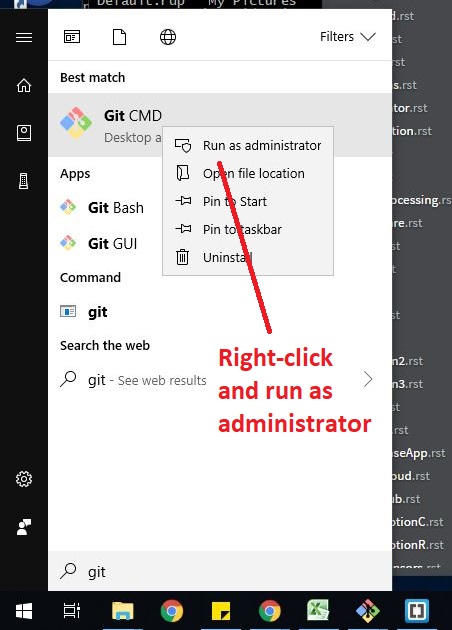
You may need to run this as sudo or administrator. In order to do this, right-click your shell and Run as administrator.
>>> python3 -m pip install --upgrade pip
2.3. MetaWear
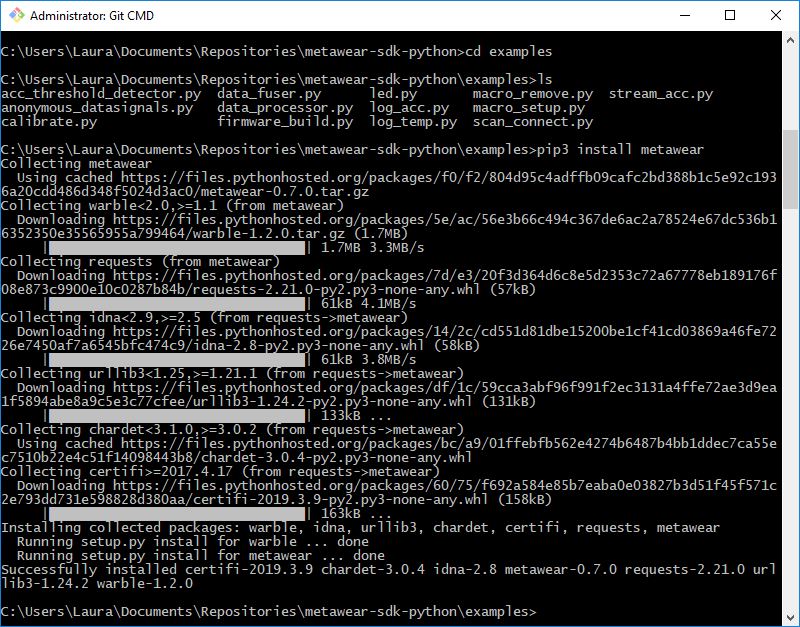
MetaWear is available on Pip. This means you can run the command below to install the MetaWear Python library directly:
>>> pip3 install metawear
>>> pip3 install --upgrade metawear
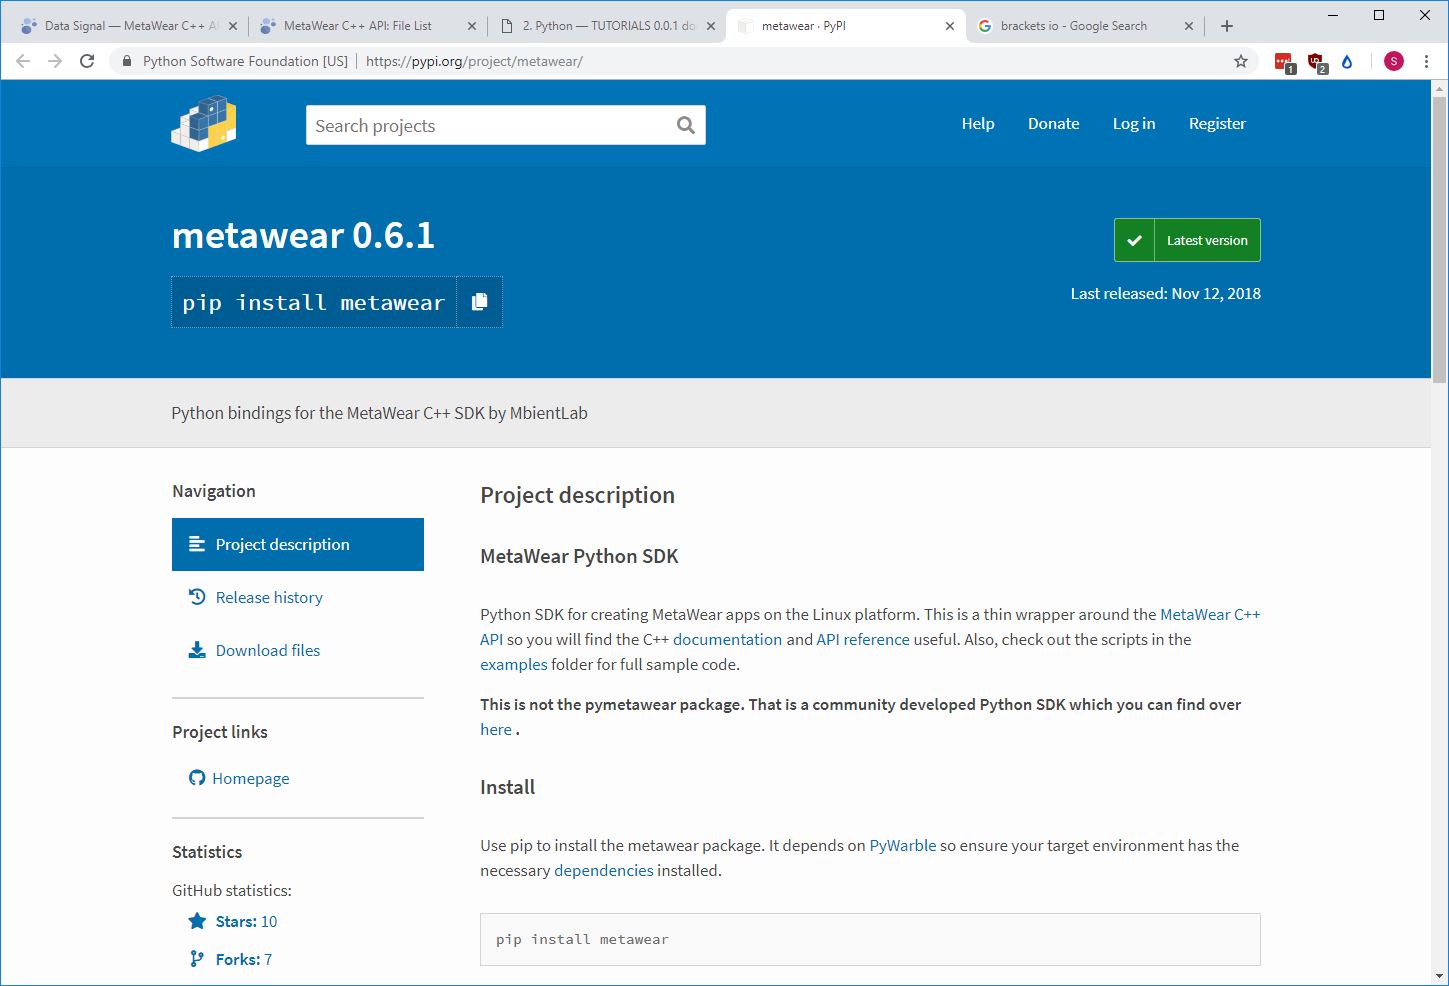
Please take a look at the official website for PyPi to learn more about the MetaWear package: https://pypi.org/project/metawear/
2.3.1. Upgrade MetaWear
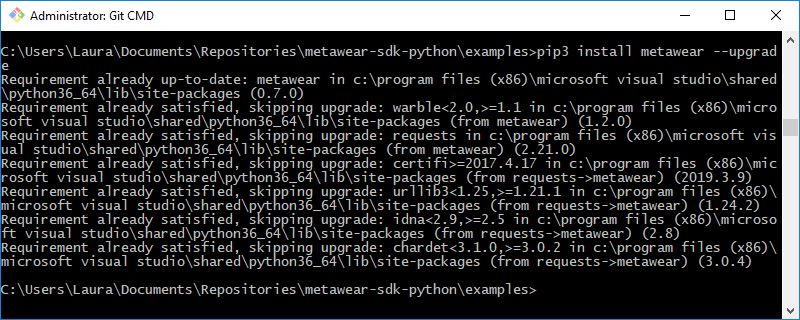
You may need to upgrade metawear. For good measure, always run:
>>> pip3 install metawear --upgrade
2.3.2. Check Warble
Pip3 will install support packages (libraries) in the C:/Python36/Libsite-packages folder (or similar).
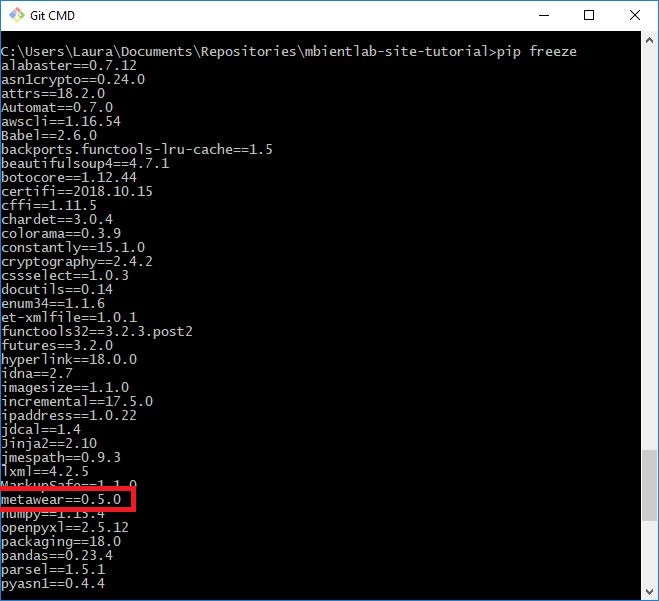
Now is a good time to check warble and metawear are correctly installed by navigating to the directory and checking what is installed. This can also be done with the pip3 freeze command.
2.3.3. Download API Repository
Head over to our Python Github page: https://github.com/mbientlab/MetaWear-SDK-Python
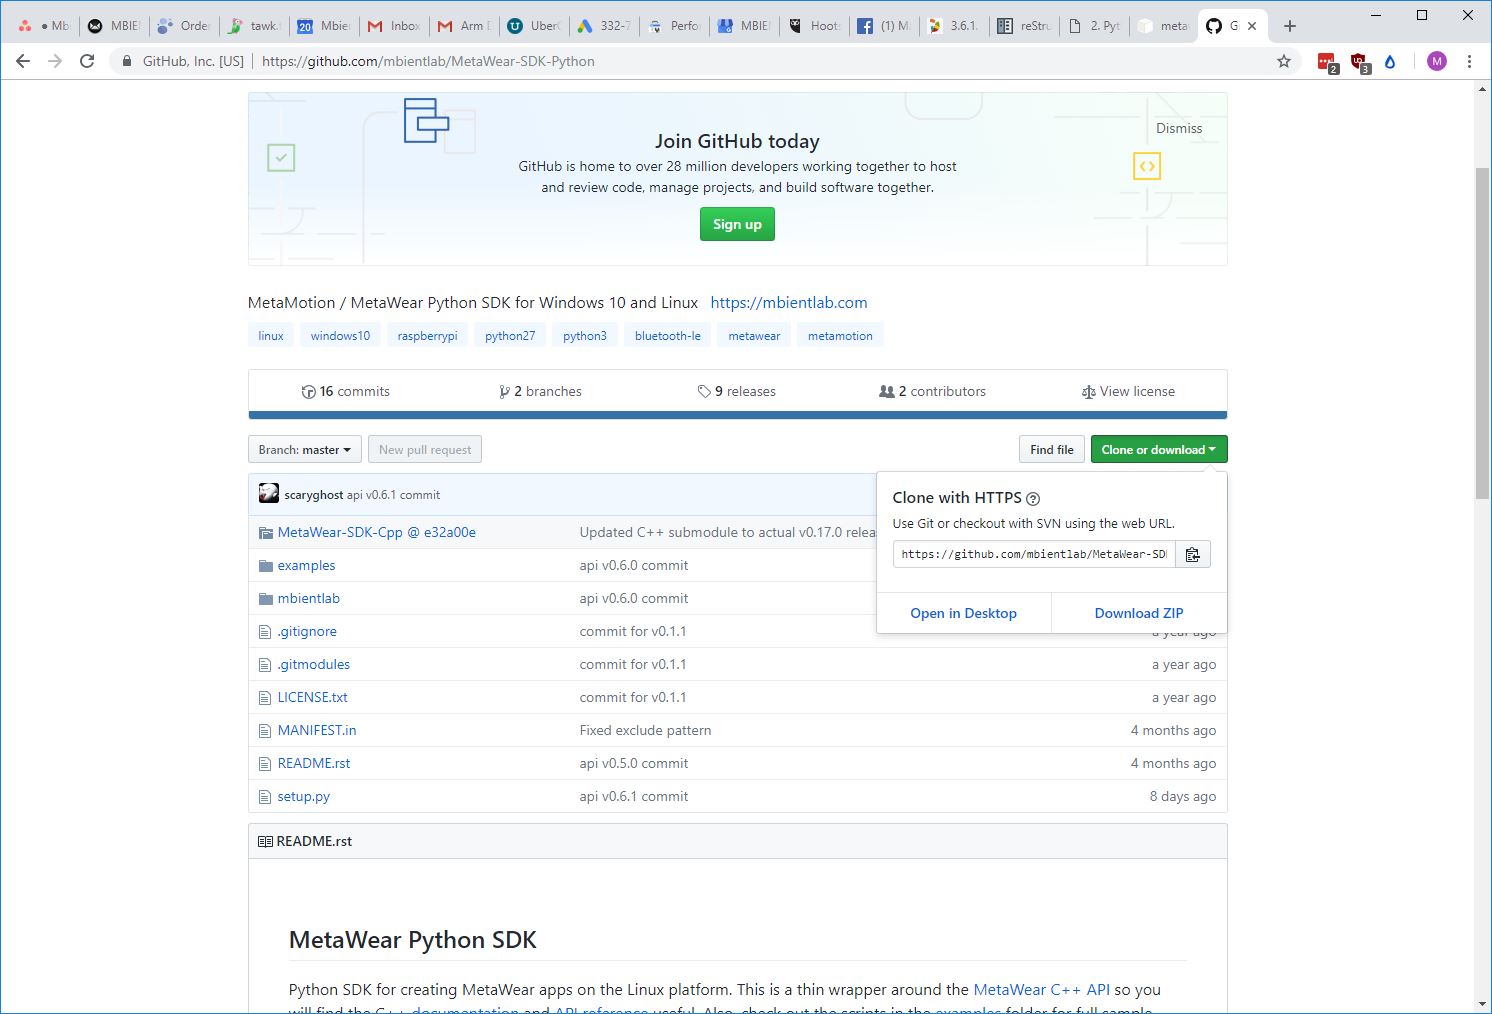
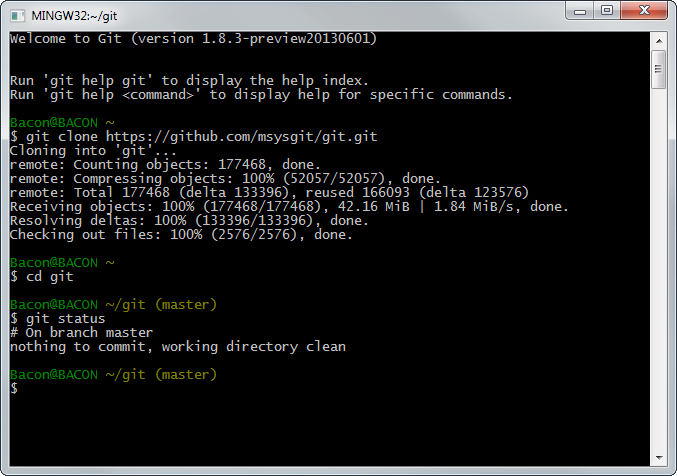
You can clone the repository or simply download as a ZIP file:
>>> git clone https://github.com/mbientlab/MetaWear-SDK-Python.git

Make sure the MetaWear-SDK-Cpp submodule is also downloaded. If it is not present, use the command git clone --recurse-submodules https://github.com/mbientlab/MetaWear-SDK-Python
>>> git clone --recurse-submodules https://github.com/mbientlab/MetaWear-SDK-Python.git
2.3.4. About Python APIs
The Python APIs are build around the C++ library. There are wrapper functions to tie the C++ to the Python.
When you download our Repository, you will find:
- MetaWear-SDK-Cpp -> The C++ metawear library pointer
- examples -> This is where we have many Python examples for you to look at
- mbientlab -> This is where the bindings reside
We also have C++ API documentation here. Please keep this documentation handy.
2.4. Usage
Import the MetaWear class and libmetawear variable from the metawear module and everything from the cbindings module.
>>> from mbientlab.metawear import MetaWear, libmetawear
>>> from mbientlab.metawear.cbindings import *
If you do not know the MAC address of your device, use PyWarble to scan for nearby devices.
from mbientlab.warble import *
from mbientlab.metawear import *
from threading import Event

e = Event()
address = None
def device_discover_task(result):
    global address
    if (result.has_service_uuid(MetaWear.GATT_SERVICE)):
        # grab the first discovered metawear device
        address = result.mac
        e.set()

BleScanner.set_handler(device_discover_task)
BleScanner.start()
e.wait()

BleScanner.stop()
Once you have the device’s MAC address, create a MetaWear object with the MAC address and connect to the device.
>>> device = MetaWear(address)
>>> device.connect()
Upon a successful connection, you can begin calling any of the functions from the C++ SDK, for example, blinking the LED green.
pattern= LedPattern(repeat_count= Const.LED_REPEAT_INDEFINITELY)
libmetawear.mbl_mw_led_load_preset_pattern(byref(pattern), LedPreset.BLINK)
libmetawear.mbl_mw_led_write_pattern(device.board, byref(pattern), LedColor.GREEN)
libmetawear.mbl_mw_led_play(device.board)
2.5. First Script
Let’s go ahead and run our first script.
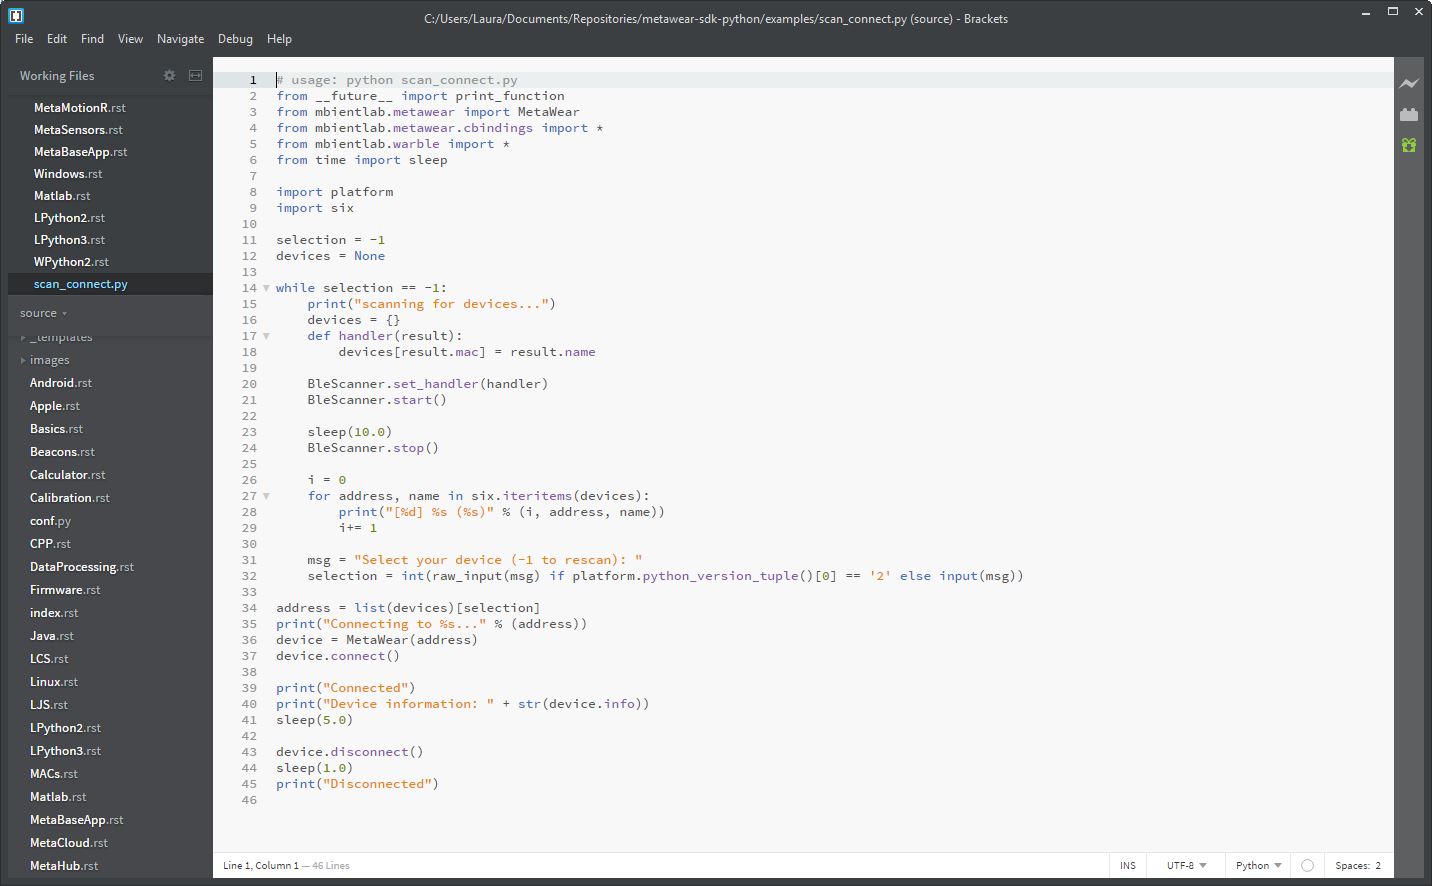
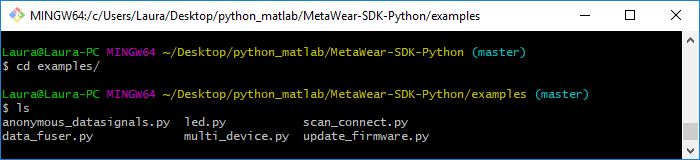
Head over to the examples folder and take a look at the scan_connect.py example.
Note
Make sure you have a MetaWear device with you, fully-charged, and that you have that device’s MAC address handy.
This python code will scan for nearby Bluetooth devices and print out a list of available devices. You can then choose a device you want to connect to.
Run the code:
>>>  # usage: python scan_connect.py
>>>  python3 scan_connect.py
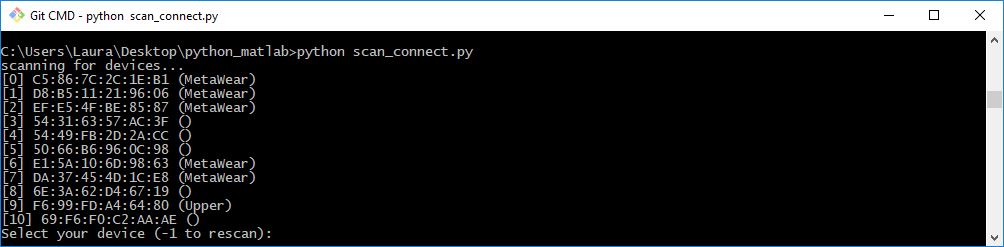
Select the device you want to connect to. The MAC address for my favorite MetaSensor is D8:B5:11:21:96:06.
>>> Select your device (-1 to rescan): 1
The code will then connect to this device for 5 seconds, retrieve device information, and disconnect.
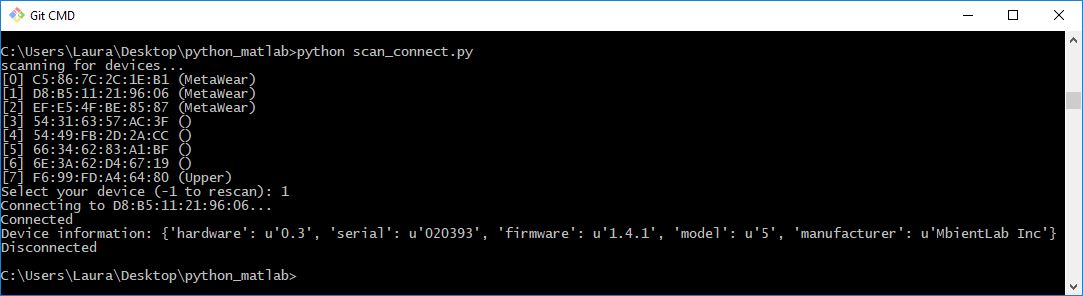
As you can see, your Windows machine connected to the MetaSensor using Bluetooth and retrieved some information about the devices such as the firmware version and the manufacturer name.
Congratulations, you ran your first Python script!
2.5.1. Errors
If you run into errors, it means you missed an installation step.
- Go back to the begining of this tutorial and re-install everything carefully.
- Try restarting your Bluetooth adapter by disabling it under the Device Manager (or by un-plugging your Bluetooth dongle if applicable).
- Try reseting or firmware updating your MetaSensor using the Android or iOS MetaBase App. This solves 99% of problems! See the troubleshooting section.
- Always try running the
scan_connect.pyexample first. It is simple and will make sure everything is working properly on your system. - Upgrade
pip3andmetawear. Make sure Visual Studio is up to date as well.
2.5.2. Local versus Global
Make sure you are using the global metawear package and not the local one:
>>> from mbientlab.metawear import MetaWear, libmetawear
>>> from mbientlab.metawear.cbindings import *
You should only be using the local metawear library if you are making changes to the Python API source code, it might look something like this:
>>> import sys
>>> sys.path.append("/path/to/your/mbientlabs/directory")
>>> from mbientlabs.metawear import MetaWear, libmetawear
>>> from mbientlabs.metawear.cbindings import *
2.5.3. Bluetooth
There are many limitation of Bluetooth on Windows. For example, BLE is not supported on Windows 8 or below.
Furthermore, Windows only supports one Bluetooth dongle.
Finally, our entire API for Python is built on Warble, a third party library: https://github.com/mbientlab/PyWarble. Some issues are unfortunately outside of our control; if you find any bugs or issues, please send them to the PyWarble owner.
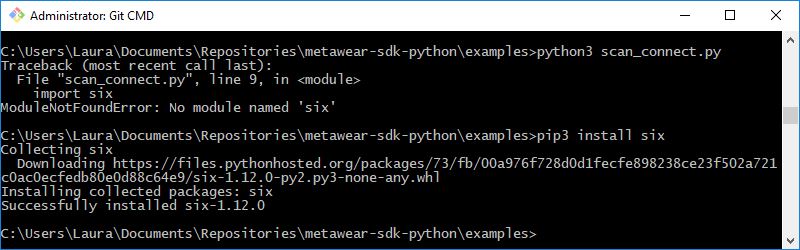
2.5.4. Missing Modules
If you are missing modules, simply install them using pip:
>>> pip3 install [module name]
2.5.5. Sudo and Administrator
Sudo is a program for Unix-like computer operating systems that allows users to run programs with the security privileges of another user, by default the superuser.
Some setup might require that you run your scripts using sudo. If so, simply add sudo to the beggining of your python command sudo python scan_connect.py.
On Windows, you may need to run your Git or Cmd shell as administrator.
2.5.6. Running Python Scripts
Be sure you are running out scripts from a command line or GUI that can interpret and run Python.
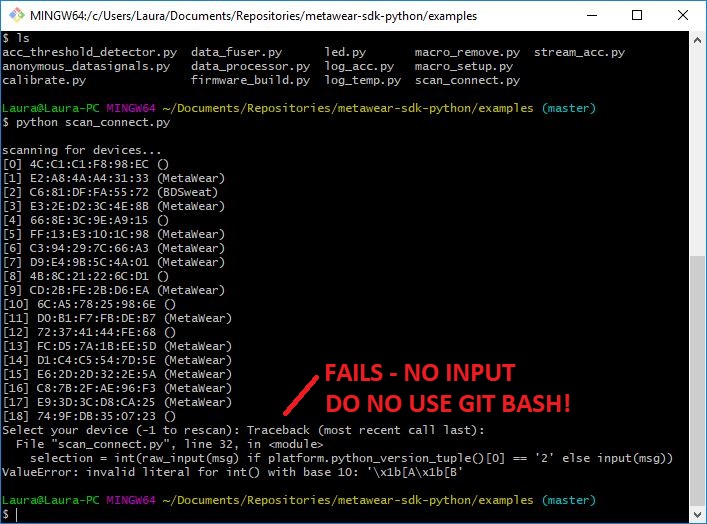
Warning
DO NOT USE Git Bash to run your Python scripts.
Use Git CMD or the Windows Command Prompt or another acceptable shell to run your Python scripts.
Git Bash may not allow inputs and therefore will fail:
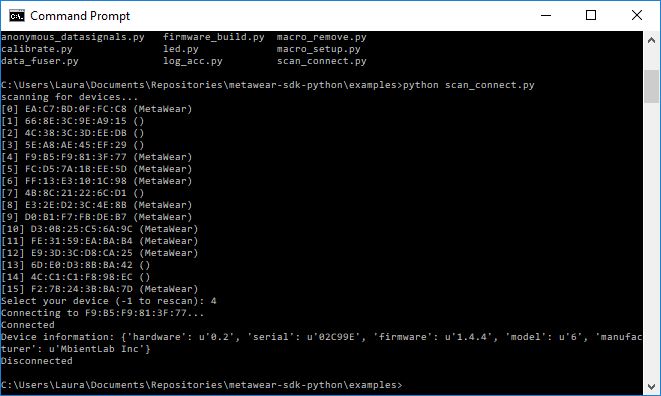
Git CMD can execute Python scripts:

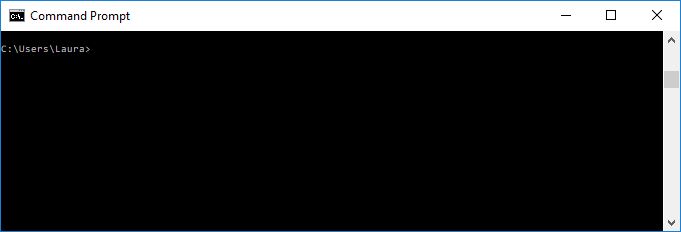
The Windows Command Prompt can execute Python if you have followed the tutorial properly:
2.5.7. Virtual Machines (VMs)
If you are running in a virtual environment, you will need to take extra care to make sure the Bluetooth drivers and adapters are working in the VM before you do anything else.
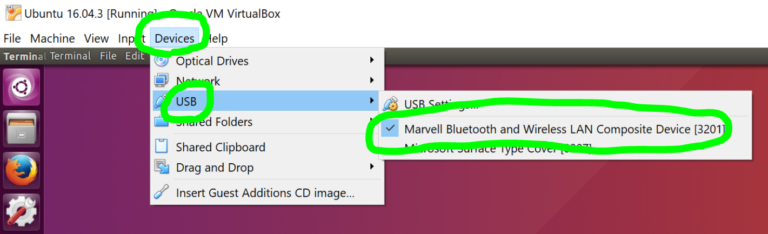
For example, VirtualBox guest OS doesn’t recognize the Bluetooth adapter by default. There are many great tutorials to get this working like this one here.
Steps you can take:
- Disable Bluetooth Adapter on Host OS
- Launch Guest OS
- Enable Bluetooth Adapter on Host OS
- Enable Bluetooth Adapter in the usb device list (Guest OS): Devices->usb->check my device
You may also need to install the VirtualBox extension Pack or similar support software, see more information here.
MbientLab is not responsible for VM support. Please consult the forum for the appropriate VM software you are using if you run into issues.
2.5.8. Example Scripts
The led.py example makes the LED on your MetaSensor blink a green color.
Note
For this example you can refer to the API documentation for LEDs here and the API references for the LED here.
Try it out by running:
>>> python3 led.py D8:B5:11:21:96:06
This script connects to a specific MetaSensor by specifying the MAC address on the cmd line. Blinks the LEDs with a preset pattern and then disconnects:

Take a look at the rest of the examples and run them.
2.6. Next Steps
Go over to our Python Developers Section to learn more about Python development.